Toy Car Experiments
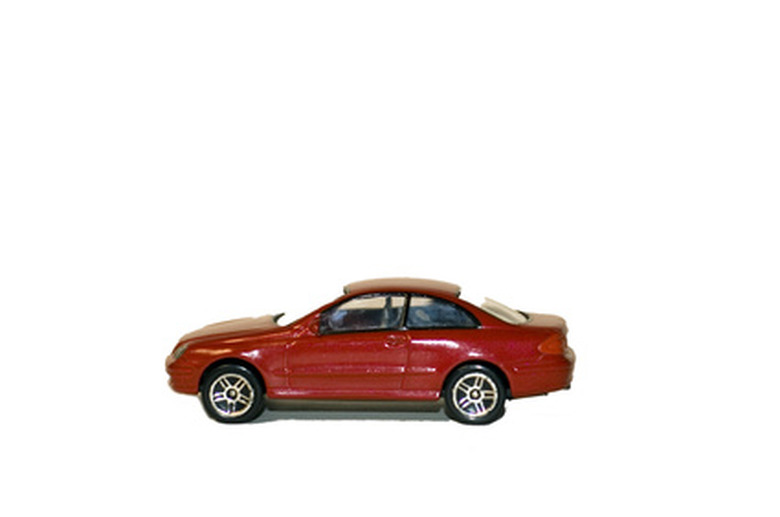
Toy cars aren't just fun to play with. They're perfect vehicles for a wide variety of science experiments, which can tell you a lot about things like energy, inertia, momentum, friction and vectors. Each experiment will require tools in addition to the toy cars, but there's a huge amount you can learn—and then you can go back to racing. These experiments are scientific, which means they involve measuring times, distances, weights and other variables.

Potential and Kinetic Energy
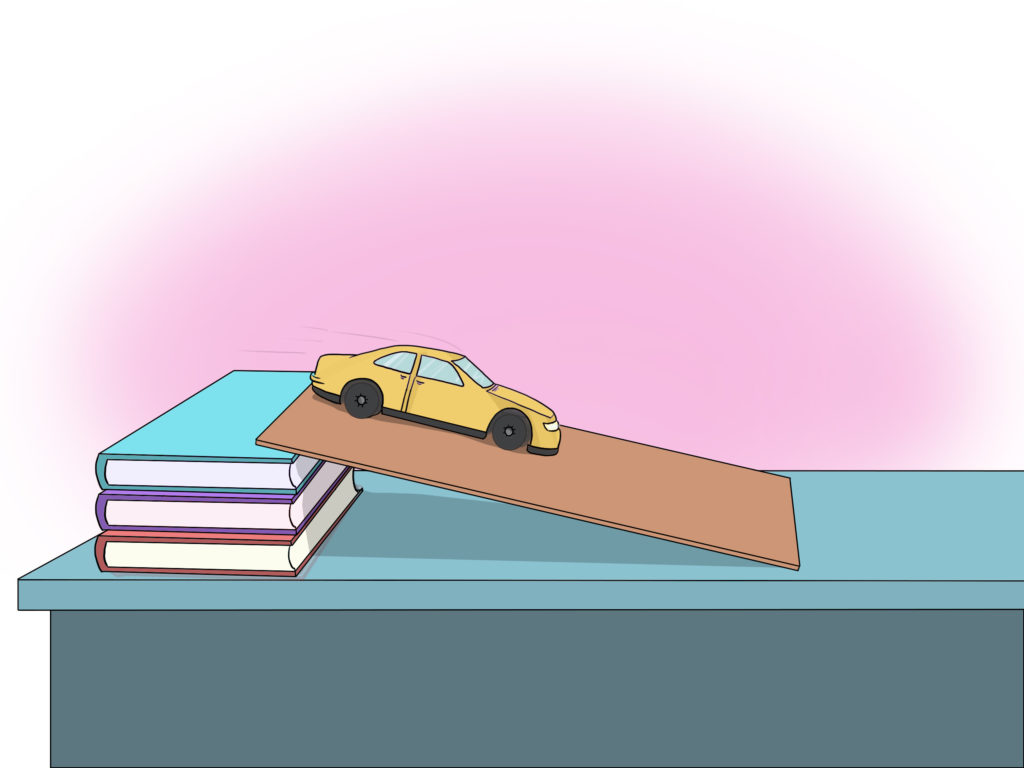
Set up a basic ramp against a chair, on top of some books, or from a table to the floor. Hold the car at the top of the ramp, and release to demonstrate the two main kinds of energy. Potential energy is placed into the car when it's lifted from the floor, and that energy is released as the car rolls down the ramp. Ramps should be made of a solid, smooth and rigid material such as wood or plywood.
Using the ramp from earlier, you can make a more interesting experiment by placing some things at the bottom. Drop the car from the top of the ramp again, and measure how far it rolls this time. Now, place a sheet of card stock at the bottom of the ramp, and let the car roll over that. Measure the distance it rolls. Place some sandpaper on top of the card stock, release the car, and measure that distance. Finally, try it with some carpet at the bottom. You've now learned something about friction: the card stock has a lot less friction than the carpet, so the car should be able to roll farther.
Place a heavy stack of books a few feet from the end of the ramp, so that the car hits those books when it rolls from the top down. Demonstrate that once or twice, and then take a small ball of clay or putty. Place it on top of the car and pat it down slightly; don't squish it onto the car, but press it just enough so that it won't roll off. Roll the car down the ramp, and when it hits the books, the clay should fly off the front of the car. This happens because of Newton's first law of motion: anything moving is going to want to keep moving (until it crashes into a wall).
Take—or make—two cars and set them at the top of the ramp to race. Place a line of masking tape on the floor a few feet from the ramp, so it acts as a finish line. Release them and see which one goes the farthest and the fastest (using a measuring stick and a stopwatch). Now, try to make each car faster: place card stock along one track, or press clay onto the top of one car to weight it down. In order to properly scientifically test these, change only one thing at a time, but use the same measuring tools for all of them.
Motion may seem like it's a one-way street, but more advanced science gets into things called vectors, which are used to plot a direction on a chart. To demonstrate one, place a piece of newspaper, plastic, or cardboard on the table (you may need to make a rope handle so you can pull it easily without wrinkling it). Roll a car slowly across the plastic, then start pulling the sheet out from under it. The car's forward motion combined with your pulling should make the car move diagonally—along a combined vector of both.
Mousetrap Cars
Building a science experiment from scratch makes it even more exciting. Begin with a simple, homemade toy car with an exposed rear axle. Make it a mousetrap racer by attaching a basic mousetrap as the motor, connected to a string on an axle. As the trap releases, the car is pulled forward. This shows lot of interesting physics. You can increase the traction—increase wheel friction—to make the car slip less. The mousetrap snapper arm is a perfect demonstration of torque, and you can get into rotational inertia with different types of wheels. Plus, racing different designs always ends in some interesting competitions. See Resources for more detailed information about mousetrap racers.
- AC Gilbert: Friction and Inertia – Toy Cars
- Doc Fizzix: The mouse trap's snapper arm and torque
Cite This Article
Turner, Grahame. "Toy Car Experiments" sciencing.com , https://www.sciencing.com/toy-car-experiments-6706983/. 24 April 2017.
Turner, Grahame. (2017, April 24). Toy Car Experiments. sciencing.com . Retrieved from https://www.sciencing.com/toy-car-experiments-6706983/
Turner, Grahame. Toy Car Experiments last modified August 30, 2022. https://www.sciencing.com/toy-car-experiments-6706983/
Recommended

Awesome Science Experiments with Hot Wheels Cars
May 9, 2018, join the conversation, categories/tags:, learn ages 8-10 stem activities science, want these great ideas sent right to your inbox sign up for the newsletter..
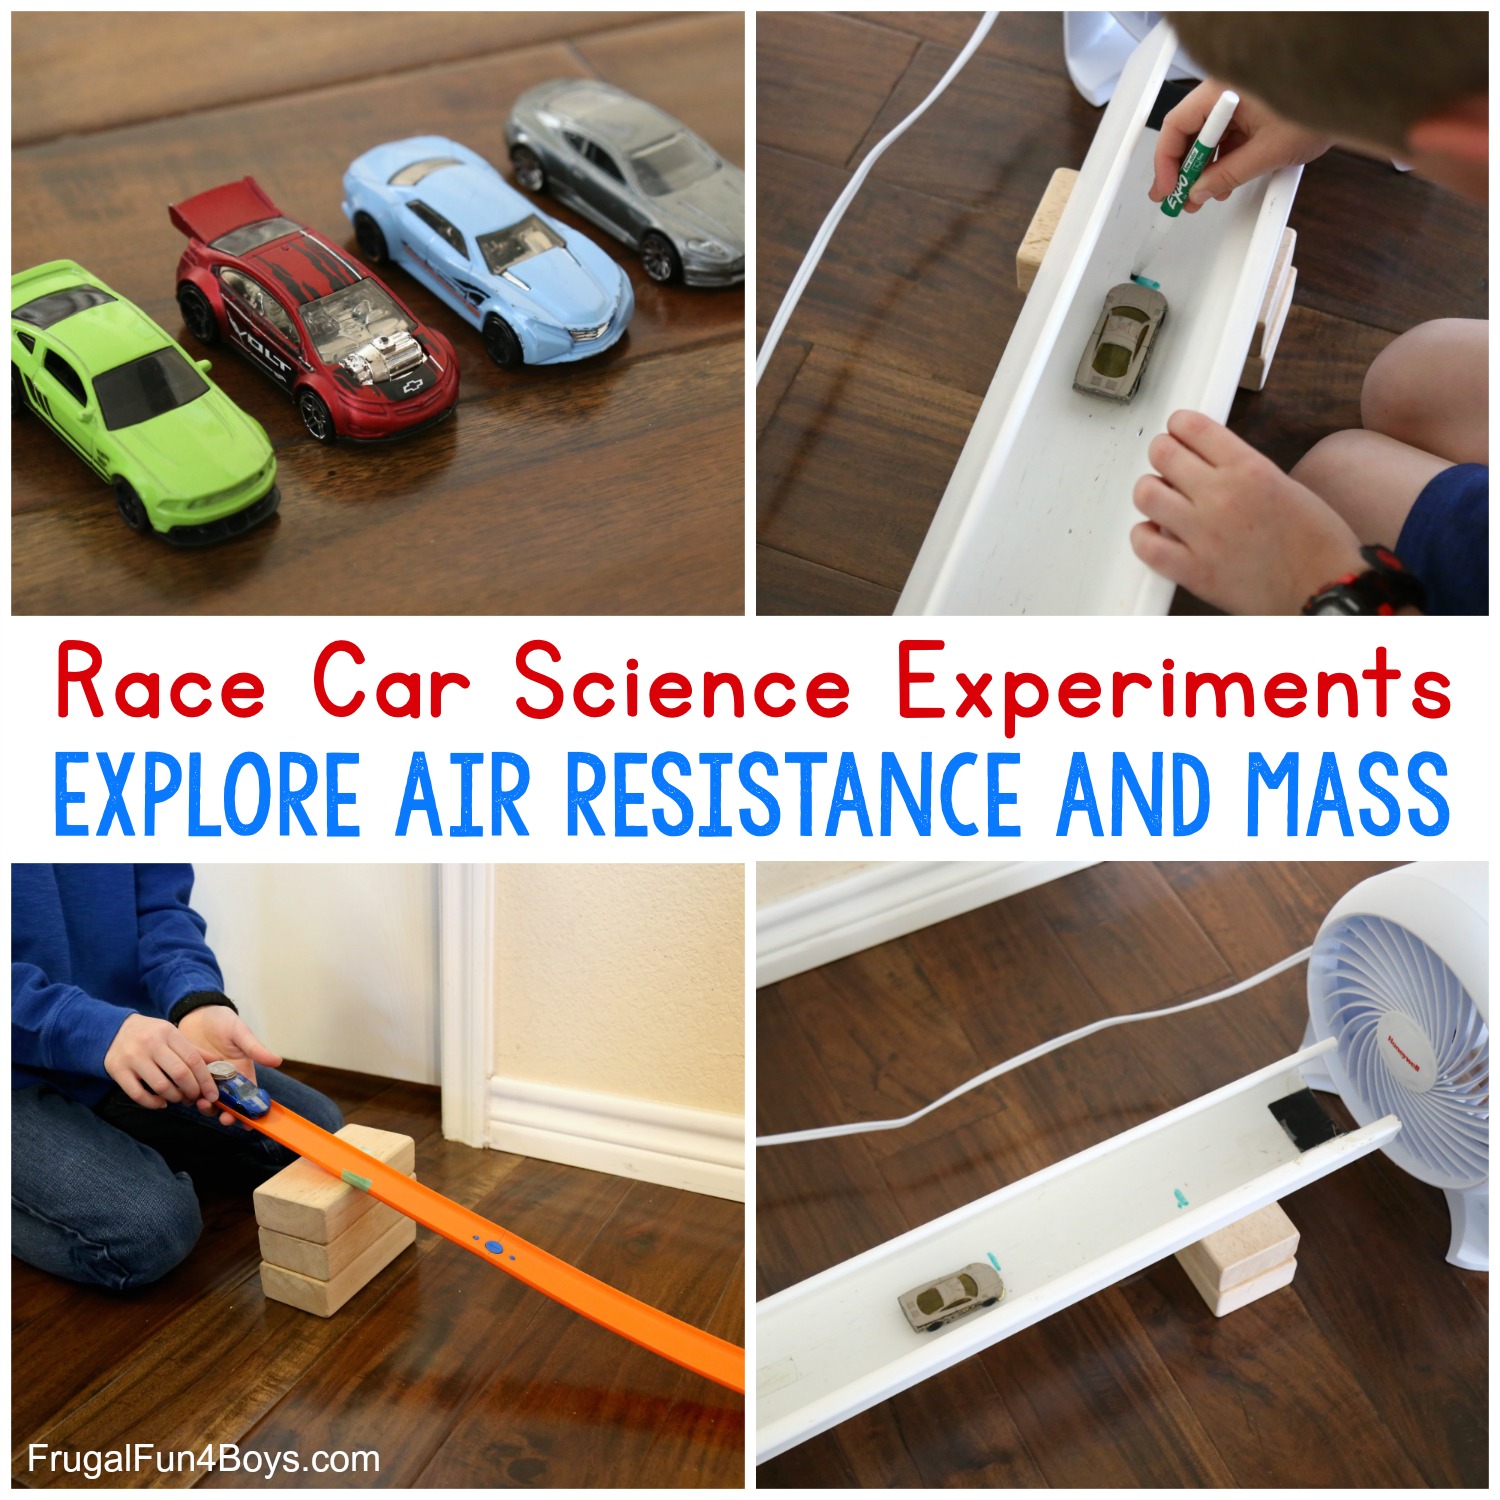
Let’s do some Hot Wheels STEM projects! These simple science experiments feel like play, but kids will actually be exploring the physics concepts of velocity, mass, momentum, and air resistance.
There are two experiments in this post. I created recording sheets for both that include the full scientific method, and you can print them at the bottom of the post.

Experiment #1: Heavyweight Race Track
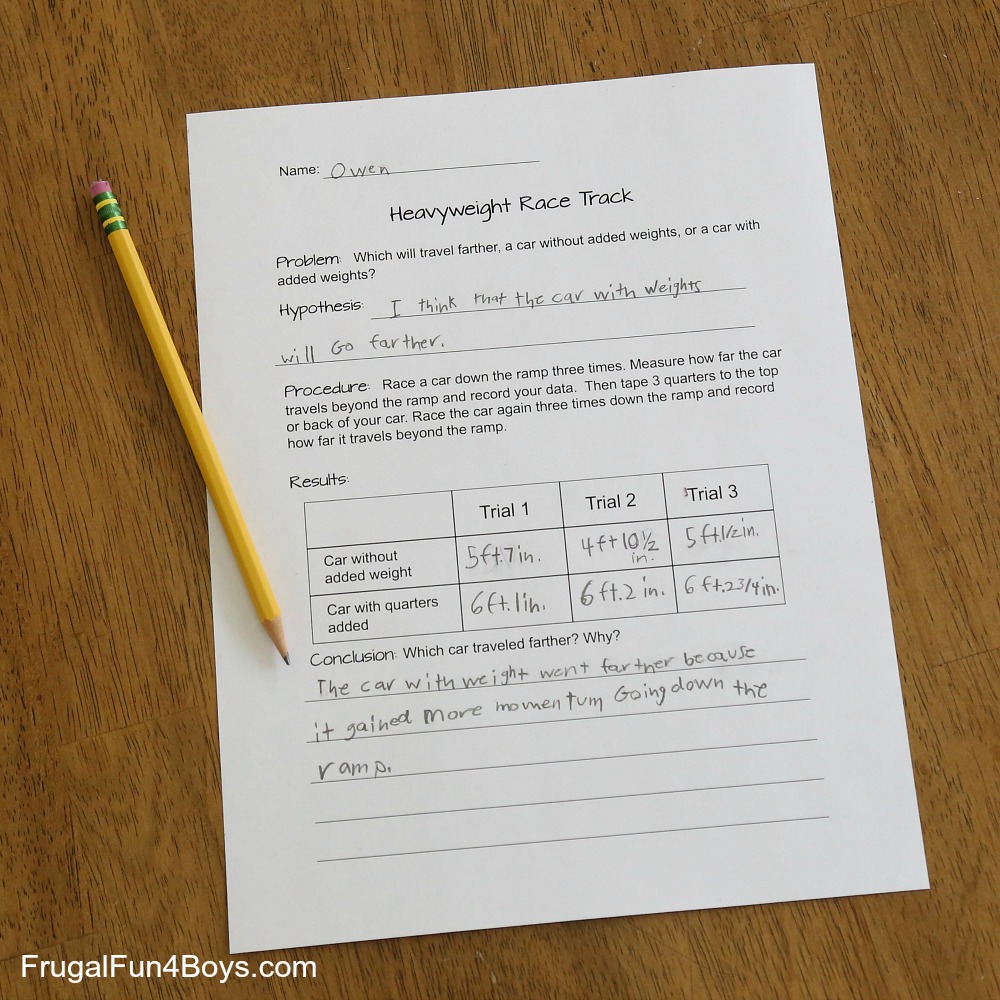
The purpose of this experiment is to answer the question of which will travel farther – a car on its own, or a car with mass added to it? Kids may guess that the plain car will travel farther because it’s lighter. It’s true that a lighter object requires less force to get going because it has less inertia to overcome. However, the heavier car will gain more momentum. Momentum is “mass in motion.” In other words, the amount of momentum an object has depends on both its mass and its speed. Which would be easier to stop – a pigeon on roller skates or an elephant on roller skates? Definitely the pigeon! So the heavier car will roll farther because it has more momentum and it takes more force to stop it. In this case, the force stopping the car is friction between the wheels and the floor.
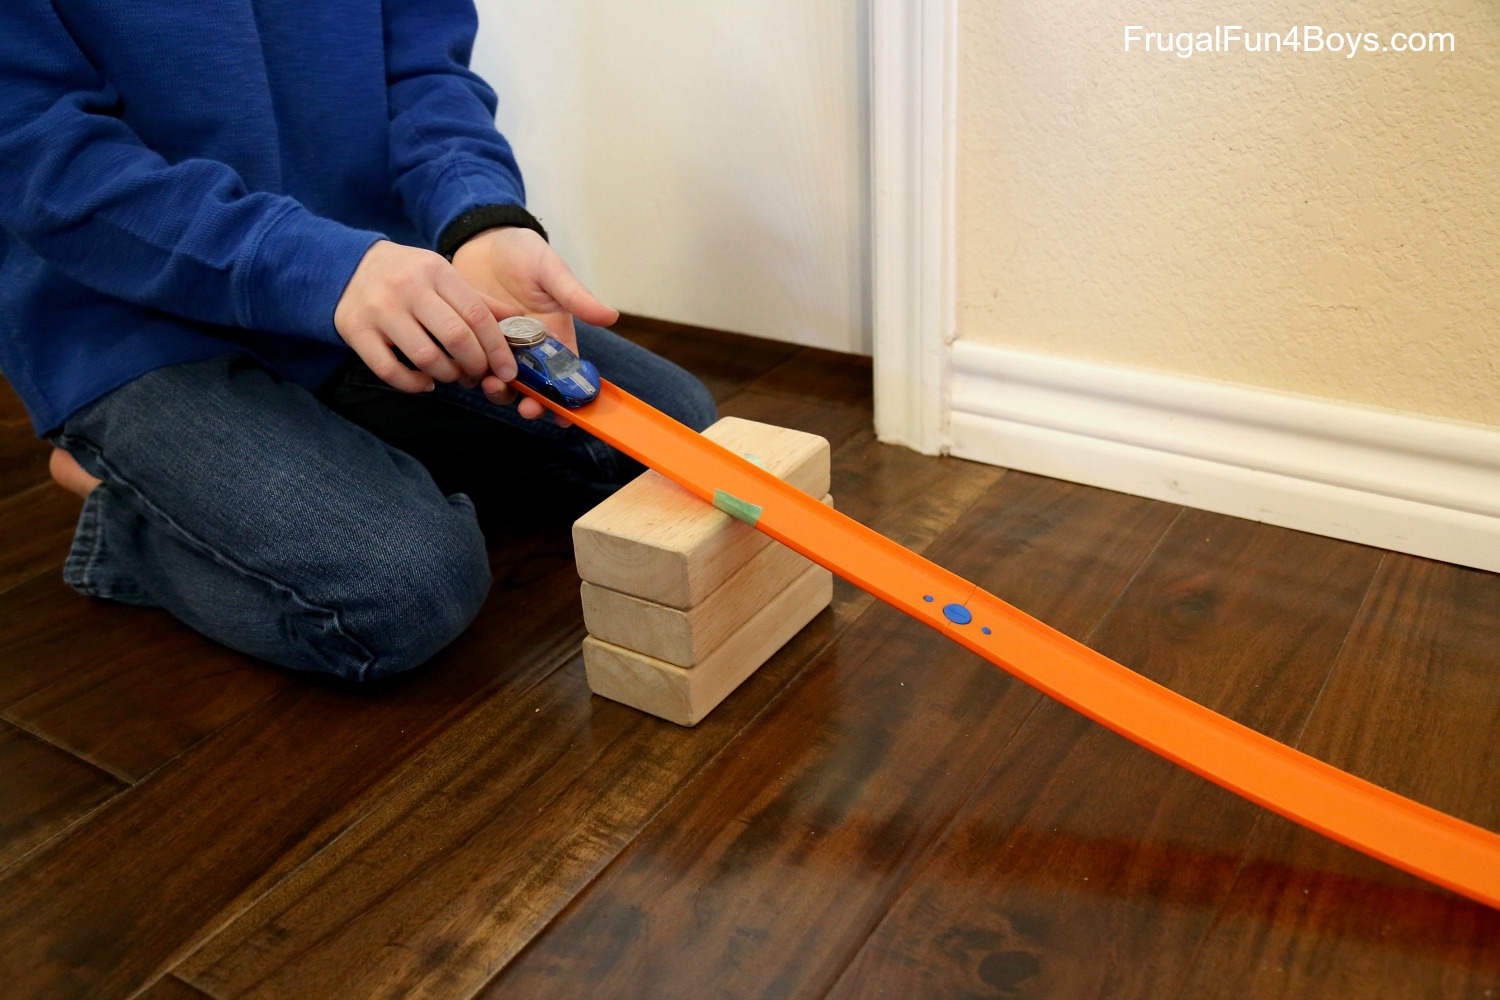
We used a simple ramp made out of Hot Wheels track propped up on blocks for this experiment.
We chose to measure how far the car traveled past the end of the ramp so that our procedure would be consistent each time.
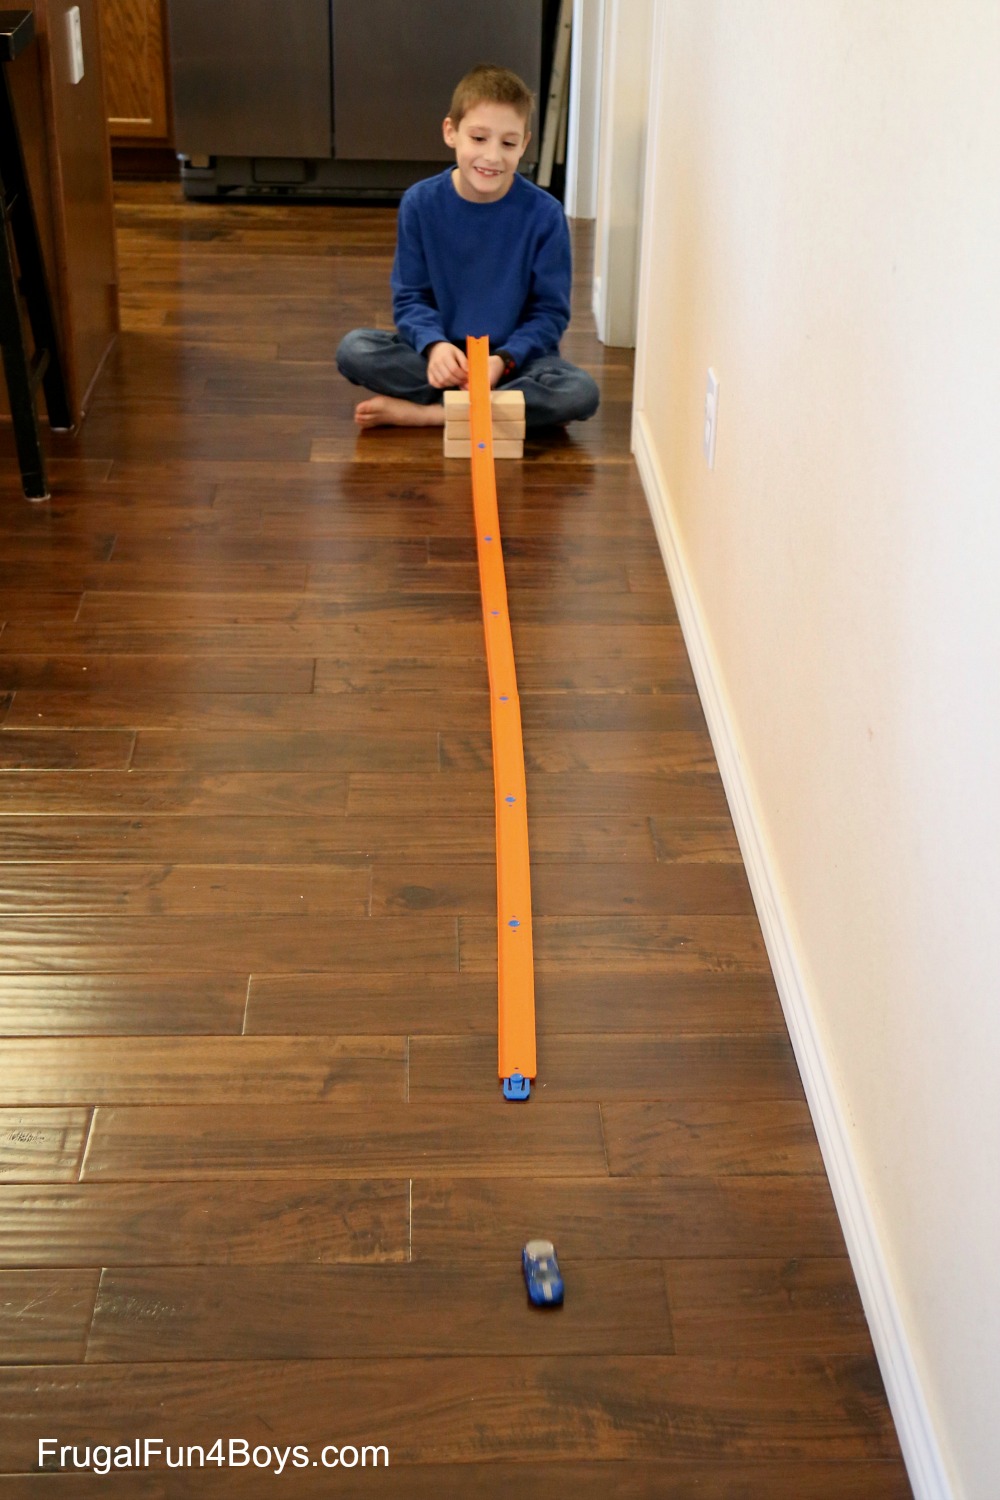
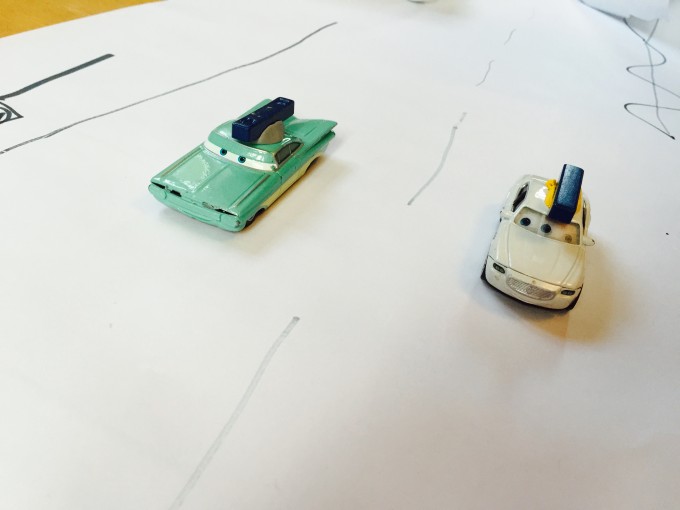
Hot Wheels cars can be a little temperamental and veer to one side or the other depending on how bent the wheels are (ha ha), so we did three trials of each car to be sure we were getting accurate results.
After three trials with just the car, we sent the car down the ramp with three quarters taped to it for added weight.
As you can see from our results, we definitely found that the heavier car traveled farther!
For older students, you may want to have them find an average of trials 1, 2, and 3.
Experiment #2: Wacky Wind Tunnel
For this experiment, I wanted to find a way to test the effect of air resistance on cars. We found a set-up that worked quite well! My 14 year old helped me figure out a good way to do this experiment, and he actually enjoyed it as much as the younger kids did.
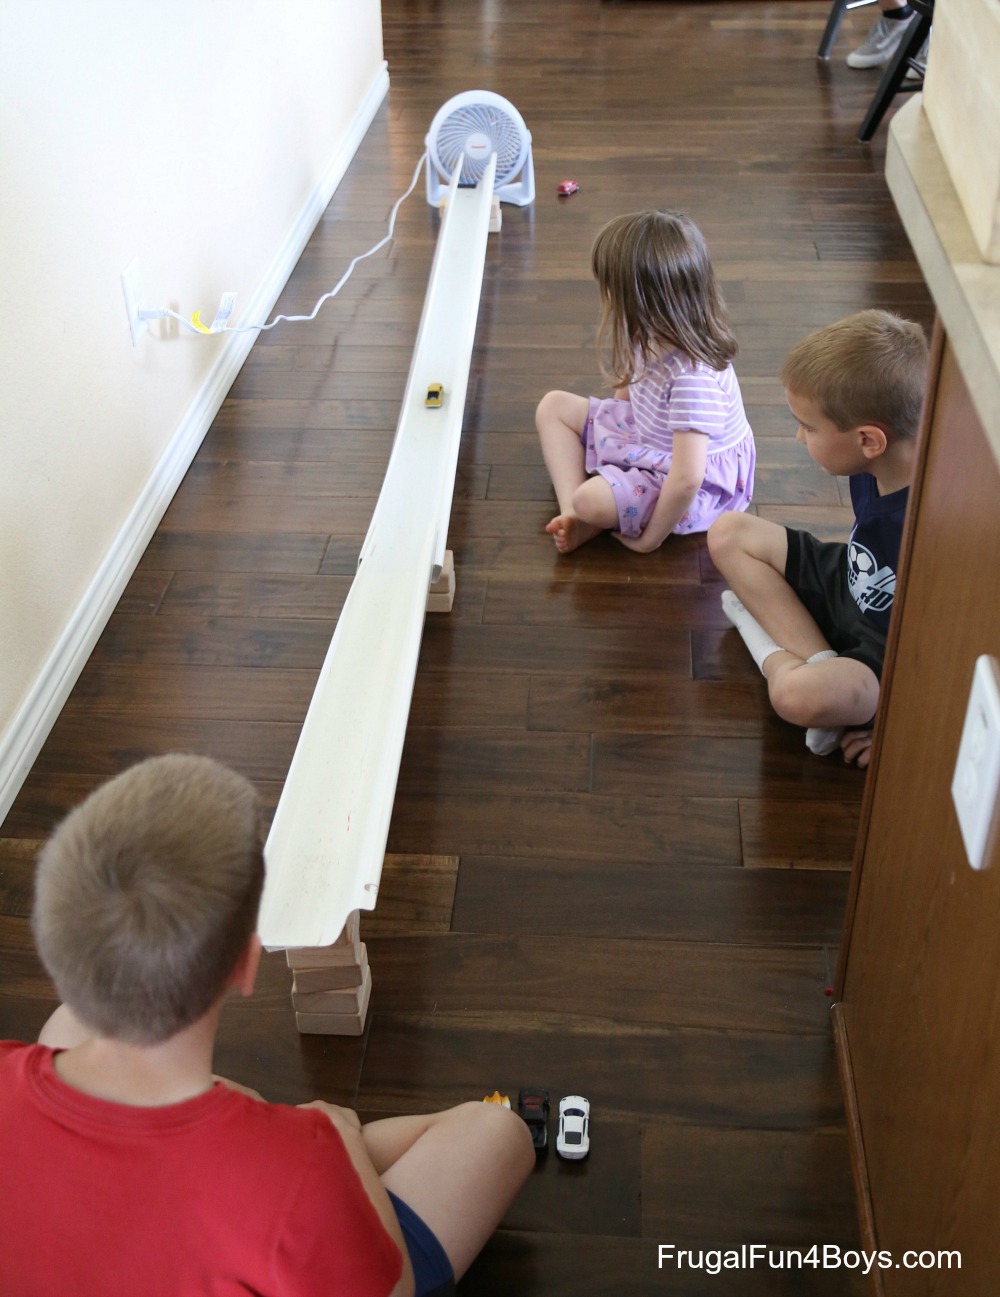
We used two pieces of plastic rain gutter to create our wind tunnel. You’ll need to align your ramp so that it’s in line with the air coming from the fan. I used two wooden blocks to prop up each end of the first section. This section of the gutter is level.
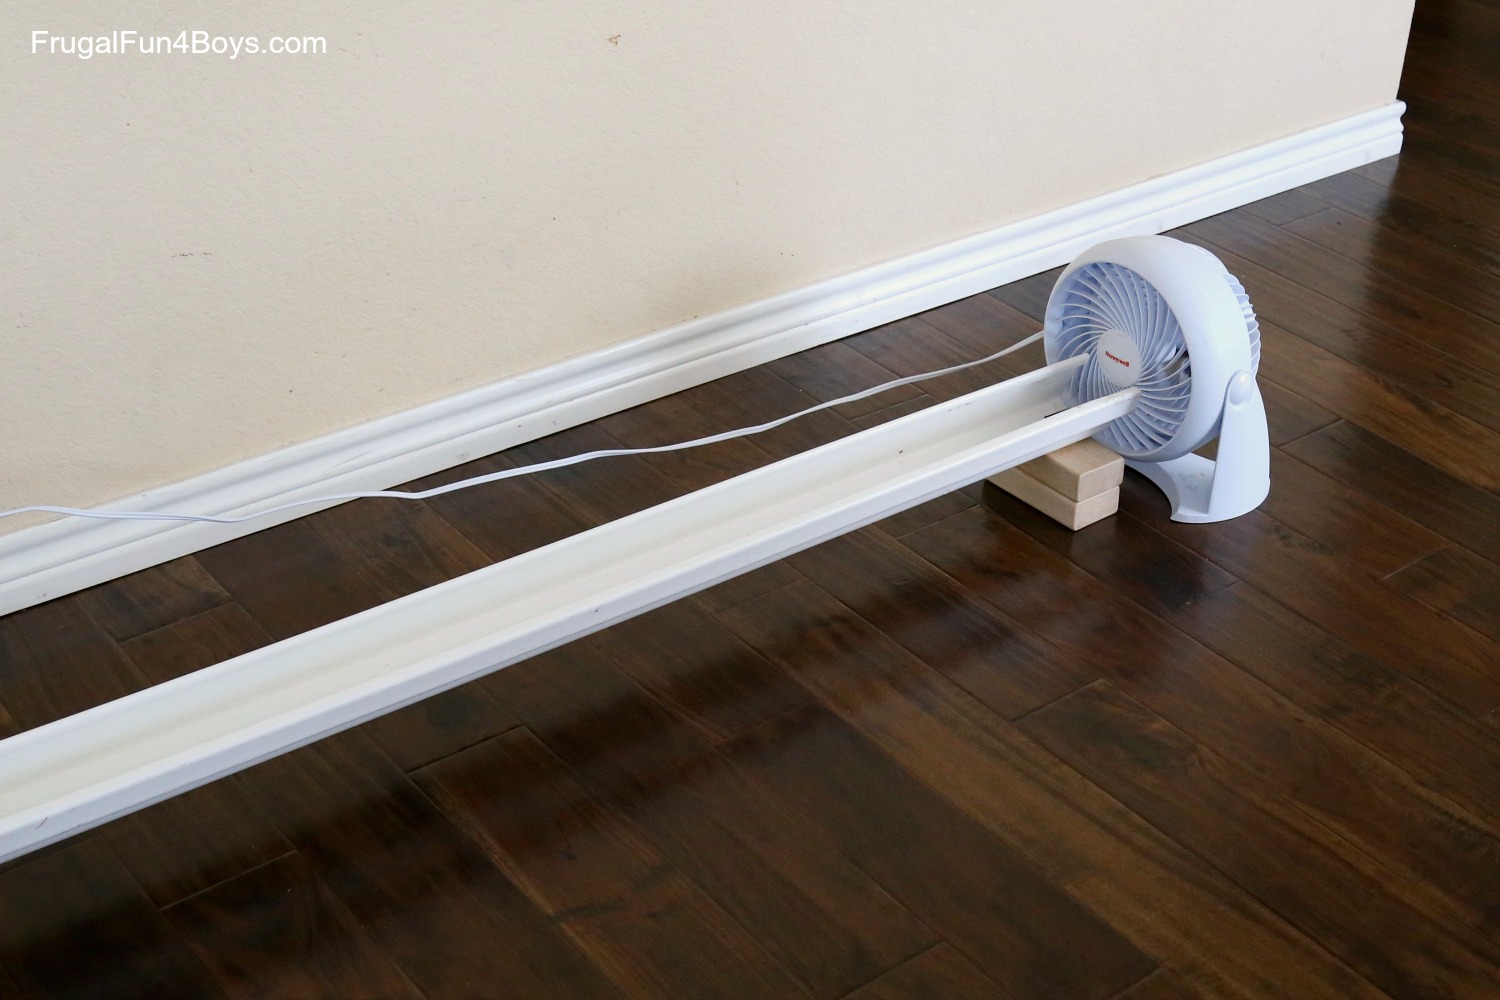
Then I added another section of rain gutter to create the ramp part.
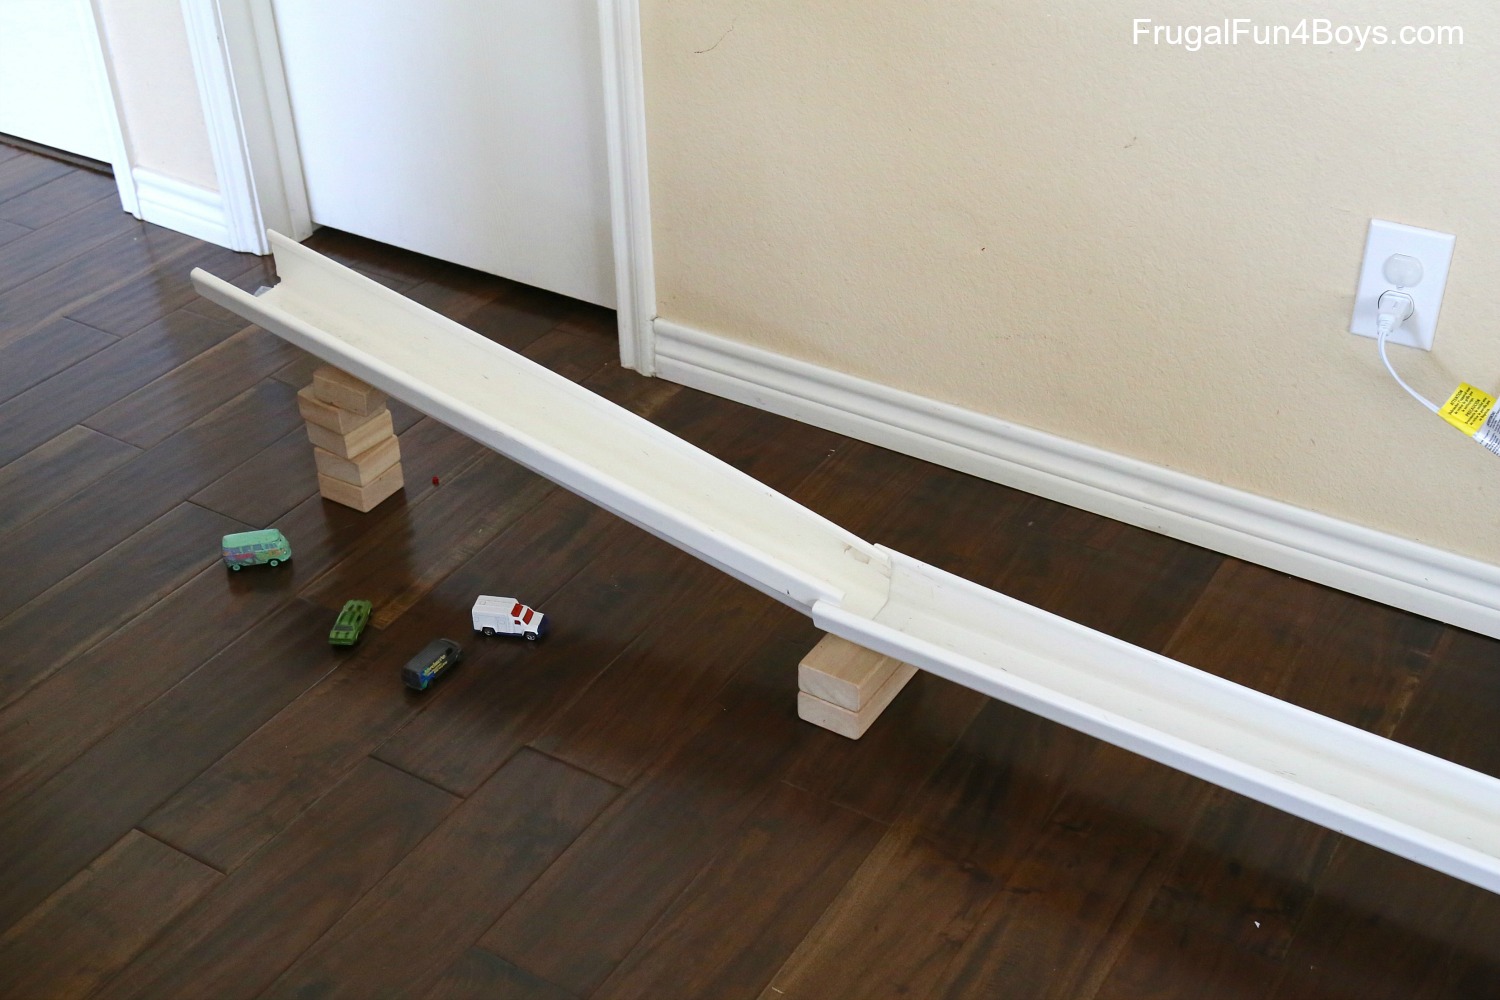
If you don’t have plastic rain gutters, you can create a wind tunnel by building walls on either side of some plastic Hot Wheels track. I thought of a few possibilities for the walls – cardboard, LEGO bricks (the big DUPLO ones would be fastest), or building blocks.
Note that you’ll want the ramp to be long enough that the car stops itself before arriving at the end (with the fan OFF).
I totally recommend rain gutters for their simplicity, and also because you can mark right on them! We used a dry erase marker to mark how far the car traveled.
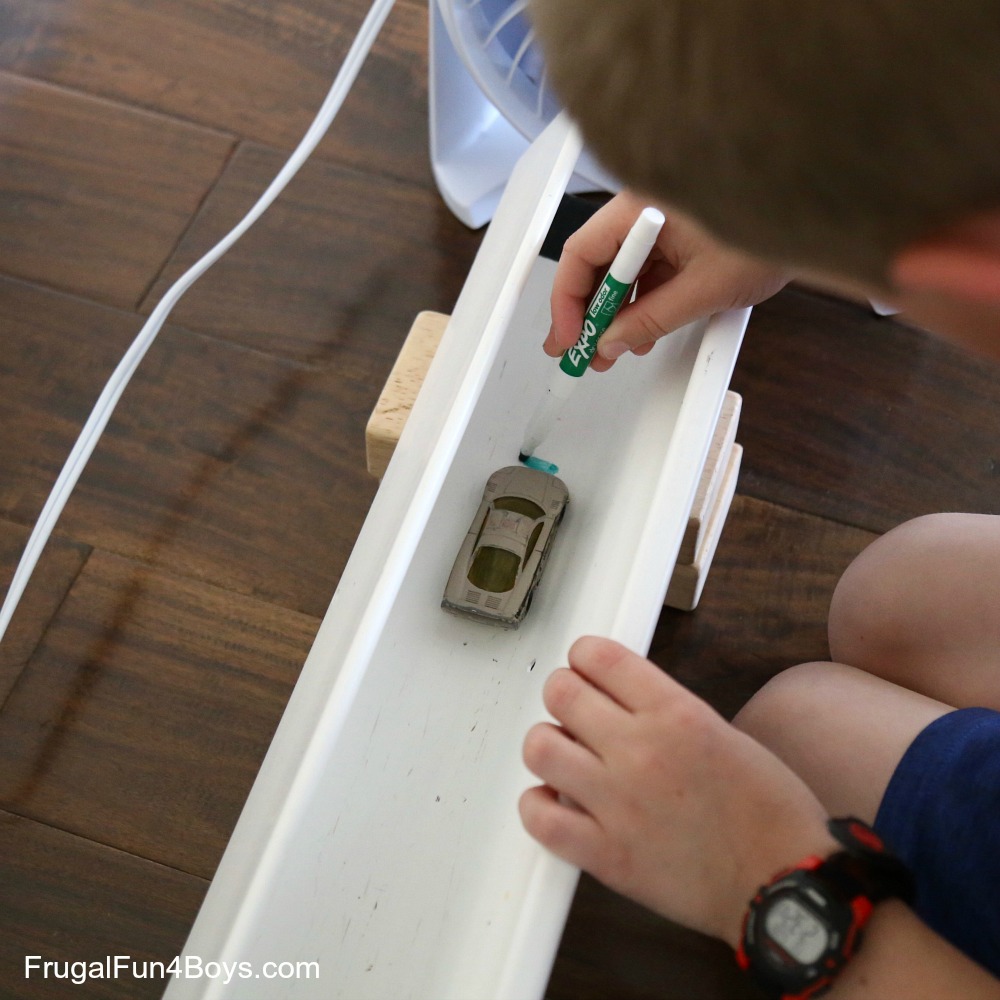
Here’s how far this truck traveled! The line close to the fan shows where it stopped with the fan off, and the truck’s current position shows where it stopped with the fan on. Air resistance slowed it down quite a bit! That’s a 21 inch difference.
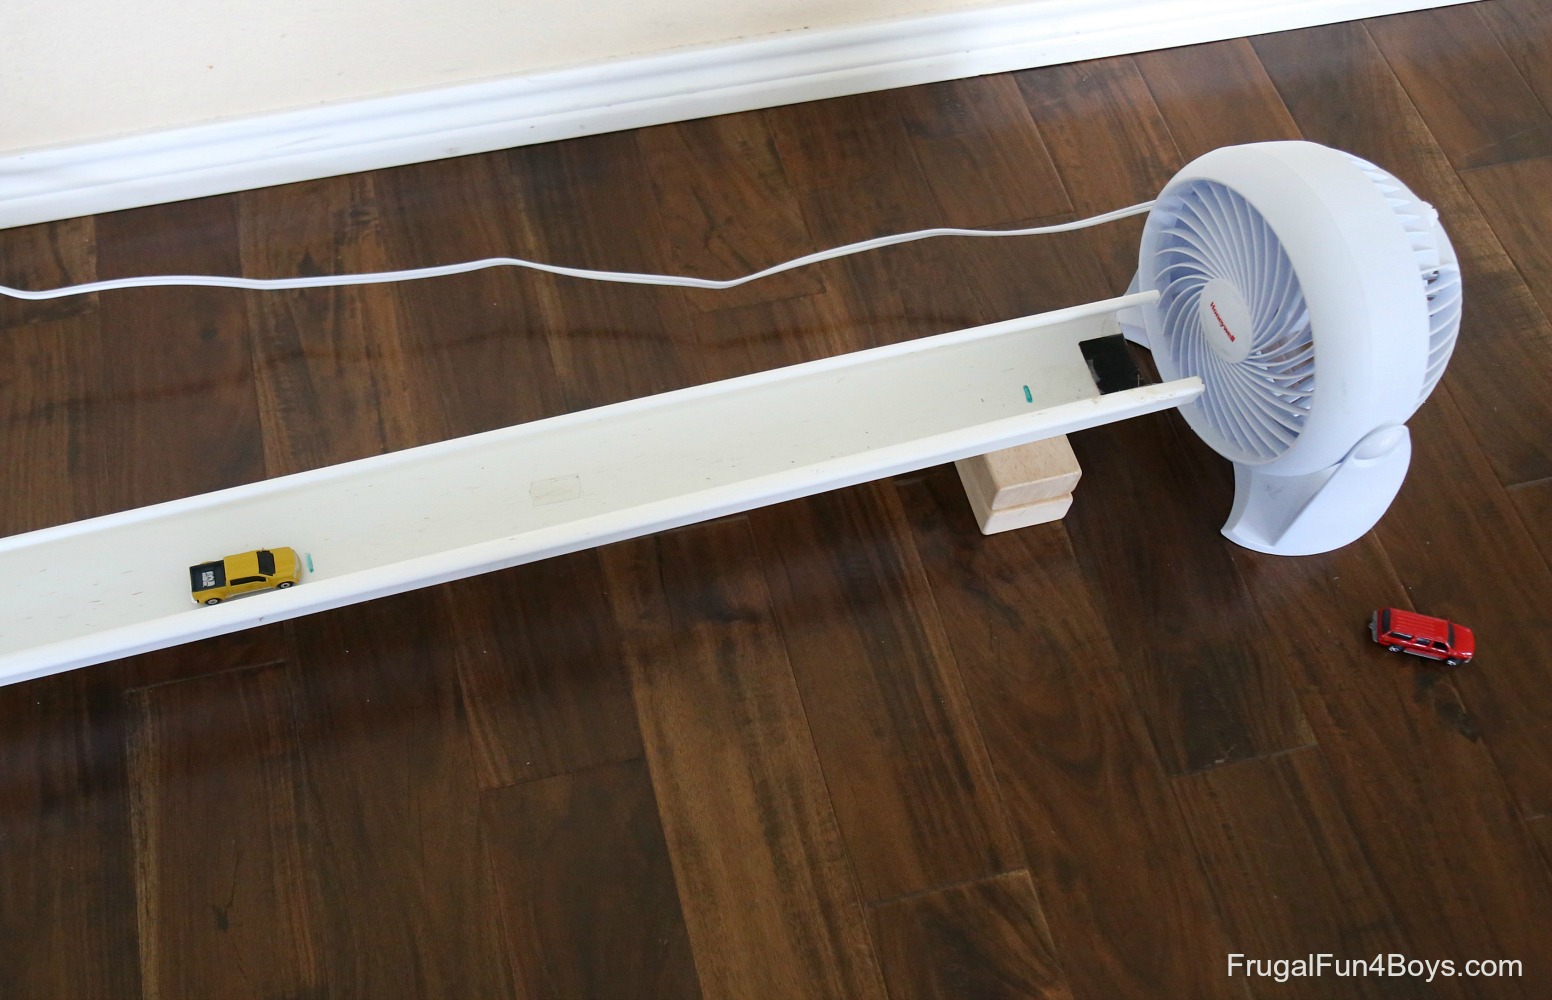
After each trial, you can wipe off the marker and do it again!
Air Resistance Explanation
Air resistance is basically friction with the air. As an object travels in one direction, it experiences the force of air resistance pushing in the opposite direction. In real life, different styles of cars experience different amounts of air resistance. Think about the effects of air resistance on a boxy van versus a low profile sports car, for example!
We found that it’s harder to compare the amount of air resistance caused by the shape of the car using Hot Wheels because the wheels are easily bent and can contribute more to a car’s poor function than its air resistance. Also, there are big differences in the mass of these cars. Still, it was a fun experiment, and we were all surprised at how much a fan could slow a car down!
Ready to print the recording sheets?
CLICK HERE: Hot Wheels STEM Recording Sheets
Kristen Oct 24, 2019
Hi Sarah, Thank you for this enthralling post! My son is participating in a science fair at our homeschool co-op, and we've been searching for just the right experiment to keep his interest peaked. Right away, he said, "This is it, this is what I want to do!" Thank you for taking the time to share your ideas with the rest of us.
Heather Sep 3, 2024
Thanks for these great ideas!!
Post a Comment
- Skip to primary navigation
- Skip to main content
- Skip to primary sidebar

- FREE Experiments
- Kitchen Science
- Climate Change
- Egg Experiments
- Fairy Tale Science
- Edible Science
- Human Health
- Inspirational Women
- Forces and Motion
- Science Fair Projects
- STEM Challenges
- Science Sparks Books
- Contact Science Sparks
- Science Resources for Home and School
Easy Science Experiments Using Toy Cars
January 13, 2023 By Emma Vanstone Leave a Comment
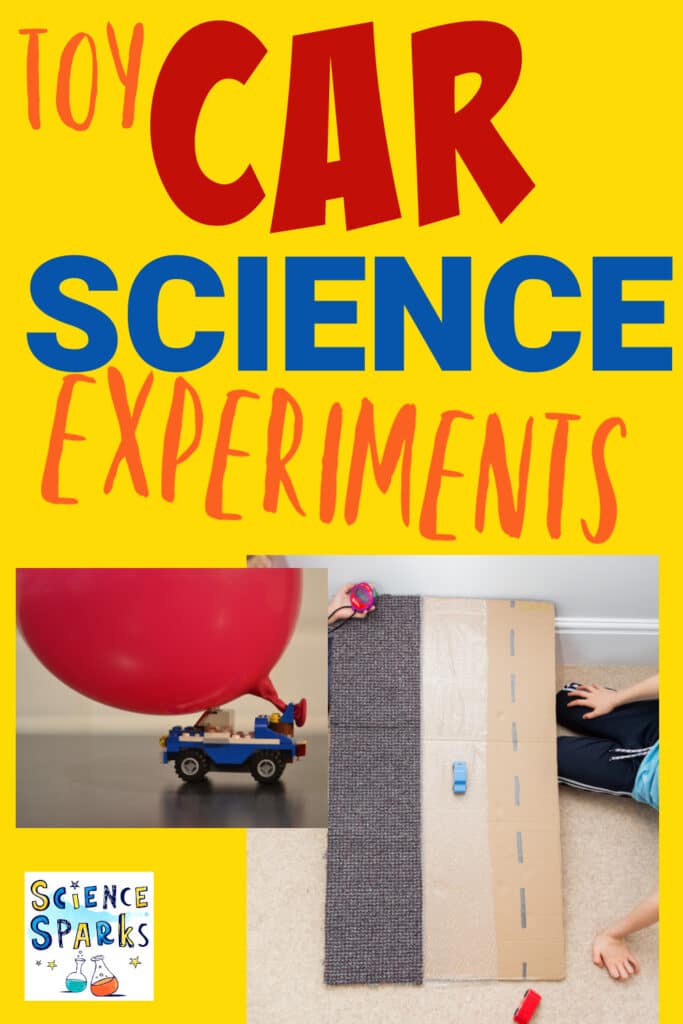
Toy cars are a great tool for learning about forces such as friction , momentum, inertia, and the effect of changing ramp gradients.
For some activities, you’ll need a few extra items, but hopefully, you already have most of them around the house.
Grab some toy cars and start experimenting!
Science investigations using toy cars
1. toy car friction ramp.
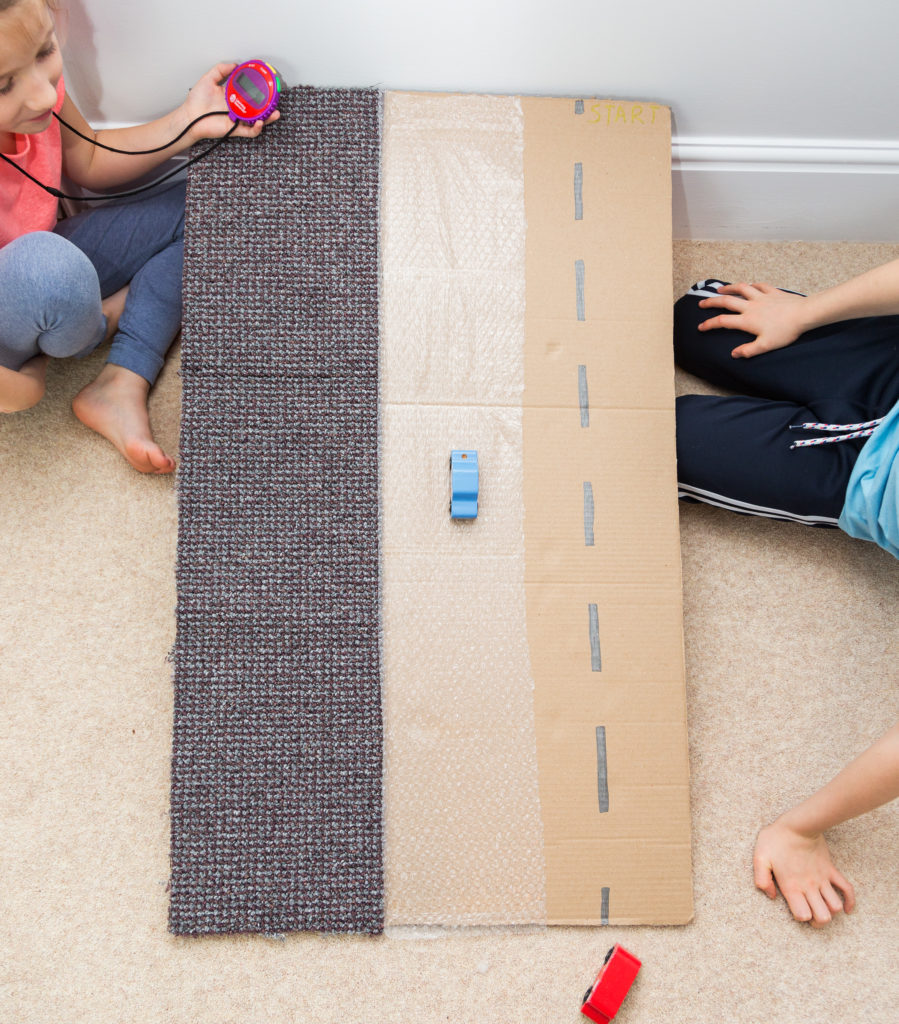
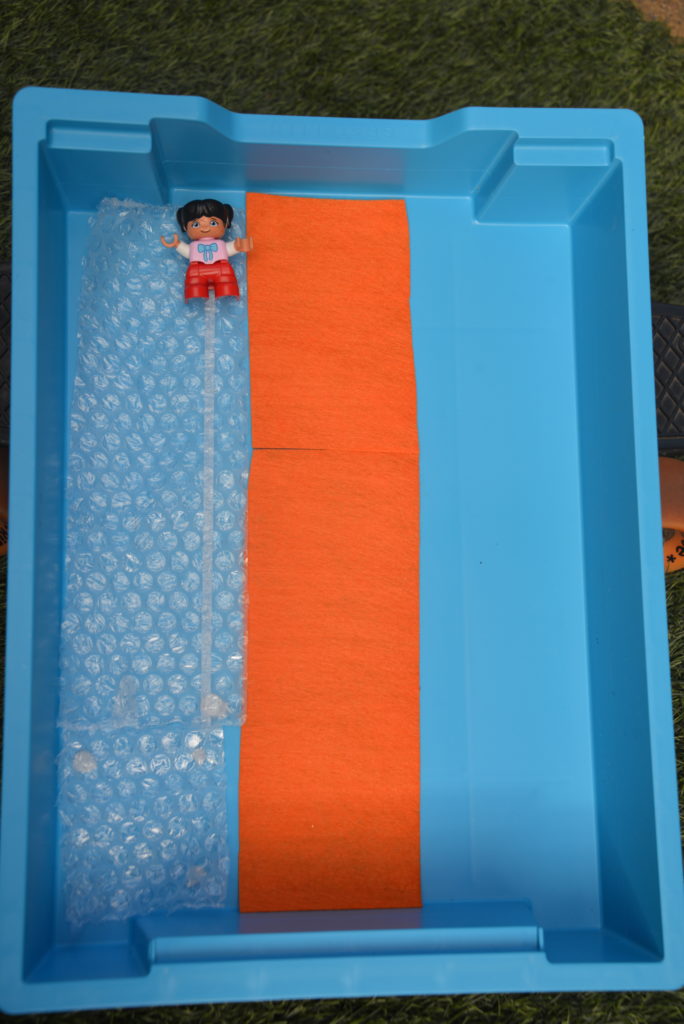
Our DIY friction ramp uses a large sheet of thick cardboard split into several lanes. Each lane is covered with a different material. This activity is a great way to demonstrate how some surfaces have more friction between themselves and another object than others.
2. Balloon-powered toy car
This fun balloon-powered car is made from LEGO. A balloon-powered car is a great way to learn about kinetic energy, potential energy, conservation of energy and Newton’s Laws of Motion.

3. Learn about momentum with a toy car
All moving objects have momentum. Another way to think about momentum is how hard it is to stop a moving object. It’s harder to stop an object moving quickly than an object moving slowly. Use a toy car to demonstrate and learn all about momentum .
4. Gradient and speed investigation
Use a ramp to investigate how the distance travelled by a toy car is affected by the slope gradient and the ramp’s surface.
5. Magic magnetic cars
Make simple magnet-powered cars to learn about magnetism. Race them, steer them and even design your own race track! These are simple to make and work brilliantly!
More science experiment ideas for preschoolers
Embrace the messy side of science with a sensory science station . Make fizzy potions, oobleck slime and lots more.
Frugal Fun also has some great ideas for science experiments with toy cars .
Try some magic opening flowers made using just paper and a tray of water or one of my other preschool science experiments !
Last Updated on September 18, 2024 by Emma Vanstone
Safety Notice
Science Sparks ( Wild Sparks Enterprises Ltd ) are not liable for the actions of activity of any person who uses the information in this resource or in any of the suggested further resources. Science Sparks assume no liability with regard to injuries or damage to property that may occur as a result of using the information and carrying out the practical activities contained in this resource or in any of the suggested further resources.
These activities are designed to be carried out by children working with a parent, guardian or other appropriate adult. The adult involved is fully responsible for ensuring that the activities are carried out safely.
Reader Interactions
Leave a reply cancel reply.
Your email address will not be published. Required fields are marked *

Toy Car Ramp Experiment (Easy STEM for Kids)
Categories Printables , Science , STEM
This Toy Car Ramp Experiment is an excellent way to introduce your kids to the wonders of physics. Don’t be intimidated by the word physics. You can start introducing it to your kids when they’re very young.
Every baby who has ever thrown anything from their highchair, just so that they can watch it fall to the floor is experimenting with gravity. Or psychology, if you happen to get annoyed whenever they make an unnecessary mess on your kitchen floor.

Disclosure: Adult supervision is required for all activities at all times.
Table of Contents
- Materials needed
Instructions
- Different experiments to try
- What you’re learning
- More STEM activities to try
Materials Needed
- Wooden plank
- Different cars in various weights, or these Duplo blocks that you can adjust.
- Measuring tape
- Stool, table, blocks or anything to lean the roadblocks against
I’ve made my own DIY Roadblocks in two different ways. One with painted wood, and the other with black cardboard. Cardboard was much easier to make and store and have been my preferred roadblocks for years now. However the wooden ones were perfect for outdoor play, and if you use outdoor paint then you don’t have to worry about them being left in the rain.

How to Make a Toy Car Ramp Experiment
1. download and print the recording sheet.

The free printable recording sheets can be found below. Simple head to the bottom of the post and click the large blue button to get your copy.
You’ll need 1 recording sheet per child, or per group if you are doing this as a group activity.
2. Set up your ramp

I placed one end of the wooden planks on top of some of our building blocks. Foam building blocks were perfect for this because you can easily adjust the height of the ramp (which you need for experiment 1) and since they were made from foam the ramps didn’t slip around so easily.
When you are setting up your ramps, make sure to set them up on a flat surface. Otherwise it’ll affect the validity of your results.
3. Place the cars at the top of the ramp

Place one hot wheels car at the top of each ramp. You’ll need to make sure that they are starting at the same point for each experiment.
You’ll also need to make sure that the cars you use are exactly the same, (except for experiment 2), otherwise your results will be invalid.
4. Let the cars go
Make sure your kids, let go of the car and don’t push it. Otherwise, your results will be invalid because you can’t guarantee that they’ve used the exact amount of force for each push. Instead, you’ll be using the Gravitational Potential Energy (GPE) to give the cars enough energy to move.
5. Measure

When the car has stopped rolling, you’re going to measure the distance between the end of the ramp and the end of the car. You can then record results on the free printable recording sheet.
With each of these three car STEM experiments, you’re going to change only one variable and see how that variable affects the distance the car rolls.
6. Record your results

Write down the distance the car traveled from the bottom of the ramp to the place where it eventually stopped rolling.
Repeat step 3 – 6 for each experiment 3 times. When you’ve gathered all of your data you can compare how far the object travels and talk about what that means.
Different Experiments to Try
Experiment 1: how does the height of the ramp affect the distance the car goes.

In this experiment, you’re going to find out how different amounts of gravitational potential energy (GPE) affects the distance the car travels.
To do this, you’re going to adjust the angle of the ramps. The higher the ramp, the greater the GPE and the more force that is exerted on the car. In other words, the higher the GPE, the further we expect the moving car to go.
Since I used foam blocks to support my simple ramps, it was easy to increase the inclined plane by adding another block to the supporting tower. Try a whole lot of different heights and see what happens.
If you want to highlight the primary concept here, you can even do an experiment where one of the ramps is lying flat on the floor. Obviously, the car is going to go nowhere, but at least now your kids will know that it’s because there was no GPE to get the car rolling.
Experiment 2: How does the weight of the car affect the distance the vehicle goes?

Have you ever been stuck behind a big truck on an onramp and thought “My gosh, this is going to take forever!” Have you ever wondered why a heavy truck still goes so slowly even when it’s going downhill and trying to increase its speed to merge safely with the other cars that are going at a faster speed?
It’s because it takes a lot more energy to move heavy objects, such as a big truck or a medicine ball, than it takes to move lighter ones, like a regular car or a tennis ball.
Another way to explain this concept to your kids is to get them to blow through a straw. Get a pom pom and a tennis ball and try to blow them off of a table. See how hard your kids have to blow to get each of the balls moving. They’ll soon find it much easier to get the pom pom to fly across the table while the tennis ball follows at a much slower rate.
In this experiment, the GPE is the same because you’re going to make the height of the ramps equal, but the weight of the cars will change. The lighter car should roll further because it requires less GPE to roll the same distance as the heavier car.
This experiment was the reason why I chose these Duplo train blocks instead of cars. I found it a lot easier to adjust the weight of the vehicle by adding on extra blocks to create a heavier mass. If you don’t have these Duplo train set blocks at home, you can instead find two cars that are different weights, or you can try to make one heavier by sticking a pebble to the top with playdough.
Experiment 3: How does the surface texture of the landing area affect the distance the car goes?

We’ve used the GPE to give the car the energy to move. Now we’re going to explain why the car stops rolling. In this experiment, your kids will learn how different surface textures and the different amounts of friction produced will affect the distance the car travels.
Pick three surfaces, something smooth, like wooden floors or tiles, something rough, like grass and something in between, like carpet. Then repeat the experiment and see how far the matchbox car goes on the different surfaces.
The more ‘rough’ a surface, the more friction is produced when something moves across it. When two objects slide against each other, friction works in the opposite direction to the movement. The more ‘rough’ a surface is, the more surface area that is actually coming into contact with the moving object.
Although the relationship between roughness and friction is a bit more complicated than this, there’s no need to go past the basic concept when doing this experiment with young kids.
In this experiment, friction acts like an outside force to stop the cars from rolling. If it weren’t for friction, the car would keep going forever, or until it ran into something.
To explain this to your kids, try to use examples of friction working in their everyday lives that they can understand. For instance, get them to think about which is harder. Is it easier to ride their bikes on the grass, or the road? Another example is to ask them if it’s easier for them to walk through air or water?
What You’re Learning
Basic concept: Objects, even inanimate ones, require energy to move.
Your kids probably already know that we need energy to move. Even if you haven’t talked to them about it directly, they would have picked up on the concept. If you think of some of the usual things parents say, you’ll understand what I mean.
“Vegetables give you the energy to grow.”
“Where’s my coffee? I need some energy.”
“Wow, running across the whole park took a lot of energy.”
Your kids are smart, and they’ll have figured out what energy does.
But have you ever told your kids that even inanimate objects need a bit of energy to move too? Why does a ball move when you kick it? The ball will then stop moving after a while, why? Why is it easier to throw a tennis ball compared to a bowling ball?
These are three questions we can answer with these simple science experiments.
More STEM Activities to try
With the right STEM experiment even young kids can become enthusiastic science students. They’re a great way to introduce kids to the scientific method and help develop essential life skills as they play and explore. Here are some more simple STEM activities that even preschoolers and kindergarteners can enjoy.
- Make a Book – STEM Invitation to Play
- Paper Plate Number Match Activity
- How to Make A Pom Pom Shooter
- Edible Bubble Science
- Safe Drinking Water STEM Activity
For more ideas, take a look at these 42 STEM Activities for Kids .
Are you going to try this Toy Car Ramp Experiment with your kids? Don’t forget to pin the idea for later.

Toy Car Ramp Experiment

Use toy cars and ramps to make an easy science experiment for your kids.
This is a fun way to teach kids about physics and the scientific method.
- Download and print the recording sheet.
- Set a ramp up, with one end on the floor and the other end on a stack of blocks or book.
- Place a car at the top of the ramp and let it go (don't push it.)
- Use a measuring tape to measurethe distance between the bottom of the ramp and the end of the car.
- Write the distance on the recording sheet.
There are three different experiments you can try with this simple setup.
- Change the height of the ramp and see what happens.
- Change the weigh of the car.
- Change the surface that the car reaches, with varying amounts of friction.
You May Also Like

STEM Activities for Kids

Transportation Activities for Kids
Share this:
- Click to share on Facebook (Opens in new window)
- Click to share on Pinterest (Opens in new window)
- Click to share on Twitter (Opens in new window)
Get Your ALL ACCESS Shop Pass here →

Toy Car Friction Experiment
Kids LOVE to send cars down ramps! The faster the better! But did you know that this favorite playtime activity is also an awesome science lesson for kids of all ages. Explore friction with just a few simple materials. Enjoy fun playful learning with our preschool science activities !
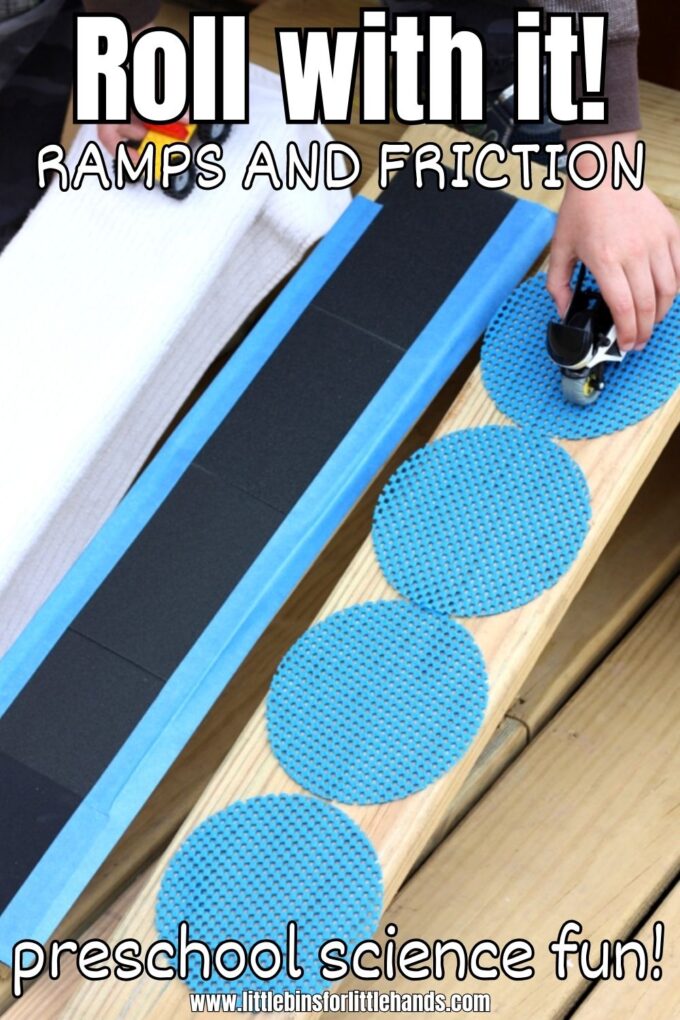
For older kiddos, learn more about friction with Floating Rice Friction Experiment and Screaming Balloon Experiment.
- Materials to make ramps. You can use cardboard or wood planks!
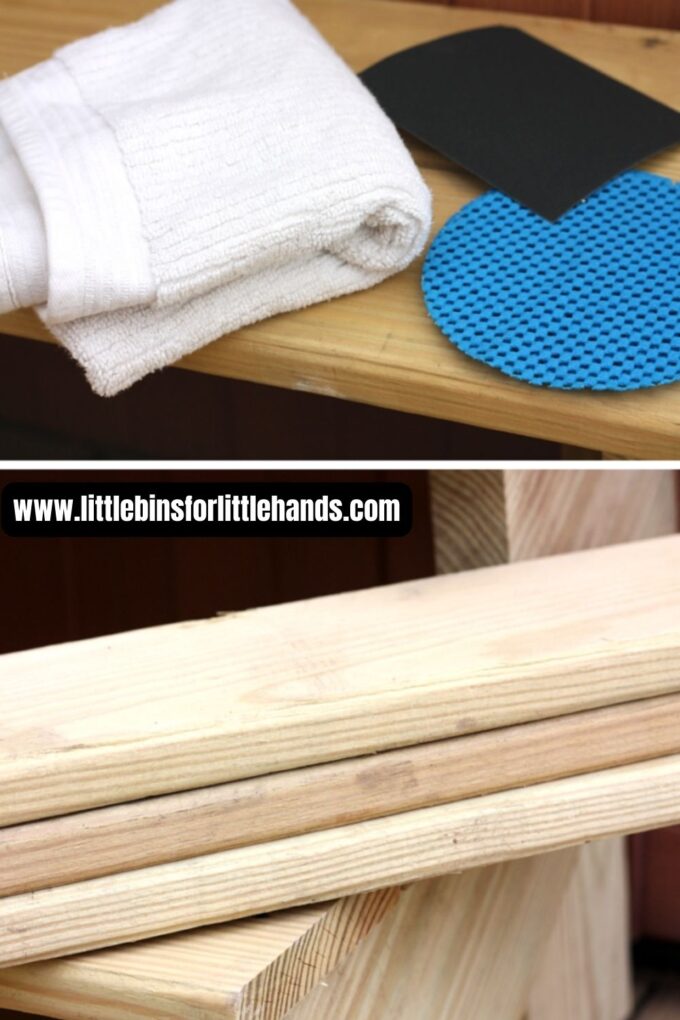
- Variety of textured materials to create friction. There are so many ideas! We used a hand towel, sand paper, and rubber grippy mats. You could also use tin foil or parchment paper, a piece of rug, or even dirt.
- Tape to secure materials if necessary so they do not slip off the ramps.
- Stopwatch and measuring tape. These are optional but a fun way to extend the activity and encourage making predictions.
Instructions:
STEP 1. Choose the number and type of materials you want to test, and how many ramps you want to have available.
STEP 2. This is fun inside or outside! Leave one ramp free of materials as a test ramp. Secure your materials to the other ramps as needed.
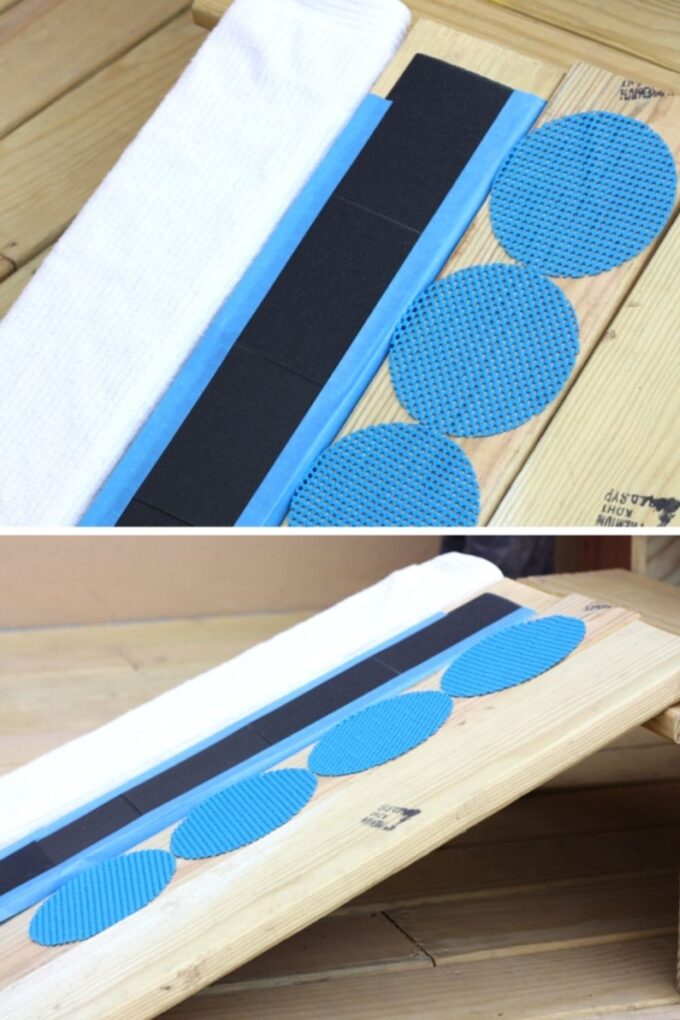
STEP 3. Set up your ramps on an incline from same height. We used stairs, but you can also stack books.
STEP 4. Gather your cars and kids!
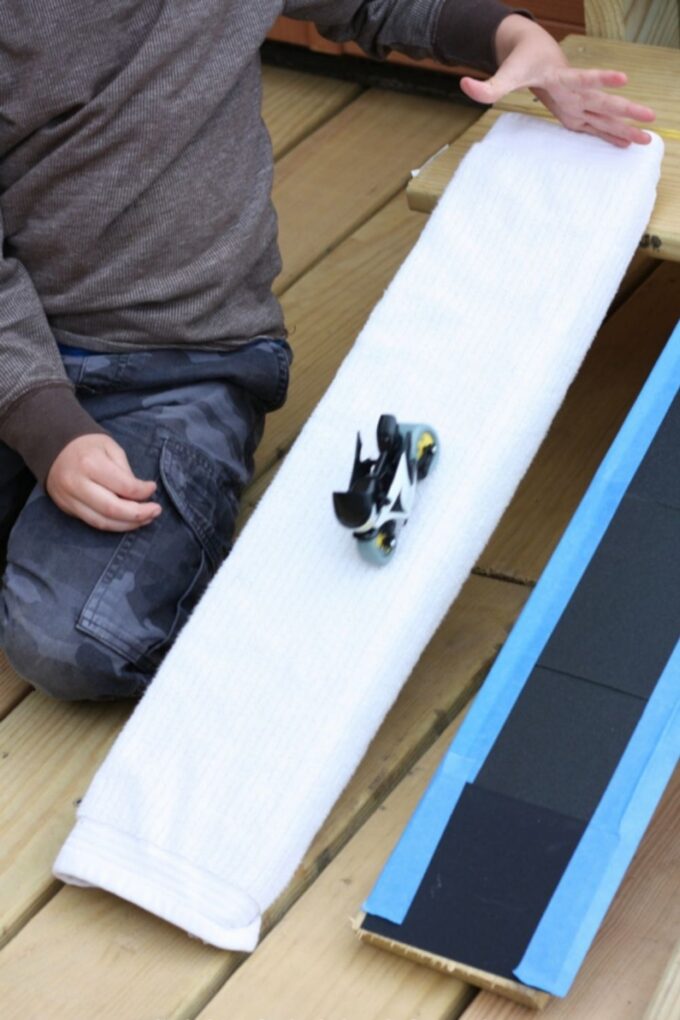
Ask lots of questions! Before they test out the cars, have the kids guess which texture might slow down the car or speed it up as it goes down the ramp. Make predictions on which cars will go faster or slower. Learn more about the scientific method for kids.
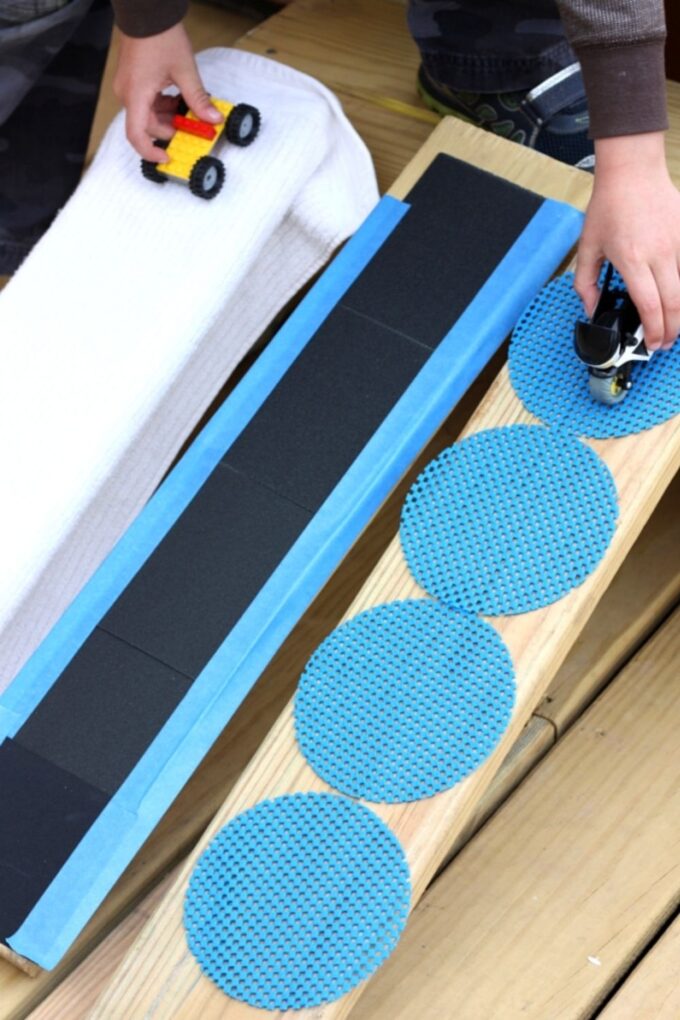
Let the kids race cars down the different ramps. If appropriate, you can use a measuring tape to see how far the cars travel off the ramp.
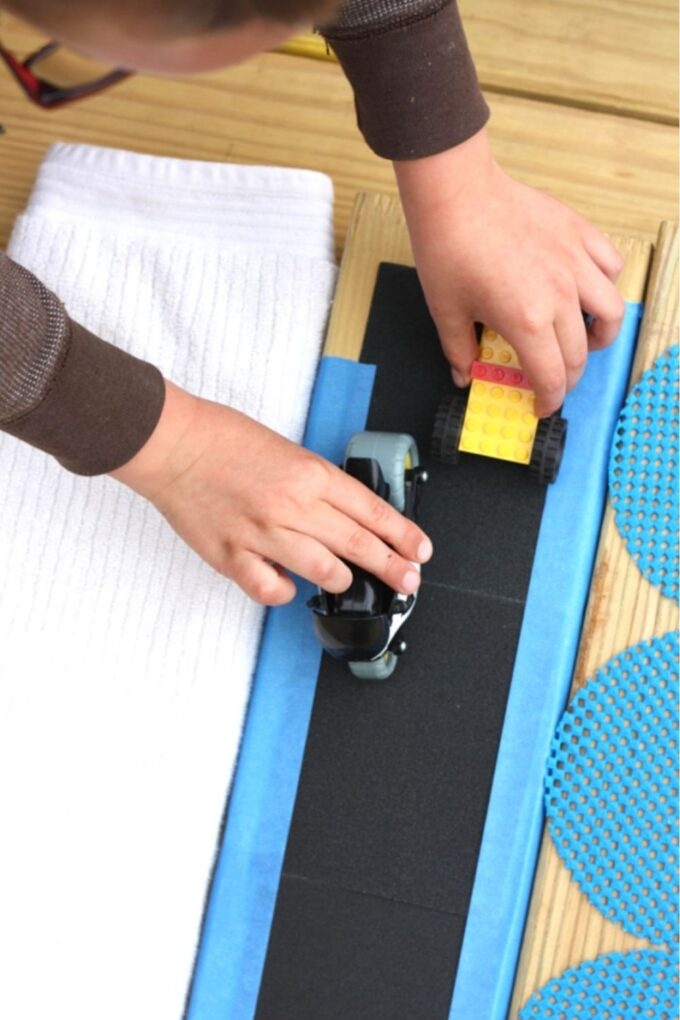
Which car goes the farthest? Which car is the slowest? Which car crashes, falls off the ramp, or doesn’t make it to the end?
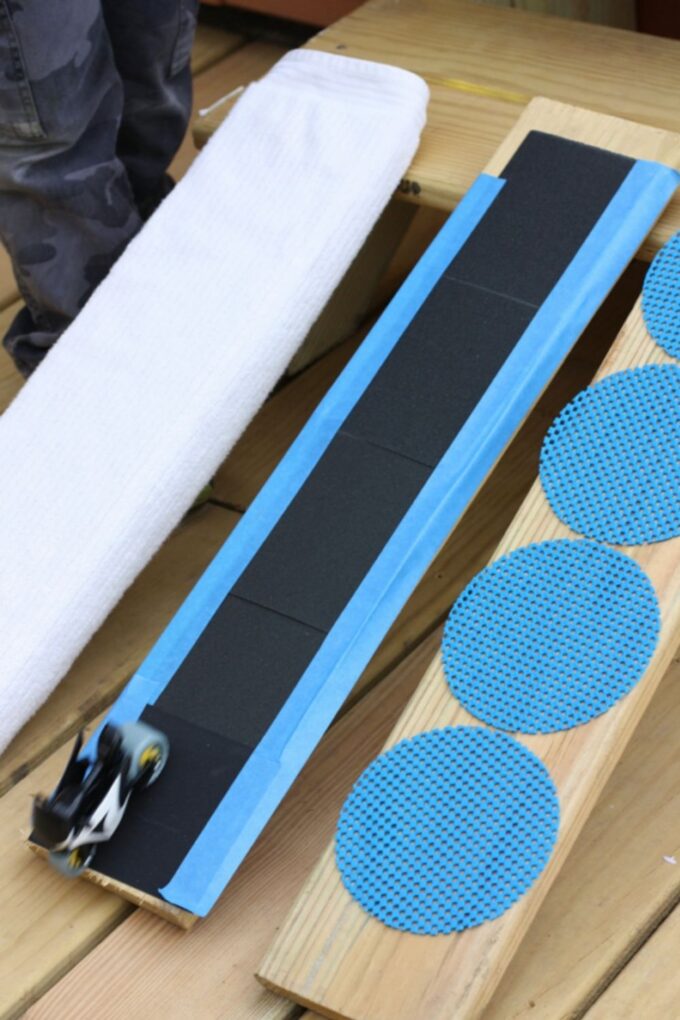
Explore Friction With Toy Cars
Simple physics activities like this toy car friction experiment are a wonderful way to get kids thinking, exploring, problem-solving, and observing what is happening around them.
All you need are some simple ramps, textured materials, and toy cars, and you are ready to go! If the weather allows, you can take the learning outdoors for easy play and learning.
Here is a fun way to introduce our preschoolers to the concept of friction in science. Extend the activity by applying the scientific method . Get kids to predict which surface will be faster or slower, measure it with a stopwatch, and make conclusions.
What Is Friction?
Young kids learn by exploring, observing, and figuring out the way things work by experimenting. Exploring friction with toy cars and ramps encourages all of the above.
Kids will learn that friction can be two surfaces rubbing against one another. We experience this when we rub our hands together when they are cold.
Friction is also the resistance an object meets when moving over another surface. The materials you attached to the ramps changed the surface of the ramp. The cars will experience different amounts of friction when going down these ramps, causing them to speed up or slow down.
Tips For Exploring Ramps (Incline Planes)
Allow your kids to explore the bare ramp as they wish. They will be super excited to play, so it is often best to let them explore the activity freely for a bit first!
At this point, you can also test angles. Change the position of the ramp and see which ramp angles are faster or slower.
Which toy cars move faster? Heavier, lighter, longer, or shorter cars move at different speeds. This is a great way to get them thinking about how things move!
Note: You may want to split this activity into two learning times since exploring the ramps or inclined planes is fun and is still a simple physics lesson!
When the kids are ready, move on to your textured ramps. Let the kids feel the textures and describe them to you.
This is a great time to introduce the term friction if you would like! Read a bit about friction below, and keep it simple for young kids!
More Fun Pre-K Learning Activities
- Shadow Activities
- Exploring Volume
- What’s Magnetic and What’s Not
- Set Up A Nature Table
- Building Bridges
- 5 Senses Sensory Station
Printable Preschool Activities Pack
Get ready to explore this year with our growing Preschool STEM Bundle . There are 20+ fun preschool themes to get you started. This is an ” I can explore” series!
Each unit contains approximately 15 activities, with instructions and templates as needed. Hands-on activities are provided to keep it fun and exciting. This includes sensory bins, experiments, games, and more! Easy supplies keep it low cost and book suggestions add the learning time.
Subscribe to receive a free 5-Day STEM Challenge Guide
~ projects to try now ~.


IMAGES
COMMENTS
Apr 24, 2017 · Toy cars aren't just fun to play with. They're perfect vehicles for a wide variety of science experiments, which can tell you a lot about things like energy, inertia, momentum, friction and vectors. Each experiment will require tools in addition to the toy cars, but there's a huge amount you can learn—and then you can go back to racing.
Let’s do some Hot Wheels STEM projects! These simple science experiments feel like play, but kids will actually be exploring the physics concepts of velocity, mass, momentum, and air resistance. There are two experiments in this post. I created recording sheets for both that include the full scientific method, and you can print them at […]
Jan 13, 2023 · More science experiment ideas for preschoolers. Embrace the messy side of science with a sensory science station. Make fizzy potions, oobleck slime and lots more. Frugal Fun also has some great ideas for science experiments with toy cars. Try some magic opening flowers made using just paper and a tray of water or one of my other preschool ...
May 17, 2024 · In this experiment, the GPE is the same because you’re going to make the height of the ramps equal, but the weight of the cars will change. The lighter car should roll further because it requires less GPE to roll the same distance as the heavier car. This experiment was the reason why I chose these Duplo train blocks instead of cars.
Start your toy engines -- this is going to be a fast and friction-filled race! Have you ever wondered what kind of surfaces make race cars go faster or slower? Grab your remote control to find out as your car zips over different surfaces. The key to this experiment is car friction, or resistance created, between the car's wheels and the road ...
Nov 10, 2024 · Toy Car Friction Experiment. For older kiddos, learn more about friction with Floating Rice Friction Experiment and Screaming Balloon Experiment. Supplies: Materials to make ramps. You can use cardboard or wood planks! Toy cars; Variety of textured materials to create friction. There are so many ideas! We used a hand towel, sand paper, and ...