- Skip to main content
- Skip to secondary menu
- Skip to primary sidebar
- Skip to footer
Erin Wright Writing
Writing-Related Software Tutorials

How to Create and Customize Charts in Microsoft Word
By Erin Wright

Charts offer a concise and visually appealing way to present numeric information. This tutorial explains the basics of creating and customizing charts in Microsoft Word. We’ll cover five topics:
- How to insert a chart
- How to update existing data in a chart
- How to resize a chart
- How to reposition a chart
- How to change chart colors
These steps apply to all seventeen of Word’s prebuilt chart types:
| Column | Area | Surface | Histogram | Combo |
| Line | X Y (Scatter) | Radar | Box & Whisker | |
| Pie | Map | Treemap | Waterfall | |
| Bar | Stock | Sunburst | Funnel |
Important Note: Word provides many ways to customize charts—many more than can reasonably be covered in one tutorial. So, this tutorial presents the basic methods I believe will be most useful for the majority of users.
Before we begin…
What about Figures and Graphs?
In the writing world, charts and graphs fall under the umbrella term figures , which also includes photos, drawings, maps, and musical scores.
Graphs are generally considered a type of chart. Therefore, the term chart is used throughout this tutorial. However, all the steps shown here also apply to visuals typically considered to be graphs, such as line graphs.
This tutorial is also available as a YouTube video showing all the steps in real time.
Watch more than 150 other writing-related software tutorials on my YouTube channel .
The images below are from Word for Microsoft 365. The steps are the same in Word 2021, Word 2019, Word 2016, and Word 2013. However, your interface may look slightly different in those older versions of the software.
How to Insert a Chart
- Place your cursor where you want to insert the chart.
- Select the Insert tab in the ribbon.

- Select the Chart button in the Illustrations group.

- Select a chart type from the left side of the Insert Chart dialog box.

Pro Tip: Hover your pointer over the example image in the center of the Insert Chart dialog box to see a larger example of the chosen chart type.
- Select a subtype of the selected chart.
The available subtypes will depend on the selected chart. Common charts such as pie charts and bar charts offer attractive 3-D options.

- Select the OK button to close the Insert Chart dialog box and insert the chart.

- Enter labels and numbers into the spreadsheet by typing over the example data. Add additional labels and numbers or delete the example data as necessary.

- Select the X to close the spreadsheet.

- (Optional Step) Select the Chart Elements button to the right of the chart if you want to add or remove the title, data labels, or the legend. (Click inside the border to select the chart if the right-side buttons are not visible.)

How to Update Existing Data in a Chart
- Right-click the chart.
- Select Edit Data from the shortcut menu.

Pro Tip: Select the arrow next to Edit Data and select Edit Data in Excel if you want to update your chart in Excel rather than Word’s spreadsheet.
- Edit your data in the spreadsheet (see figure 6).
- Select the X to close the spreadsheet and apply your changes (see figure 7).
How to Resize a Chart
Charts can be resized by dragging the border or by using exact dimensions (e.g., 3” x 4”).
Basic Method: Resize a Chart by Dragging the Border
- Click inside the border to reveal the resizing handles.

- Click and hold one of the handles as you drag the chart to the appropriate size.
- The corner handles provide movement in all directions.
- The side handles provide horizontal movement.
- The top and bottom handles provide vertical movement.
Advanced Method: Resize a Chart to Exact Dimensions
- Click inside the border to select the chart.
- Select the Layout Options button to the right of the chart.

- Select See more from the Layout Options menu.

- Select the Size tab in the Layout dialog box.

- (Optional Step) Select Lock aspect ratio if you want to maintain the current shape.

- Enter the dimensions in the Height and Width boxes. If you selected Lock aspect ratio , you only have to enter one of these numbers.

- Select the OK button to close the Layout dialog box and apply your new dimensions.

How to Reposition a Chart
You can customize your chart’s placement on the page by changing its alignment and text wrapping. Text wrapping determines how charts and other figures are positioned in relation to the surrounding text.
- Select the Home tab in the ribbon.

- Select the Align Left , Center , or Align Right button in the Paragraph group.

- (Optional Step) Select the Layout Options button to the right of the chart for text wrapping options.

Your position changes will be applied immediately.
How to Change Chart Colors
You can choose a prebuilt color palette for your whole chart or select custom colors for individual elements.
See the bonus section below for information about using RGB, HSL, and Hex color codes.
Basic Method: Choose a Prebuilt Color Palette
- Select the Chart Styles button to the right of the chart.

- Select the Color tab in the shortcut menu.

- Select a color palette.

Your new color palette will be applied immediately.
Advanced Method: Choose Custom Colors
- Select and then right-click the individual chart element you want to change.
- Select the Fill button in the shortcut menu.

- Select a color from the drop-down menu or choose More Fill Colors for additional options.

Your new color will be applied immediately.
Bonus Section: How to Use RGB, HSL, and Hex Color Codes in a Chart
Word lets you use RGB (Red, Green, Blue) and HSL (Hue, Saturation, Lightness) color codes in your charts. In addition, you can use Hex color codes if you are using an updated version of Word for Microsoft 365 (formerly Office 365).
- Select the Fill button in the shortcut menu (see figure 23).
- Select More Fill Colors from the drop-down menu.

- Select the Custom tab in the Colors dialog box.

- Select RGB or HSL from the Color model menu or enter a code in the Hex box.

- Enter your RGB or HSL code into the appropriate boxes. (Skip this step if you are using a Hex code.)

- Select the OK button to close the Colors dialog box and apply your color change.

Related Resources
Three Ways to Insert Tables in Microsoft Word
How to Save Tables and Figures as Images in Microsoft Word (PC & Mac)
How to Update Table and Figure Numbers in Microsoft Word
How to Change the Style of Table Titles and Figure Captions in Microsoft Word
How to Create and Update a List of Tables or Figures in Microsoft Word
How to Write Figure Captions for Graphs, Charts, Photos, Drawings, and Maps
How to Write Table Titles
How to Reference Tables and Figures in Text
Updated November 27, 2022
- Microsoft Word Tutorials
- Adobe Acrobat Tutorials
- PowerPoint Tutorials
- Writing Tips
- Editing Tips
- Writing-Related Resources
How-To Geek
How to make a chart in microsoft word.

Your changes have been saved
Email Is sent
Please verify your email address.
You’ve reached your account maximum for followed topics.
Today's NYT Connections Hints and Answer for June 25 (#380)
Spice up your whatsapp messages with these formatting tricks, adding android auto or carplay to your car is easier than you think, quick links, create a chart in word, customize a chart in word.
Sometimes documents you're authoring can benefit from an illustrative chart. Rather than taking the time to set up a chart in another application and embedding it or copying and pasting it into Microsoft Word, you can use the built-in chart feature.
Related: How to Link or Embed an Excel Worksheet in a Word Document
You might be creating a company report, business proposal, or college essay where a data-filled visual is an ideal addition.
Place your cursor where you want the chart in your Word document. Then, go to the Insert tab and click "Chart" in the Illustrations section of the ribbon.

Pick the type of chart you want to add on the left and the style on the right. If you're familiar with the chart options in Excel, you can choose from the same types in Word like bar , column, pie, line, and many others. Click "OK" to insert the chart.
Once you insert the chart, an Excel spreadsheet will open. The sheet contains sample data to get you started and is a stripped-down version of Excel without tabs or a ribbon.
You can edit the data in the spreadsheet to include your own or copy and paste the data from another spot into the attached sheet. You'll then see the chart in Word immediately update with your changes.
Related: How to Choose a Chart to Fit Your Data in Microsoft Excel
Update the Chart Data
Anytime you want to update the data for the chart, you can do so by heading to the Chart Design tab.
Click the drop-down arrow for Edit Data. Select "Edit Data" to display the small spreadsheet you had when you created the chart, or select "Edit Data in Excel" to open the sheet in a standard Excel window with tabs and a ribbon.
Once you insert the chart into Word with the data you want, you can make some customizations. You can add a title, adjust the colors, pick a theme, include a legend, and more. Again, if you're familiar with customizing charts in Excel , you'll recognize the below options.
Related: How to Create and Customize a Funnel Chart in Microsoft Excel
Use the Chart Design Tab
Select the chart and go to the Chart Design tab. Starting on the left side of the ribbon you can add, remove, and position chart elements, change the layout, pick new colors, and select a style.
On the right side of the Chart Design ribbon, you have an option for Change Chart Type. If you believe a different type of graph would work better with your data, you can select it here.
Open the Format Chart Sidebar
If you'd like to change the font, border, or specifics of the chart like a series or axis, you can use the Format Chart sidebar.
Right-click the chart and pick "Format Chart Area" or double-click the chart.
When the sidebar opens, click the arrow next to Chart Options to select a part of the chart to adjust.
Use the tabs at the top of the sidebar for fill and line colors, effects, and properties. These tabs change depending on the chart area you select in the drop-down list.
Use the Floating Buttons on Windows
If you're using Word on Windows, you also have floating buttons for quick changes to your chart. Select the graph, and these will display on the right side.
You can then change the Layout Options for the chart's placement within the text. You can also use the Chart Elements, Chart Styles, and Chart Filters buttons to adjust items on the chart, choose a color scheme, and apply filters.
By creating a chart directly in Microsoft Word, you can save yourself a bit of time. This is especially handy if you're using a small amount of data that's beneficial to your Word document.
If you're interested in other ways to use charts in your documents, take a look at how to create a flowchart in Word .
- Microsoft Office
- Microsoft Word
How to Draw a Graph in MS Word: A Step-by-Step Guide
Drawing a graph in MS Word is a straightforward process that involves inserting a chart, choosing the appropriate graph type, and inputting the data you want to visualize. By following a series of simple steps, you’ll be able to create a visual representation of your data directly in your Word document.
After you complete the action of drawing a graph, you’ll have a visual aid that can enhance your document’s presentation, making complex data more accessible and easier to understand for readers.
Introduction
Graphs and charts are powerful tools that turn numbers into visual stories, making complex data easier to digest. In the professional world, graphs are crucial for reports, presentations, and data analysis. Students also use graphs for projects and assignments to showcase research findings. Whether you’re in the corporate world, academia, or just need to make a personal budget more understandable, knowing how to create a graph in MS Word is a skill worth having.
MS Word is known primarily as a word processing software, but it has robust graphing capabilities that many users overlook. With MS Word, you can create a variety of graphs, including bar charts, line graphs, pie charts, and more. This functionality is particularly convenient because it allows you to present your data visually without having to switch between different software. It’s a skill that can save time and add a professional touch to your documents. Let’s dive into the step-by-step process of drawing a graph in MS Word.
Step by Step Tutorial on How to Draw a Graph in MS Word
Before we start, make sure you have your data ready. Knowing what kind of graph you need is also helpful.
Step 1: Open MS Word and Navigate to the Insert Tab
Open your MS Word document and click on the ‘Insert’ tab in the ribbon.
In this tab, you will find various options to add different elements to your document. Look for the ‘Chart’ option, which is what we’ll use to insert a graph.
Step 2: Click on the Chart Option
Click on the ‘Chart’ button, and a dialog box will appear with various graph types.
Choose the graph that best represents the data you want to visualize. For example, use a pie chart for showing percentages, a bar chart for comparisons, etc.
Step 3: Select the Type of Graph
Select the specific graph type from the list and click ‘OK.’
Once you’ve chosen the graph type, a generic graph will appear on your document, along with an Excel spreadsheet where you can input your data.
Step 4: Input Your Data in the Excel Spreadsheet
Enter your data into the Excel spreadsheet that popped up.
This data will automatically reflect in the graph on your Word document. If you need more series or categories, you can add them in the spreadsheet.
Step 5: Customize Your Graph
Customize your graph by right-clicking on different elements of the graph and selecting the appropriate formatting options.
You can change the graph’s design, layout, and format using the tools available under the ‘Chart Tools’ section in the ribbon, which appears when the graph is selected.
| Benefit | Explanation |
|---|---|
| Easy to Use | MS Word provides a user-friendly interface for creating graphs. The process is intuitive, and you can quickly insert a graph with just a few clicks. |
| Customizable | There’s a wide range of customization options available. You can format your graph to match your document’s aesthetics, making it look professional and coherent. |
| Convenient | Since most people are already familiar with MS Word, being able to create graphs within the software is very convenient. It eliminates the need to use separate graphing software. |
| Drawback | Explanation |
|---|---|
| Limited Options | While MS Word offers a variety of graph types, it might not have the same breadth of options as specialized graphing software. |
| Less Precision | For advanced data analysis, MS Word may not provide the precision and tools available in dedicated programs like Excel. |
| Potential Compatibility Issues | There might be compatibility issues when sharing documents, as the graphs may not appear the same on different devices or Word versions. |
Additional Information
When you draw a graph in MS Word, it’s important to ensure that it serves its purpose – to make data more understandable. Always keep your audience in mind. Will they get the intended message from your graph? Avoid clutter and unnecessary information that could confuse the reader. Also, familiarize yourself with different graph types and their uses. A misused graph can misrepresent data and lead to misinterpretation.
Another tip is to use the ‘Edit Data’ option if you need to update your graph after closing Excel. This will reopen the spreadsheet for you to make changes. Remember, practice makes perfect. The more you play around with MS Word’s graphing features, the better you’ll become at creating visually appealing and accurate graphs. And don’t forget, your graph should complement the text in your document, not replace it. Use it to reinforce what you’re saying in your narrative.
- Open MS Word and navigate to the ‘Insert’ tab.
- Click on the ‘Chart’ option.
- Select the type of graph.
- Input your data in the Excel spreadsheet.
- Customize your graph.
Frequently Asked Questions
Can i import data from an external source to create a graph in ms word.
Yes, you can copy and paste data from another program into the Excel spreadsheet that appears when inserting a graph in MS Word.
Is it possible to save the graph as an image?
Absolutely, you can save your graph as an image by right-clicking on it and selecting ‘Save as Picture.’
Can I add a legend or data labels to my graph?
Yes, you can add legends, data labels, and other elements by using the ‘Chart Elements’ button that appears when you select the graph.
How can I change the color of my graph?
You can change the color of your graph by selecting it and then choosing from the color options under the ‘Design’ tab in ‘Chart Tools.’
Can I create 3D graphs in MS Word?
Yes, there are 3D options available for certain graph types, which you can select when choosing the graph style.
Drawing a graph in MS Word is a skill that can significantly enhance the way you present data in your documents. Whether you’re a student, professional, or just someone who loves organizing data, knowing how to create a graph in this widely-used word processor is incredibly beneficial. It’s a simple process that, when done right, can communicate your message effectively and leave a lasting impression.
As we wrap up, remember that a good graph in MS Word is more than just numbers and lines or bars—it’s a storytelling tool. Use it to highlight key insights and support your content. Keep experimenting with different types and styles, and you’ll soon be able to turn even the most complex data into compelling visuals. Now, go ahead and give it a try – your documents will thank you for it!

Matthew Burleigh has been writing tech tutorials since 2008. His writing has appeared on dozens of different websites and been read over 50 million times.
After receiving his Bachelor’s and Master’s degrees in Computer Science he spent several years working in IT management for small businesses. However, he now works full time writing content online and creating websites.
His main writing topics include iPhones, Microsoft Office, Google Apps, Android, and Photoshop, but he has also written about many other tech topics as well.
Read his full bio here.
Share this:
Join our free newsletter.
Featured guides and deals
You may opt out at any time. Read our Privacy Policy
Related posts:
- How to Make a Graph in Google Sheets: A Step-by-Step Guide
- How to Get Graph Paper on Microsoft Word: A Step-by-Step Guide
- How to Make a Graph in Google Sheets
- How to Insert a Graph in Google Docs
- How to Add a Chart to Another Chart in Excel: A Step-by-Step Guide
- How to Save an Excel Chart as an Image in Excel 2010
- How to Make a Pie Chart in Excel 2013
- Adding a Series to an Excel Chart: A Step-by-Step Guide
- How to Delete a Graph or Chart from Google Sheets
- How to Download a Graph or Chart as a Picture from Google Sheets
- How to Make All Columns the Same Width in Excel 2013
- How to Insert a Square Root Symbol in Word
- How to Insert Text Box in Google Docs
- How to Remove Section Breaks in Word Documents
- How to Change Horizontal Axis Labels in Excel 2010
- Can I Convert a Microsoft Word Table to Excel?
- How to Merge Excel Data Into Word Documents: A Step-by-Step Guide
- How to Make a Spreadsheet in Word: A Step-by-Step Guide
- How to Return to Normal View in Word 2010
- How to Find the Slope of a Line on an Excel Graph: A Step-by-Step Guide
How To Make A Chart In Microsoft Word: A Step-By-Step Guide
Learn how to create charts in Microsoft Word with this step-by-step guide. From choosing the chart type to customizing colors and labels, you'll be able to present your data in a clear and visually appealing way.
A chart in Microsoft Word is a graphical representation of data that helps convey information in a clear and visually appealing way. With the ability to import data from external sources and resize and copy charts into other documents, creating professional-looking charts in Word is a simple and effective way to enhance your documents.
Check out the frequently asked questions to troubleshoot any issues and create professional-looking documents.
- A Chart In Microsoft Word: Step-By-Step 💞
FAQ About Chart In Microsoft Word 🧶
- Conclusion 🐮
Graph In Microsoft Word: Step-By-Step 💞
Open Microsoft Word and create a new document or open an existing one.

Click on the " Insert " tab on the top ribbon menu.

Click on the " Chart " or " Pie " option in the " Illustrations " section.

After selecting your chart type, click on " OK " to insert the chart into your Word document.

After you have selected your chart type, a new window will appear with a sample chart and an Exce l spreadsheet. Enter your data into the spreadsheet to create your graph. You can either type in the data directly or copy and paste it from another program.

Customize the chart by selecting different chart styles, colors, and fonts from the " Chart Desig n" and " Chart Format " tabs that appear when the chart is selected.

Add a chart title and axis titles by clicking on the " Chart Title " and " Axis Titles " options in the " Chart Layout " section of the ribbon menu.

Once you've finished customizing your chart, save your document .

For further information on these steps, refer to this YouTube video:
Q: What types of charts can I create in Microsoft Word?
A : Microsoft Word provides a variety of chart types including column, bar, line, pie, scatter, and more.
Q: Can I import data into my chart from an external source?
A : Yes, you can import data into your chart from an external source, such as an Excel spreadsheet, by using the " Insert Data " button on the chart's spreadsheet-like table.
Q: How do I change the colors of my chart?
A : You can change the colors of your chart by selecting the chart and then clicking on the " Chart Styles " option in the " Chart Design " tab. From there, you can select a different color scheme for your chart.
Q: Can I add labels to my chart?
A : Yes, you can add labels to your chart by selecting the chart and then clicking on the " Chart Layout " tab. From there, you can add chart titles, axis titles, data labels, and more.
Q: Can I resize my chart?
A : Yes, you can resize your chart by selecting it and then dragging one of the corner handles. You can also adjust the size of the chart by clicking on the " Size " option in the " Format " tab.
Q: Can I copy and paste my chart into another document?
A : Yes, you can copy and paste your chart into another document by selecting the chart and then using the " Copy " and " Paste " commands.
Conclusion🐮
In conclusion, creating charts in Microsoft Word is a straightforward process that can help you present data in a clear and visually appealing way. With a variety of chart types and customization options available, you can create charts that effectively convey information and make your documents more engaging .
Want to learn more Microsoft Word hacks? Check out the rest of our tutorials .
Subscribe to our newsletter
Subscribe to be notified of new content on marketsplash..
- Link to facebook
- Link to linkedin
- Link to twitter
- Link to youtube
- Writing Tips
Using Tables and Charts in Microsoft Word
3-minute read
- 7th August 2016
Using tables and charts can make a huge difference in an academic essay, helping to communicate vital information while also making your work more visually striking. In order to do this, you first have to know how to use the relevant functions in Microsoft Word.
Adding Tables
In Microsoft Word, a table is a grid of empty cells to which you can add information. To add a table to a document, you have three main options:

- In the dropdown ‘Table’ menu, select ‘Draw Table’ to draw and edit tables with the mouse cursor
You can then add information, such as the data from an experiment, as required. Editing or formatting an existing table simply involves selecting it and clicking on the ‘Table Tools’ section that appears on the main ribbon at the top of the screen.
Adding Charts
Adding a chart , usually a graph of some kind, can be a little more complicated, since your options depend on the type of chart you choose. The basic process, however, is fairly simple:
Find this useful?
Subscribe to our newsletter and get writing tips from our editors straight to your inbox.

- Choose a chart type that suits your requirements (e.g. bar graph, pie chart, etc.)

- Edit the chart’s title by double-clicking and typing
This will give you a different way of presenting data and analysis, complementing the text of your essay. Charts can be customised further via the buttons that appear when you click them in the document. You can even link a chart to a Microsoft Excel spreadsheet , if required.
Using Captions
Ideally, you should add captions to all tables and charts in your document. As well as providing a clear, consistent way of labelling your tables and charts, this enables use of MS Word’s ‘dynamic list’ function. To add a caption to a table or chart, you have two options:

- Go to the ‘References’ tab on the main ribbon and select ‘Insert Caption’
Next, choose a label (‘Table’ for tables or ‘Figure’ for charts and images), type in a title for the chart/table, and click ‘OK’ to add a caption. These captions are then used if you choose the ‘Insert a Table of Figures’ option to create a list of the tables and charts in your document.
Share this article:
Post A New Comment
Get help from a language expert. Try our proofreading services for free.
9-minute read
How to Use Infographics to Boost Your Presentation
Is your content getting noticed? Capturing and maintaining an audience’s attention is a challenge when...
8-minute read
Why Interactive PDFs Are Better for Engagement
Are you looking to enhance engagement and captivate your audience through your professional documents? Interactive...
7-minute read
Seven Key Strategies for Voice Search Optimization
Voice search optimization is rapidly shaping the digital landscape, requiring content professionals to adapt their...
How to Ace Slack Messaging for Contractors and Freelancers
Effective professional communication is an important skill for contractors and freelancers navigating remote work environments....
How to Insert a Text Box in a Google Doc
Google Docs is a powerful collaborative tool, and mastering its features can significantly enhance your...
2-minute read
How to Cite the CDC in APA
If you’re writing about health issues, you might need to reference the Centers for Disease...
Make sure your writing is the best it can be with our expert English proofreading and editing.

- Get started with computers
- Learn Microsoft Office
- Apply for a job
- Improve my work skills
- Design nice-looking docs
- Getting Started
- Smartphones & Tablets
- Typing Tutorial
- Online Learning
- Basic Internet Skills
- Online Safety
- Social Media
- Zoom Basics
- Google Docs
- Google Sheets
- Career Planning
- Resume Writing
- Cover Letters
- Job Search and Networking
- Business Communication
- Entrepreneurship 101
- Careers without College
- Job Hunt for Today
- 3D Printing
- Freelancing 101
- Personal Finance
- Sharing Economy
- Decision-Making
- Graphic Design
- Photography
- Image Editing
- Learning WordPress
- Language Learning
- Critical Thinking
- For Educators
- Translations
- Staff Picks
- English expand_more expand_less
Word 2013 - Charts
Word 2013 -, word 2013 charts.

Word 2013: Charts
Lesson 24: charts.
/en/word2013/tables/content/
Introduction
A chart is a tool you can use to communicate data graphically . Including a chart in your document can allow your reader to see the meaning behind the numbers , and it can make showing comparisons and trends easier.
Optional: Download our practice document .
Types of charts
Word has several types of charts, allowing you to choose the one that best fits your data. In order to use charts effectively, you'll need to understand how different charts are used.
Click the arrows in the slideshow below to learn more about the types of charts in Word.

Word has a variety of chart types, each with its own advantages. Click the arrows to see some of the different types of charts available in Word.

Column charts use vertical bars to represent data. They can work with many different types of data, but they're most frequently used for comparing information.

Line charts are ideal for showing trends. The data points are connected with lines, making it easy to see whether values are increasing or decreasing over time.

Pie charts make it easy to compare proportions. Each value is shown as a slice of the pie, so it's easy to see which values make up the percentage of a whole.

Bar charts work just like column charts, but they use horizontal bars instead of vertical bars.

Area charts are similar to line charts, except the areas under the lines are filled in.

Surface charts allow you to display data across a 3D landscape. They work best with large data sets, allowing you to see a variety of information at the same time.

Identifying the parts of a chart
Click the buttons in the interactive below to learn about the different parts of a chart.

Data Series
The data series consists of the related data points in a chart. In this example, as we can see in the legend, the yellow columns represent net sales in February.
Horizontal Axis
The horizontal axis (also known as the x axis ) is the horizontal part of the chart. Here, the horizontal axis identifies the categories in the chart. In this example, each genre is placed in its own group .
The legend identifies which data series each color on the chart represents. In this example, the legend identifies the different months in the chart.
Chart Title
The title should clearly describe what the chart is illustrating.
Vertical Axis
The vertical axis (also known as the y axis ) is the vertical part of the chart. Here, the vertical axis measures the value of the columns. In this example, the measured value is each genre's total sales.
Inserting charts
Word uses a spreadsheet as a placeholder for entering chart data, much like Excel . The process of entering data is fairly simple, but if you are unfamiliar with Excel you might want to review our Excel 2013 Cell Basics lesson.
To insert a chart:

- A dialog box will appear. Select a category from the left pane, and review the charts that appear in the right pane.

You can edit the chart data at any time by selecting your chart and clicking the Edit Data command on the Design tab.

Creating charts with existing Excel data
If you already have data in an existing Excel file that you would like to use for a Word chart, you can transfer the data by copying and pasting it. Just open the spreadsheet in Excel, select and copy the desired data, and paste it into the source data area for your Word chart.
You can also embed an existing Excel chart into your Word document. This can be useful when you know you'll need to update the data in your Excel file and would like the Word chart to automatically update whenever the Excel data is changed.
Read our guide on Embedding an Excel Chart for more information.
Modifying charts with chart tools
There are many ways to customize and organize your charts. For example, Word allows you to change the chart type , rearrange a chart's data, and even change the layout and style .
To change the chart type:
If you find that your data isn't well suited to a certain chart, it's easy to switch to a new chart type . In our example, we'll change our chart from a line chart to a column chart.

To switch row and column data:
Sometimes you may want to change the way charts group your data. For example, in the chart below the book sales data is grouped by genre , with columns for each year . However, we could switch the rows and columns so the chart will group the data by year , with columns for each genre . In both cases, the chart contains the same data; it's just organized differently.

- Select the chart you want to modify. The Design tab will appear.

We've noticed that when numeric data has been entered in the first column of the spreadsheet, switching rows and columns may cause unexpected results. One solution is to type an apostrophe before each number, which tells the spreadsheet to format it as text (instead of a numeric value). For example, the year 2013 would be entered as '2013 .

To change the chart layout:
Word's predefined chart layouts allow you to modify chart elements—including chart titles , legends , and data labels —to make your chart easier to read.

To change a chart element (such as the chart title), click the element and begin typing.

To change the chart style:
Chart styles allow you to quickly modify the look and feel of your chart.

You can also use the chart formatting shortcut buttons to quickly add chart elements , change the chart style , and filter the chart data.

- Open an existing Word document . If you want, you can use our practice document .
- Insert a new chart . If you're using the example, edit the data for the chart by deleting the data from October through December .
- Try changing the chart type and layout .
- Switch the row and column data .
- Apply a chart style . If the new style includes a chart title or any labels , edit them.
/en/word2013/checking-spelling-and-grammar/content/
Subject Explorer
School Subjects
Math & Science
Business & Technology
Electives & Health
Board & Administration
Teaching & Learning
Audio/Video Lectures
Books & Documents
Classifieds
Jobs & Resources
Discussions
Language & Literature
Practice Projects for Microsoft Word

Word 9 Table
In this practice project for Word, students create a document with a title and table. The table has two columns that have different font alignment and incluces various fonts. …

Word 8 Formatting Text
In this practice project for Word, students create a document using a different size and color font for the title than the rest of the paragraph. …

Word 7 Bullets
In this practice project for Word, students create a document with two different types of bullets showing points and subpoints. …

Word 6 Letter
In this practice project for Word, students create a letter. Included in the letter is a heading on the right, indented paragraphs, and the closing and signiture near the middle of the document. …

Word 5 Text And Outline
In this practice project for Word, students create a document that contains several paragraphs of text and also includes an outline with key points and subpoints. …

Word 4 Modified Text
In this practice project for Word, students create a document with the heading on the right, a boldfaced, centered title, and indented paragraphs. The document is double-spaced. …
Word 3 Basic Text
In this practice project for Word, students create a document with the heading on the right, a boldfaced title that is centered, and several paragraphs that are indented. …

Word 22 Preset Headings
In this practice project for Word, students create a document using the preset headings to create a title bar. The document has different alignment and font, blanks, and a short outline. …

Word 21 Formatting Options
In this practice project for Word, students create a document that shows some different effects that can be used with the same font. …

Word 20 Numbered List
In this practice project for Word, students create a document that includes a centered title followed by a numbered list. …

Word 2 Heading 2
In this practice project for Word, students create a document that has a centered title, a heading in the upper right corner, and indented paragraphs. …

Word 19 Advanced Table
In this practice project for Word, students create a document with a table showing a school schedule. The blocks in the table are different sizes and will take individual work within the blocks to …

Word 18 Columns
In this practice project for Word, students create a document with a header and two colomns. The columns include boldfaced and italic font and different alignment. …

Word 17 Columns
In this practice project for Word, students create a document with two identical columns in landscape orientation. Included in each are indented lines and different alignment and font. …

Word 16 Lesson Notes Handout
In this practice project for Word, students create a document like a student handout. This includes an outline with several levels, blanks for students to write on, and different font. …

Word 15 Lesson Notes
In this practice project for Word, students create a document with a header and two outlines. Students are asked to use the automatic numbering and outlining features in Word. They must use different …

Word 14 Table
In this practice project for Word, students create a scoresheet using a table. Students must use different sizes, colors and styles of font, including different alignment. …

Word 13 Outline
In this practice project for Word, students create an outline using the automatic outline in Word, including many levels of subpoints. …

Word 12 Formatting
In this practice project for Word, students create a document with a centered title in all capitals, the first letter of each word slightly larger than the rest. Throughout the document the font is …

Word 11 Formatting
In this practice project for Word, students create a document similar to a test or quiz. They must include points and subpoints, blanks, boldfaced text, tabs, and spacing. …
Resource Type:
Pass it on:
Leave a Reply
Templates for college and university assignments
Include customizable templates in your college toolbox. stay focused on your studies and leave the assignment structuring to tried and true layout templates for all kinds of papers, reports, and more..

Keep your college toolbox stocked with easy-to-use templates
Work smarter with higher-ed helpers from our college tools collection. Presentations are on point from start to finish when you start your project using a designer-created template; you'll be sure to catch and keep your professor's attention. Staying on track semester after semester takes work, but that work gets a little easier when you take control of your scheduling, list making, and planning by using trackers and planners that bring you joy. Learning good habits in college will serve you well into your professional life after graduation, so don't reinvent the wheel—use what is known to work!

Insert a chart from an Excel spreadsheet into Word
Insert an excel chart in a word document.
The simplest way to insert a chart from an Excel spreadsheet into your Word document is to use the copy and paste commands.

You can change the chart, update it, and redesign it without ever leaving Word. If you change the data in Excel, you can automatically refresh the chart in Word.
In Excel, select the chart, and then press Ctrl+C or go to Home > Copy .
In your Word document, click or tap where you want the chart to appear, and press Ctrl+V or go to Home > Paste .
Note: The chart is linked to the original Excel spreadsheet. If data in the spreadsheet changes, the chart updates automatically.
Update a chart
In Word, select the chart.
Go to Chart Design or Chart Tools Design > Data > Refresh Data .
You can change the design or data for a chart in Word.
Note: You can't edit a chart that was inserted as a picture, but you can adjust it. Select the chart, and then on Picture Format or Picture Tools Format , choose an option.
Edit a chart in Word
Select the chart.
Go to Chart Design or Chart Tools Design > Data > Edit Data and choose one of the following:
Choose Edit Data to edit the chart in Word.
Choose Edit Data in Excel .
You also can modify the chart in Word by using any of the four buttons that appear when you select the chart.

The buttons are:
Layout Options Choose how your object interacts with the text around it.
Chart Elements Add, remove, or change chart elements such as the title, legend, gridlines, and data labels.
Chart Styles Set a style and color scheme for your chart.
Chart Filters Edit what data points and names are visible in your chart.
Select any button to view available options.
More ways to insert Excel charts
There are five options for pasting an Excel chart into Word. Two options embed a copy of the whole workbook, another two keep the chart linked to the original workbook instead of embedding it, and one converts the chart into a picture. If none of those options do exactly what you want, you also can select Paste Special .
In Excel, select the chart you want to paste into Word, and then press Ctrl+C or go to Home > Copy .
In Word, select Home , and in the Paste list, choose one of the five Paste Options .

Note: Hover over a button to read a description of the option.
| Paste option | Color theme | Data refresh |
|---|---|---|
|
| Matches the Word theme | Embeds a copy of the Excel workbook with the chart. The chart doesn’t stay linked to the original workbook. To update the chart automatically, change the data in the embedded workbook. |
|
| Keeps the Excel theme | Embeds a copy of the Excel workbook with the chart. The chart doesn’t stay linked to the original workbook. To update the chart automatically, change the data in the embedded workbook. |
|
This is the default paste option (Ctrl+V). | Matches the Word theme | Keeps the chart linked to the original workbook. To update the chart automatically, change the data in the original workbook. You also can select > > . |
|
| Keeps the Excel theme | Keeps the chart linked to the original workbook. To update the chart automatically, change the data in the original workbook. You also can select > > . |
|
| Becomes a picture | You can’t update the data or edit the chart, but you can adjust the chart’s appearance. Under , select . |
Link or embed an Excel worksheet in Word
The main differences between linked objects and embedded objects are where the data is stored and how you update the data after it's inserted in the Word document.
Linked object Information from a object that is linked in Word is stored in the source file and can be updated if the source file is modified. Use linked objects if file size is a consideration.
Embedded object Information from an Excel object that you embed in Word doesn't change if you modify the source Excel file. Once embedded, the object is no longer part of the source file and won't reflect any changes made.
Go to Insert > Text > Object .
Go to Create from file > Browse , and locate the file you want to insert in the Word document.
Choose one of the following:
To add the file as a linked object, select Link to file , and then select OK .
To add the file as an embedded object, select Display as icon , and then select OK .

Need more help?
Want more options.
Explore subscription benefits, browse training courses, learn how to secure your device, and more.

Microsoft 365 subscription benefits

Microsoft 365 training

Microsoft security

Accessibility center
Communities help you ask and answer questions, give feedback, and hear from experts with rich knowledge.

Ask the Microsoft Community

Microsoft Tech Community

Windows Insiders
Microsoft 365 Insiders
Was this information helpful?
Thank you for your feedback.
- PRO Courses Guides New Tech Help Pro Expert Videos About wikiHow Pro Upgrade Sign In
- EDIT Edit this Article
- EXPLORE Tech Help Pro About Us Random Article Quizzes Request a New Article Community Dashboard This Or That Game Popular Categories Arts and Entertainment Artwork Books Movies Computers and Electronics Computers Phone Skills Technology Hacks Health Men's Health Mental Health Women's Health Relationships Dating Love Relationship Issues Hobbies and Crafts Crafts Drawing Games Education & Communication Communication Skills Personal Development Studying Personal Care and Style Fashion Hair Care Personal Hygiene Youth Personal Care School Stuff Dating All Categories Arts and Entertainment Finance and Business Home and Garden Relationship Quizzes Cars & Other Vehicles Food and Entertaining Personal Care and Style Sports and Fitness Computers and Electronics Health Pets and Animals Travel Education & Communication Hobbies and Crafts Philosophy and Religion Work World Family Life Holidays and Traditions Relationships Youth
- Browse Articles
- Learn Something New
- Quizzes Hot
- This Or That Game
- Train Your Brain
- Explore More
- Support wikiHow
- About wikiHow
- Log in / Sign up
How to Make a Bar Chart in Word
Last Updated: March 6, 2024 Fact Checked
This article was co-authored by wikiHow staff writer, Nicole Levine, MFA . Nicole Levine is a Technology Writer and Editor for wikiHow. She has more than 20 years of experience creating technical documentation and leading support teams at major web hosting and software companies. Nicole also holds an MFA in Creative Writing from Portland State University and teaches composition, fiction-writing, and zine-making at various institutions. This article has been fact-checked, ensuring the accuracy of any cited facts and confirming the authority of its sources. This article has been viewed 329,270 times. Learn more...
Creating a bar chart or graph is a great way to compare data that's separated into categories. Microsoft Word makes it easy to create many types of graphs, including simple but attractive bar charts, using their Chart tool. We'll show you how to insert a Chart into your Microsoft Word document and use it to illustrate your own data.
Creating Simple Bar Graphs With Microsoft Word
Click the Insert tab at the top and select the Chart icon. In the new window, click Bar in the left panel. Double-click the graph you want, such as Clustered Bar, Stacked bar, or another.

- The Clustered and 3-D Clustered bar charts are helpful for comparing values across categories. [2] X Trustworthy Source Microsoft Support Technical support and product information from Microsoft. Go to source
- Stacked bar and 3-D Stacked bar charts are best for showing the relationship of individual items to a whole.
- The 100% Stacked and 3-D 100% Stacked bar charts compare the percentage each value contributes across multiple categories.

- You can close the spreadsheet window when you're finished. If you need to edit the data again, click the chart to select it, click the Chart Design tab at the top, and then click Edit Data on the toolbar.

- Click the first icon, which looks like a curved line over a set of horizontal lines, to display and select from a variety of layout and text-wrapping options.
- Click the + to show or hide chart elements, including axes, category and series names, grid lines, legends, and more.
- Click the paintbrush icon at the top-right corner of the chart to choose a different chart style. [3] X Trustworthy Source Microsoft Support Technical support and product information from Microsoft. Go to source

- For example, if you click text on your chart, you can change the text color and outline in the right panel.
- You can change the colors of the chart by clicking Change Colors on the Chart Design tab.
- For more formatting options, click the Chart Design tab at the top of Word—it's only visible when the chart is selected. This is also where you'll find options for changing the chart type, editing the data, and choosing a different color scheme.
Community Q&A
- Your bar charts' sections will be labeled "Category X" by default (wherein "X" is a number pertaining to the section). You can change these sections' names to something more descriptive by clicking a section's cell and typing in a new name. Thanks Helpful 0 Not Helpful 0
- Some bar chart layouts may work better than others with certain types of data. Feel free to experiment with different layouts. Thanks Helpful 0 Not Helpful 0

You Might Also Like

- ↑ https://support.microsoft.com/en-us/office/add-a-chart-to-your-document-in-word-ff48e3eb-5e04-4368-a39e-20df7c798932
- ↑ https://support.microsoft.com/en-us/office/available-chart-types-in-office-a6187218-807e-4103-9e0a-27cdb19afb90#OfficeVersion=macOS
- ↑ https://support.microsoft.com/en-us/office/change-the-color-or-style-of-a-chart-in-office-f4db3f23-f5a1-4b30-abb3-62e8c2c33d9b
About This Article

1. Click Insert . 2. Click Chart . 3. Click Bar . 4. Double-click a bar chart format. 5. Replace the sample data with your own data. Did this summary help you? Yes No
- Send fan mail to authors
Is this article up to date?

Featured Articles

Trending Articles

Watch Articles

- Computers and Electronics
- Microsoft Office
- Microsoft Word
- Terms of Use
- Privacy Policy
- Do Not Sell or Share My Info
- Not Selling Info
Keep up with tech in just 5 minutes a week!
Want to create or adapt books like this? Learn more about how Pressbooks supports open publishing practices.
4.3 Using Charts with Microsoft® Word® and Microsoft® PowerPoint®
Learning objectives.
- Learn how to paste an image of an Excel chart into a Word document.
- Learn how to paste a link to an Excel chart into a PowerPoint slide.
Charts that are created in Excel are commonly used in Microsoft Word documents or for presentations that use Microsoft PowerPoint slides. Excel provides options for pasting an image of a chart into either a Word document or a PowerPoint slide. You can also establish a link to your Excel charts so that if you change the data in your Excel file, it is automatically reflected in your Word or PowerPoint files. We will demonstrate both methods in this section.
Pasting a Chart Image into Word
For this exercise you will need two files:
- The Excel spreadsheet you have been working with in this chapter — CH4 Charting .
- A Word document data file — CH4 Diversity
Excel charts can be valuable tools for explaining quantitative data in a written report. Reports that address business plans, public policies, budgets, and so on all involve quantitative data. For this example, we will assume that the Change in Enrollment Statistics Spend Source stacked column chart is being used in a student’s written report (see Figure 4.44 ). The following steps demonstrate how to paste an image, or picture, of this chart into a Word document:
- Open CH4 Diversity . Save it as CH4 Diversity in Enrollment in Community Colleges
- Click below the figure heading in the Word document that reads: Figure 1: Enrollment by Race . The image of the stacked column chart will be placed below this heading.
- If needed, open the Excel file you have been working with ( CH4 Charting) . Activate the Enrollment by Race chart in the Enrollment by Race Chart sheet.
- Click the down arrow on the Copy button in the Home tab of the ribbon. Select Copy as Picture
- As shown on Screen
- Go back to the CH4 Diversity in Enrollment in Community Colleges Word document by clicking the file in the taskbar.
- Confirm that the insertion point is below the Figure 1: Enrollment by Race heading (see Figure 4.42) and click the Paste button in the Home tab of the ribbon ( or press Crtl-V ).

Oh no!! The picture is so big that it falls on to the next page. We will need to change its size.
- Click anywhere on the picture of the chart to activate it.
- Click the Format tab under the Picture Tools section of the ribbon (see Figure 4.43 ).
- Click the down arrow on the Shape Width button in the Size group of commands. Continue to click the down arrow until the width of the picture is 5.4 .” As you reduce the width of the picture, the height is automatically reduced as well. (The height should be ~ 3.92″ )
- To center the chart on the page, make sure the chart is activated. Then go to the Home tab, to the Paragraph group, and select Center.
- Save your work.

Figure 4.44 shows the final appearance of the Enrollment by Race Source chart pasted into a Word document. It is best to use either the Shape Width or Shape Height buttons to reduce the size of the chart. Using either button automatically reduces the height and width of the chart in proper proportion. If you choose to use the sizing handles to resize the chart, holding the SHIFT key while clicking and dragging on a corner sizing handle will also keep the chart in proper proportion.

Skill R e f resher
P a sting a C h art I m a g e i n t o W o rd
- Activate an Excel chart and click the Copy button in the Home tab of the ribbon.
- Click on the location in the Word document where the Excel chart will be pasted.
- Click the down arrow of the Paste button in the Home tab of the ribbon.
- Click the Picture option from the drop-down list.
- Click the Format tab in the Picture Tools section of the ribbon.
- Resize the picture by clicking the up or down arrow on the Shape Width or Shape Height buttons.
Pasting a Linked Chart Image into PowerPoint
- A PowerPoint data file – CH4 Diversity .
Microsoft PowerPoint is perhaps the most commonly used tool for delivering live presentations. The charts used in a live presentation are critical for efficiently delivering your ideas to an audience. Similar to written documents, a wide range of presentations may require the explanation of quantitative data. This demonstration includes a PowerPoint slide that could be used in a presentation. We will paste the Enrollment by Race chart into this PowerPoint slide. However, instead of pasting an image, as demonstrated in the Word document, we will establish a link to the Excel file. As a result, if we change the chart in the Excel file, the change will be reflected in the PowerPoint file. The following steps explain how to accomplish this:
- Open CH4 Diversity.pptx . Save it as CH4 Diversity in Enrollment in Community Colleges .
- Navigate to Slide 6 – Diversity in Enrollment . This is the slide where you will place the linked chart.
- Click the down arrow on the Copy button in the Home tab of the ribbon. Select Copy (not Copy as Picture.)
- Go back to the CH4 Diversity in Enrollment in Community Colleges presenation by clicking the file in the taskbar.
- Make sure you are still on Slide 6 – Diversity in Enrollment. Click on the outside edge of the empty prompt box on the right.
- Click the down arrow below the Paste button in the Home tab of the ribbon in the PowerPoint file.
- Hover over each of the Paste Options until you find Keep Source Formatting & Link Data (see Figure 4.45 ). Select this option. This pastes an image of the Excel chart into the PowerPoint slide. In addition, a link is created so that any changes made to the chart (in Excel) appear on the PowerPoint slide.

Next we need to make some changes to clean up the chart a bit. First, we are going to apply a different chart style.
- Click anywhere in the plot area of the column chart pasted into the PowerPoint slide. You will see the same Excel Chart Tools tabs added to the ribbon (see Figure 4.46 ).
- On the Design tab, select Style 8 in the Chart Style group.

Paste linking this chart caused trouble with the text boxes we added, so next we are going to delete them.
- Select each text box by clicking on the outside edge of the text box with the four-headed arrow. Press the delete key on your keyboard. Be sure that the insertion point is NOT blinking inside the text box. If it is, you will be editing the contents of the text box instead of deleting the actual text box.
The benefit of adding this chart to the presentation as a link is that it will automatically update when you change the data in the linked spreadsheet file.
- Return to your CH4 Charting Excel file.
- Select the Enrollment Statistics worksheet (the one with the Enrollment data.) Change the value in cell D3 to 1000 . You have just changed the number of white students at Clackamas Community College to 1000 . This isn’t true, but you want to change the data enough to see the effect in the charts.
- Select the Enrollment by Race Chart worksheet. Notice how the chart has changed.
- Return to the Diversity in Enrollment in Community Colleges PowerPoint file by clicking the file in the taskbar.
- On Slide6, you should see the updated chart (see Figure 4.47 ).
- If the chart has not changed; be sure that your chart is selected, click the Design tab in the Chart Tools section of the ribbon. Click the Refresh Data button. The change made in the Excel workbook is now reflected on the PowerPoint slide.
- If that still doesn’t work, you may have created a “normal” link — instead of a Paste Link . Delete the chart and follow the steps again. Start from the beginning of this section.
- Save your work. You will submit both the Word and PowerPoint files, along with the Excel file, at the end of the next section.
Figure 4.47 shows the appearance of the column chart after the change was made in the Enrollment Statistics worksheet in the Excel file. Note that the Data Chart at the bottom reflects the new number, too. The change that was made in the Excel file will appear in the PowerPoint file after clicking the Refresh Data button.

Integrity Check
Refreshing Linked Charts in PowerPoint and Word
When creating a link to a chart in Word or PowerPoint, you must refresh the data if you make any changes in the Excel workbook. This is especially true if you make changes in the Excel file prior to opening the Word or PowerPoint file that contains a link to a chart. To refresh the chart, make sure it is activated, then click the Refresh Data button in the Design tab of the ribbon. Forgetting this step can result in old or erroneous data being displayed on the chart.
Severed Link?
When creating a link to an Excel chart in Word or PowerPoint, you must keep the Excel workbook in its original location on your computer or network. If you move or delete the Excel workbook, you will get an error message when you try to update the link in your Word or PowerPoint file. You will also get an error if the Excel workbook is saved on a network drive that your computer cannot access. These errors occur because the link to the Excel workbook has been severed. Therefore, if you know in advance that you will be using a USB drive to pull up your documents or presentation, move the Excel workbook to your USB drive before you establish the link in your Word or PowerPoint file.
Skill R e f resher :
P a sting a Linked C hart Image in t o P o w er P oint
- Click in the PowerPoint slide where the Excel chart will be pasted.
- Click the Keep Source Formatting & Link Data option from the drop-down list.
- Click the Refresh Data button in the Design tab of the ribbon to ensure any changes in the Excel file are reflected in the chart.
Key Takeaways
- When pasting an image of an Excel chart into a Word document or PowerPoint file, use the Picture option from the Paste drop-down list of options – if you want the image to act as an image. You will not be able to make any changes to the content of the picture.
- When creating a link to a chart in Word or PowerPoint, you may need to refresh the data if you make any changes in the originating spreadsheet. You should not use the Picture option.
Attribution
Adapted by Noreen Brown from How to Use Microsoft Excel: The Careers in Practice Series , adapted by The Saylor Foundation without attribution as requested by the work’s original creator or licensee, and licensed under CC BY-NC-SA 3.0 .
Beginning Excel Copyright © by Noreen Brown; Barbara Lave; Julie Romey; Mary Schatz; and Diane Shingledecker is licensed under a Creative Commons Attribution 4.0 International License , except where otherwise noted.
Share This Book
Module 5: Microsoft Word, part 3
Assignment: create document with tables and images.
For this assignment, you will format a document with a table and an image. Follow the directions, then submit your assignment. If you get stuck on a step, review this module or previous modules and ask your classmates for help in the discussion forum.
- Download the report document and open it in Microsoft Word.
- Save the document as BA132_LastName_Report.docx , replacing “LastName” with your own last name. (Example: BA132_Hywater_Newsletter). It is a good idea to save your work periodically.

- Insert the graph image into your document after “creating greater contact efficiency for consumers.”

- Save your document again and submit your work to Canvas.
- shopping-business-retail [used in report document]. Authored by : Alexas_Fotos. Located at : https://pixabay.com/en/shopping-business-retail-1165437/ . License : CC0: No Rights Reserved
- Reading: Types of Retailers. Authored by : Lumen Learning. Located at : https://courses.lumenlearning.com/marketing-spring2016/chapter/reading-types-of-retailers/ . License : CC BY: Attribution
- Assignment: Report. Authored by : Lumen Learning. License : CC BY: Attribution
- The Retail Industry [used in report document]. Authored by : Lumen Learning. Located at : https://courses.lumenlearning.com/marketing-spring2016/chapter/reading-define-retailing/ . License : CC BY: Attribution
- Outcome: Retailers As Channels of Distribution. Authored by : Lumen Learning. Located at : https://courses.lumenlearning.com/marketing-spring2016/chapter/outcome-retailers-as-channels-of-distribution/ . License : CC BY: Attribution


22 Basic Microsoft Word practice exercises for beginners

Microsoft Word Exercises for Practice: – This article is very important for a basic computer course, for college and school students learning Microsoft Word online and offline. In this, you will get the best ideas on how to learn and practice Microsoft Word. And you can explore the capabilities of Microsoft Word as a business software in this post.
The best way to learn anything is by doing exercises and creating samples of existing materials from experts. It’s ok that you know about Bold, Italic, Page Layout, Insert Menu, View options, etc. but it’s great if you can use such options in creating anything in Microsoft Word.
I mean tools are the same, but the field, seed, and process are changed. So, Can you do that with the same tools? I know farmers do it daily.
So, let’s explore how to learn Microsoft Word. Microsoft Word Exercises ideas that I think every student around the world should practice.
Microsoft Word practice exercises for beginners:
1. create and design admission/enquiry forms etc..
To create this kind of form, you need to use shapes, text boxes, colors, formatting options, tables, and horizontal lines in MS Word. This is a very good exercise to practice because it will give you an idea of how to use such options practically on various official documents that we use in our daily official life.
These days many people do not create forms and charts usually they download them. That makes the forms boring. And often you see similar kinds of formats in forms. But as a student or teacher or small business owner if you learn to create such forms not only do you expand your thinking and creativity but you can also utilize this ability in business and job.
See a sample in the image below.

2. Create bills/leaflets/brochures. See the sample below.
Everyone has various designs of bills such as your refrigerator shopping bill, computer bill, electricity bills, and various other kinds of bills. So you can practice in Microsoft Word to create that type of bill format. It’s good for practice in which you will learn the Insert menu option, text adjustment between the table, page size, and text boxes.

3. Design E-book cover pages / Magazine front/ books front/back page using the cover page option in Insert Menu.
This practice is an advance. But try to find the books and magazine cover pages. And try to make it similar in MS Word. Imagine if you’re the designer, how you will design the same content or front page. You will learn while practicing this about the Cover Page option in MS Word or you can design without using that option. The benefit of learning this is about understanding the various practical uses of Microsoft Word in our daily lives.

4. Create Business Cards using Shapes, text, and colors.
People use Adobe Photoshop, Corel Draw, and websites to create business cards nowadays automatically and manually. You can also use that. But it’s about mastering MS Word options and skills. When you create and design anything in Microsoft Word. Your basic computer skills become strong. That helps you in the future when you start working on a Computer or MS Office or MS Word. Also, basic computer skills are very important before doing any degree course in IT. So, Design the business cards similarly you see in the below sample picture.
You Might Also Like

How to learn Microsoft Office Online at Home
5 Best CRM Software to build intact customer relationships
Streamline Your Business with Essential All-in-One Management Software

This is an advanced exercise, but if you do it and create cards then the options you’ve learned during your computer courses in MS Word remain forever in your brain.
Related: Importance of MS Word in Education
5. Use smart art and create organizational charts and showcase relations:
Smart Art is one of the favorite options in Microsoft Word. Smart art is used to draw diagrams that are used to showcase the content visually that will be easy to understand and manage. As you see below the smart art image Hierarchy Diagram is used to create an organizational chart or structure of the Telecom company.
This is the best method to understand and teach certain things to students, teachers, parents, and companies. You will see such organizational charts in the company’s office and government head offices.

Radial Cluster:
I have created this radial cluster diagram and organizational chart using Smart Art in Microsoft Word to showcase the difference between Managed WordPress Hosting and Shared Hosting” in one of the latest published posts. You can practice and create a similar chart to showcase the relation or useability differences.
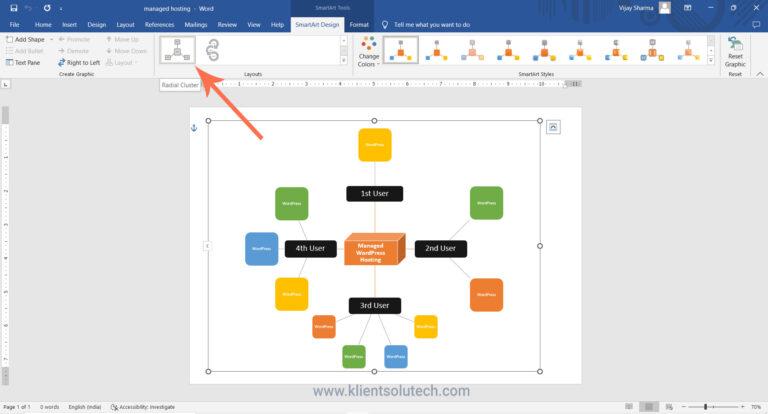
Structural Chart:

I hope that you can see (if not zoom in the browser using (Ctrl+ + ) both WordPress hosting and shared hosting smart images that are created in Microsoft Word.
When you practice MS Word Option to create the above diagram or any other, you get many problems. Those problems were not there while you were learning MS Word. These are the problems such as font size adjustment, lines adjustment, etc. colors, shape adjustment, etc. when you use tools or Word applications to communicate your point of view.
So, when you solve these problems by yourself or with the help of your computer course instructor it will be great for your computer knowledge and MS Office skills. Because when you solve the problem you learn very important working lessons in MS Word. This is why you’re learning.
Related: Steps to create a simple business plan using templates in Word App
6. Make book content page or index page
This is another idea in which you need to create an index or content page of the book. In this process, you will learn about the first-line indent, hanging indent, and the perfect use of the ruler bar in Microsoft Word.
And also about a page number, and a hyperlink (if it is an eBook). You can discuss this article with your computer teachers, to allow us or provide us with similar things to practice on.

7. Try to create a similar Header and footer that you’re seeing in the Book
This is the most important option and thousands of students find it difficult to use the header and footer. It’s easier to learn header and footer one time but if you’re not practicing it in various ways or the things such as books header and footer, it’s tough for you to explain it to others.
That’s why I am suggesting you try using the different styles of header and footer. And you will get such an example from the books.

8. Insert the Image into the shape
This is a little easy. But you must know easier things more than difficult things. Because in interviews especially related to IT, people ask easier questions than difficult ones.
So, practicing even on small things is also beneficial. You don’t know when it will be helpful for you in the future.
So, insert an image into the shape. Take and draw a shape from the Illustration menu, place it on a page a little higher in size, and then double-click on the shape. Go to the shape fill option and click on the picture. As an example, you can see the following image.

Related: – Top 10 powerful uses of Microsoft Word.
9. Practice hyperlinking and creating links between Word document texts to D: /, Play songs from Microsoft Word text, and create links between internal and external files.
This is the most important option in Microsoft Word. Most of the processes on the internet contain links. The hyperlink is the starting point in which you learn how things are connected.
It’s also a great option for Web Designers or web designing teachers to teach “How website links work” by using the hyperlink as an example.
As you can see in the image below, I am displaying the connection between the play song text to the location of the song.
Now you need to select the text in which have written the play song and then insert a hyperlink (Ctrl+K) and in the hyperlink address, put the path of the song. After that press, the Ctrl button and click on the blue link, so now any song that you selected will start playing.

10. Design a Happy Birthday Message by using Word Art and print it.
I think it’s the easiest thing for you. You can use the Word Art option for this. You can create the best wishes message in MS Word. After that, you can print. And give it to the person. It’s about creating small things at home. This is also a good way to make kids interested in learning the computer.
Also good for students and kids to create fun things and print or give them as a gift to parents. So, they will enjoy your creativity.

11. Create a chart and show the product price comparison between years:
The chart option is very important in Microsoft Word and Excel. However, the use of the chart option and any other option in MS Word depends on the demand for a certain content type.
For example, you’re writing a book or making notes about something in which you have to write and explain the price comparison between 3-4 years. Then you can use the chart for visualizations to analyze the data.
In visual format or the chart, it’s easier for people to understand, what you mean. Also, it gets more views or focus than the content.

So, try to create the chart you’re seeing in the above image.
12. Get the newspaper and see the text-based advertisement and Design
Design and create text or image-based advertisements that you saw in the newspaper. Designing such an advertisement will be a very beneficial role for Microsoft Word students or people learning Advanced Microsoft Word skills. Advertisement designs contain high-quality images, text, and layouts. And these designs are created by experts. When students practice expert material and create similar or better than that.
I think that movement is great for learners and teachers. So, try to create as many as you like. It will make you master MS Word. And I think doing exercises after completing the class topic is the best way to learn MS Word.

13. Take a double-column book or newspaper and design or create a similar paragraph style in the Word document .
Not all often type or create content in a double column. I know computer teachers can teach you such options. But they will not be able to explain the deepest or professional uses of such options for certain reasons.
So, I will suggest that you use the column option and find the newspaper similarly as you see below and create or type the text as you’re seeing in the newspaper. And if you’re having a problem, ask your teachers. So, when your teachers teach you how to do that thing or this thing, it will be great for your knowledge.
14. Create a letterhead or identity card of any company or institution that you have and insert the Watermark with that company name in the document.

You can create an identity card, visiting card or birthday card in MS Word. As you’re seeing below this is an example of cards and letterheads. But you can find such things. And practice your MS Word knowledge in creating an identity card, and letterhead.
This will give you an idea of how to adjust the text in different shapes and areas. Also, this is a good exercise in which you learn after printing, what size you need to adjust on the page. And when you do that, you learn very precious things in MS Word.
In this video tutorial, you will get basic ideas to create a letterhead. You will get ideas to insert letterhead content in the header and footer, you will also learn how you can use watermarks in letterhead, and how to print and adjust content on the page. The video tutorial is in Hindi, but even if you’re not familiar with the Hindi language, you can still learn and watch it for practice ideas:
Step by Step Guide to create printable letterhead in Microsoft Word and Google Docs
15. Decorate a Word document with a page border, and content border, add patterns, and write beautiful text in it.
This is the easiest page layout option, in which you can learn about page borders in MS Word, text borders, color or shading on the page, and pattern.
These options are very beautiful when you’re creating eBooks, making notes, and doing anything that requires the following type of style. See the image below and try to create something similar to this one.

16. Insert Images and Practice on Format Menu and Image Options.
You can use image options and style to decorate, retouch, and adjustment of colors and brightness in MS Word. As you can see, I have created various styles and image effects. These are easy to create.
But to learn more advanced effects later in other professional software, you need to learn and practice such things during your basic computer course.

17. Insert a template or download the new template in Microsoft Word from the Internet and edit those templates with your content.
There are 100+ templates almost for anything in the Microsoft Word Template option. The top benefit of using the template is that if you don’t know how to create or design a certain thing then you can just download the template and replace the existing text with your text. And it’s done.
This is the most important option that you should learn because it’s tough when you don’t know how to design or create anything, so try to practice on 10+ templates and see what it will look like.

Related: Uses and features of Microsoft Word.
18. Practice Typography
Write 10 lines or 10 sentences and then change the font, style, color, and size of each sentence. make each one different from than previous and next..
Fonts are the face of the text. The following image displays various fonts and styles. Just create similarly. During the practice, you will learn which font will be better for the specific text. Just write 10 lines and differentiate each one.

19. Create a Tenant management form in Hindi or your native language.
We use computers or technology mainly for two reasons the one is Innovation and the second is problem-solving. There are various ways of solving problems using computers. Some problems are solved immediately or some take time. For example, you can create an accounts management software to manage business incoming, outgoings, cash flow, balance, and taxes.
Similarly, there are software and mobile apps to manage tenants. I have created this form for my office space owner. He wanted a simple solution that they could follow and manage easily. They are not that much familiar with apps and other digital methods. I told them about digital options. But they want something that can be taken care of easily and also send tenants’ details for police verification when needed.
So we created the following form and this is also an example of immediate problem-solving using a computer and Microsoft Word. Now after printing one copy of this, they can photocopy it as per the number of tenants they want to manage.

So as beginners, you can try to create a similar form by using the Table feature in Microsoft Word. For the best practice 1st create and decide on columns on rough physical paper and the details that you want. You can create a better form than this and I expect that from you.
And for Hindi or your native language, even if you do not have Hindi font or French or Spanish font on your computer or in Microsoft Word. You can use Google Translate for this, convert the word into Hindi or Spanish, and then copy and paste it into the form table column.
20. Practice to design a brochure for an event
When you try creating this brochure design in Microsoft Word, you’ll learn basic and advanced techniques. This includes using image effects, grouping shapes, adding colorful bullets, and creating textures. These skills are valuable, especially if you plan to work with Word or as a virtual assistant. But even as a Word beginner, practicing these exercises is essential for building your Word skills.

Here you can watch a free video tutorial to learn brochure design : Brochure Design Practice in Microsoft Word | Word Exercise for Beginners | Hindi Tutorial
21. Learn and Practice creating business card designs in Microsoft Word
Today, there are plenty of software options available for creating business cards, such as online tools, Adobe InDesign, Corel Draw, Photoshop, Canva, and more. However, making a printable business card may seem straightforward but does involve some technicalities and creative flair.
As a student, it’s beneficial to tackle challenging and intricate design tasks in Microsoft Word, like this business card project. This practice will help you strive for excellence and mastery of Word skills. Consider it your 21st exercise towards becoming a Word expert.
Here you can watch a complete and detailed video tutorial on this: How to Create Modern Business Card Design in MS Word | Step-by-Step Detailed Tutorial
22. Practice to create a professional-looking certificate design
Practicing certificate design and Microsoft Word is essential because it empowers you with valuable digital skills that are increasingly relevant in today’s technology-driven world. By honing your proficiency in Microsoft Word, you not only gain the ability to create professional certificates but also enhance your competence in document formatting, layout design, and image manipulation. These skills have broad applications across various personal and professional tasks, making you more adaptable and capable in a digital environment.
Furthermore, practicing certificate design offers you a practical avenue for skill development while producing tangible outcomes. It allows you to create certificates for courses, achievements, or even for your own business, helping you develop an eye for aesthetics, attention to detail, and the ability to produce polished documents. Overall, this practice not only enhances your digital competence but also provides you with a versatile skill set that can significantly benefit your personal and professional growth.
By creating and practicing below certificate design below, you will be able to explore various design options to create a professional-looking certificate. This is just a sample but along with this design, you can take it’s design to the next level.

If you want to learn how you can do it please follow this step tutorial: How to create a professional-looking certificate design in Word | Step-by-Step Tutorial in Hindi
I think if you practice Microsoft Word by working on these exercises then it will be enough to make you above average among all the students around the world doing basic computer courses or learning Microsoft Word.
Because after learning Microsoft Word, you have to work with professionals or in companies. And almost all official works are related directly and indirectly to the above exercises.
So, this is the best method to learn Microsoft Word by doing exercises. And this is about practical knowledge.
I hope these Microsoft Word Exercises ideas will be helpful for you. To learn more visit: Top 10 Basic and Advanced Microsoft Word skills
7 thoughts on “22 Basic Microsoft Word practice exercises for beginners”
good practical please send more practical in winword. Thanks
These are good Practical exercises. Please send list of practicals of MS Word in Vocational IT NSQF level-1 subject code-402 class IX
please send a book which covers exercises like this
Great content! Thanks for putting this out there!
This is very nice
I have recently joined a Private Computer classes at the age of 53. Can you guide me through WORD, EXCEL, POWERPOINT & INTERNET
Is it possible for you send step by step Assignments for all the above 4 courses, so that I can evaluate whether I am learning properly or not ?
Hi, That’s a very good concern as a student “whether I am learning properly or not” I think 80% students ignore this. I will contact you by email. Age is not a problem. I expect you have strong reason or specific task or goals to learn all these three + internet in this age. Yes, I can evaluate through giving you assignment and testing it.
Leave a Comment Cancel reply
Save my name, email, and website in this browser for the next time I comment.
Home » Microsoft Word » How to Create an Organizational Chart in MS Word
How to Create an Organizational Chart in MS Word
An organizational chart serves as a visual tool to show the reporting relationships within an organization. Such charts are very useful for inducting new employees. They are also good for illustrating managerial functions and the functions of employees in a large organization.
MS Word has easy to use pre-built templates for creating an organizational chart. We will show you how to create organizational charts in simple, easy, step-by-step instructions.
Let us begin.
Step #1: Open a Word document
Open an existing document or a new document where you want to create the chart.
Step #2: Open SmartArt graphics
Click on the Insert tab in the top menu bar to change the ribbon.

In the section Illustrations , click on the SmartArt icon.
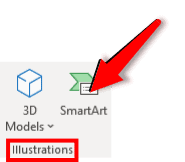
This opens a new window for SmartArt Graphics with three panes.
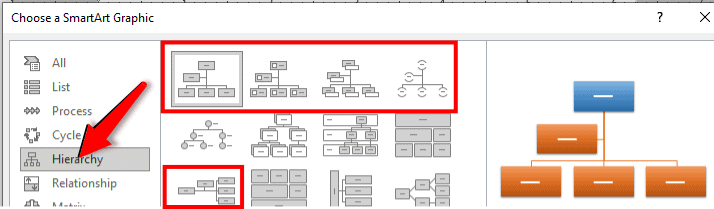
Click on Hierarchy in the left pane.
The middle pane shows many chart options.
Step #3: Pick a blank organizational chart
The first four charts, as well as the ninth chart, are organization charts:
- Organization Chart — A simple organization chart.
- Picture Organization Chart — Organization chart with pictures, where you could add staff photos.
- Name and Title Organization Chart — Allows you to add names and titles to the chart.
- Half-Circle Organizational Chart — Organizational chart with half-circles instead of rectangles.
- Horizontal Organization Chart — A horizontal chart instead of vertical.
Click on the type of chart you want to select it.
As an example, we click on the first organization chart option.
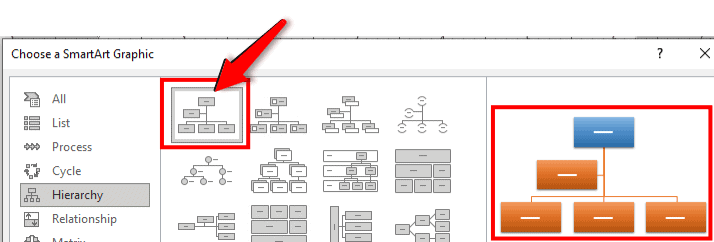
The right pane now shows a preview of the selected chart.
Click on the OK button at the bottom of the window.
Word will now show the blank organizational chart in the document.
Use the handles (small circles and icons on the periphery, indicated in red squares below) to reposition and resize the chart.
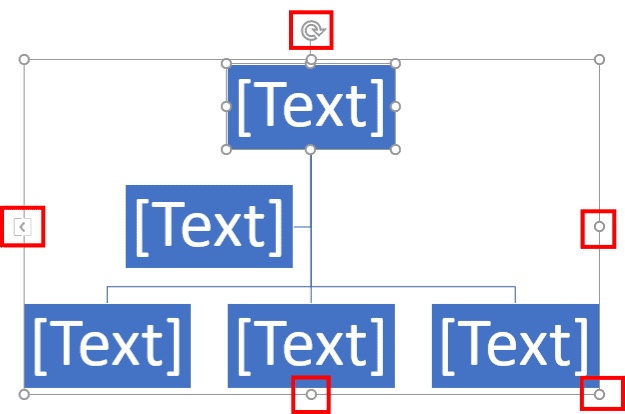
Step #4: Add names in the organizational chart
While still in the SmartArt Design tab in the top menu bar:
In the section Create Graphic , click on the Text Pane icon.
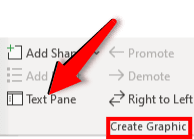
This opens the Text Pane .
The L mark denotes a branch in the chart.
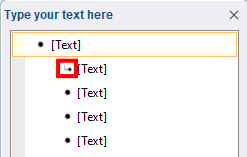
Click on each [Text] and replace it with a suitable name for your organizational structure.
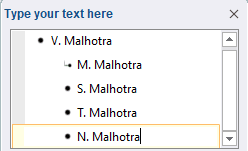
The organizational chart will now show the names.
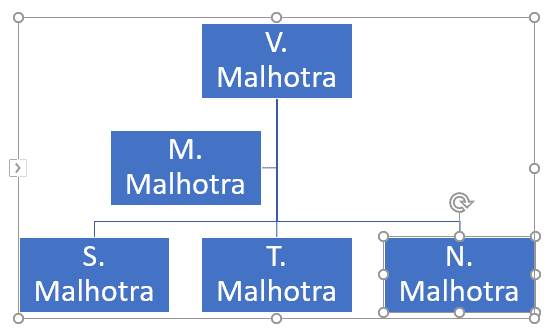
Step #5: How to add designations
Apply this step if you wish to indicate the designation of each member.
In the Text Box itself, click on the name for whom you want to add the designation.
Press the Shift key on your keyboard, and then Enter to move below the line.
Type the designation.
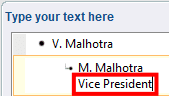
The chart shows the designation.
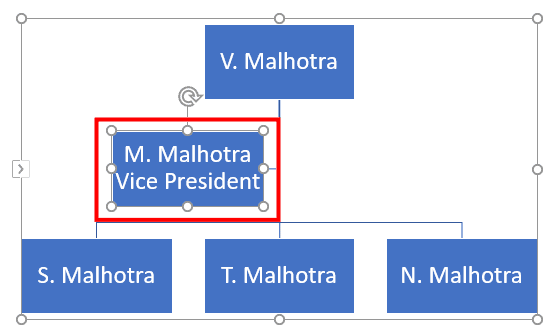
Step #6: How to add more names
If your organization has more than 5 members, you will have to add more text boxes for all the members.
In the Text Pane , hit Enter after the last name .
Add a new name.
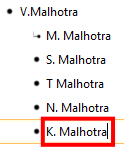
The chart shows the new name.

Under Create Graphic , click the Promote or Demote tab to reposition the new name in the chart.
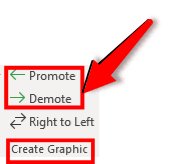
Step #7: How to add an assistant to a member
If a member has an assistant, you would want to indicate this person differently on the chart.
Select the name of the person to which you want to add an assistant.
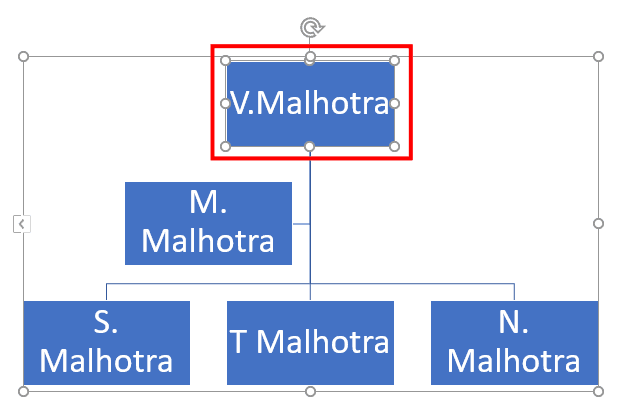
Under Create Graphic , click on the small drop down arrow next to Add Shape .
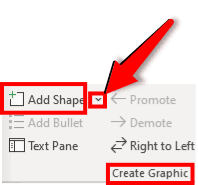
A new menu will open.
Click on the Add Assistant option at the bottom.
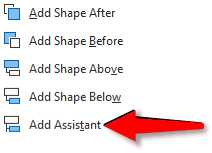
A new box will be added below the chosen name.
Open the Text Pane .
Enter a name in the blank space.
The chart now shows the new name.
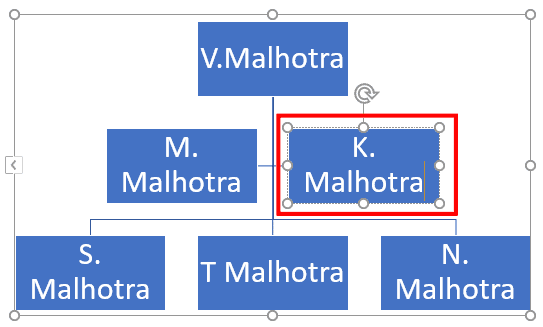
Step #8: How to delete a name
Select the name you want to remove by clicking on the block.
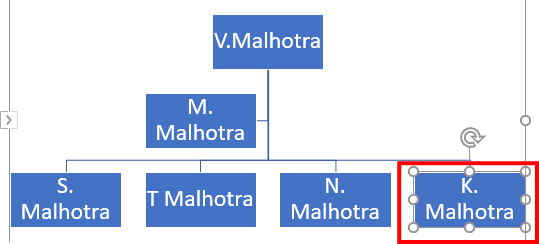
Open the Text Pane , and delete the name
Hit Delete on your keyboard.
The organization chart shows the rest of the names.

We have shown you how to create an organizational chart in MS Word.
We have also shown you in simple steps how to move, add, and remove a name from the chart as optional ways to customize your chart.
Leave a Comment Cancel reply
Save my name, email, and website in this browser for the next time I comment.
IMAGES
VIDEO
COMMENTS
To create a simple chart from scratch in Word, click Insert > Chart, and pick the chart you want. Click Insert > Chart. Click the chart type and then double-click the chart you want. Tip: For help deciding which chart is best for your data, see Available chart types. In the spreadsheet that appears, replace the default data with your own ...
Learn the basics of creating and customizing charts in Word, such as inserting, updating, resizing, repositioning, and changing colors. This tutorial covers all seventeen prebuilt chart types and provides examples and tips.
Then, go to the Insert tab and click "Chart" in the Illustrations section of the ribbon. Pick the type of chart you want to add on the left and the style on the right. If you're familiar with the chart options in Excel, you can choose from the same types in Word like bar, column, pie, line, and many others. Click "OK" to insert the chart.
In Excel, select the chart by clicking its border, and then on the Home tab, in the Clipboard group, click Cut. The chart is removed, but the data remains in Excel. In Word, click where you want to insert the chart in the document. On the Home tab, in the Clipboard group, click Paste.
When you create a chart in an Excel worksheet, a Word document, or a PowerPoint presentation, you have a lot of options. Whether you'll use a chart that's recommended for your data, one that you'll pick from the list of all charts, or one from our selection of chart templates, it might help to know a little more about each type of chart.. Click here to start creating a chart.
Step 2: Click on the Chart Option. Click on the 'Chart' button, and a dialog box will appear with various graph types. Choose the graph that best represents the data you want to visualize. For example, use a pie chart for showing percentages, a bar chart for comparisons, etc.
It also presents the Word feature of creating, modifying and formatting charts. The students will learn the following skills: Inserting and modifying a table. Editing tables. Inserting Rows, Columns and Cells. Deleting Rows, Columns and Cells. Sorting Data in a Table. Calculating Data in a Table.
Learn how to insert charts in Microsoft Word. Plus, learn how to update chart data, resize and reposition charts, and change chart colors.These steps are for...
A Chart In Microsoft Word: Step-By-Step 💞; FAQ About Chart In Microsoft Word 🧶; Conclusion 🐮; Graph In Microsoft Word: Step-By-Step 💞 Step 1. Open Microsoft Word and create a new document or open an existing one. Step 2. Click on the "Insert" tab on the top ribbon menu. Step 3. Click on the "Chart" or "Pie" option in the ...
This opens a dropdown menu with a grid. You can then pick the number of columns and rows required. Option 2. In the same dropdown menu, select "Insert Table.". In the window that opens, pick the number of columns and rows required. Option 3. Draw your own! In the "Table" menu on the "Insert" tab, select "Draw Table.".
Select the table/chart in question, right click and choose 'Insert Caption…'. Go to the 'References' tab on the main ribbon and select 'Insert Caption'. Next, choose a label ('Table' for tables or 'Figure' for charts and images), type in a title for the chart/table, and click 'OK' to add a caption. These captions are ...
To insert a chart: Select the Insert tab, then click the Chart command in the Illustrations group. Clicking the Chart command. A dialog box will appear. Select a category from the left pane, and review the charts that appear in the right pane. Select the desired chart, then click OK.
Word 11 Formatting. ★★★★★. Kendall Myers November 15, 2017. In this practice project for Word, students create a document similar to a test or quiz. They must include points and subpoints, blanks, boldfaced text, tabs, and spacing. …. 1 2.
Templates for college and university assignments. Include customizable templates in your college toolbox. Stay focused on your studies and leave the assignment structuring to tried and true layout templates for all kinds of papers, reports, and more. Category. Color. Create from scratch. Show all.
The process of creating a chart in Word is simple. First click to position the cursor wherever you want the chart to appear (you can move the chart later if you choose) then follow these steps: On the Insert tab (on the Ribbon), click Chart in the Illustrations group. The Insert Chart dialog box appears, as shown in Figure 16-7.
In your Word document, click or tap where you want the chart to appear, and press Ctrl+V or go to Home > Paste. Note: The chart is linked to the original Excel spreadsheet. If data in the spreadsheet changes, the chart updates automatically. Update a chart. In Word, select the chart. Go to Chart Design or Chart Tools Design > Data > Refresh Data.
Microsoft W ord is a word processor developed by Microsoft. It was first. released in 1983 under the name Multi-T ool W ord for Xenix systems. MS. W ord is a popular word-processing program used primarily for creating. documents such as letters, brochures, learning activities, tests, quizzes and. students' homework assignments.
Click the Insert tab in Microsoft Word. It's at the top of Word. [1] 2. Click Chart on the toolbar. It's the vertical bar graph icon in the toolbar at the top of Word. Depending on your version, it may be on a panel called "Illustrations." 3. Select the Bar option.
Pasting a Chart Image into Word. Activate an Excel chart and click the Copy button in the Home tab of the ribbon. Click on the location in the Word document where the Excel chart will be pasted. Click the down arrow of the Paste button in the Home tab of the ribbon. Click the Picture option from the drop-down list.
For this assignment, you will format a document with a table and an image. Follow the directions, then submit your assignment. If you get stuck on a step, review this module or previous modules and ask your classmates for help in the discussion forum. Download the report document and open it in Microsoft Word.
Microsoft Word practice exercises for beginners: 1. Create and Design Admission/Enquiry Forms etc. To create this kind of form, you need to use shapes, text boxes, colors, formatting options, tables, and horizontal lines in MS Word.
Step #1: Open a Word document. Open an existing document or a new document where you want to create the chart. Step #2: Open SmartArt graphics. Click on the Insert tab in the top menu bar to change the ribbon.. In the section Illustrations, click on the SmartArt icon.. This opens a new window for SmartArt Graphics with three panes.. Click on Hierarchy in the left pane.
The Word Options window will appear. 3. Click on the Customize Ribbon option. 4. From the Choose commands from list, click on your desired ribbon option, and then click on the Add button to place it in the Customize the Ribbon list. 5. Click on the OK button Tabs Home Tab The Home Tab (Figure 4) is Microsoft Words standard view.