
The Epoxy Resin Reaction: Make a hand keepsake while talking about chemical reactions

This experiment calls for mixing science and art to make a beautiful handprint keepsake.
Experimenting with resin allows you to talk through buoyancy and color mixtures with your child while allowing for artistic creativity. It’s also an opportunity to talk about a chemical reaction (what happens when we pour) and converting from a liquid to a solid.
Plus, you’re making a beautiful piece of art that gives you a keepsake of your child’s hand! What’s not to love about this experiment?

How to make the Epoxy Resin Reaction science experiment
Supplies you will need.
For this experiment, you will need the following:

Before you start
Be sure to be in a well-ventilated area when you pour the resin.
Instructions
Here is how to do this experiment with your child:
Step 1: Create the handprint mold
I cheated and bought a prepackaged handprint mold kit.
Once you have the mold you want, have your child gently push their hand into the mold to create a handprint. It should be deep enough to hold the resin and whatever decorations you want to add.

Step 2: Decorate
The fun part! This is where you and your child can get creative.
You can just use mica powder if you only want swirls of color in the handprint, or you can even use small, flat trinkets, sprinkles, glitter, or anything else that you choose.
If you choose to use something that’s not powdery like mica powder and glitter, you may want to pour a little bit of the resin mixture into the mold first so it looks uniform.

Step 3: Prepare the resin mixture
Please be sure to work with the resin mixture in a well-ventilated area (I chose to move my work surface outside).
Place two clean, empty cups down on the working surface. It can get messy, so be sure to put down wax paper or a towel you don’t mind getting resin on.
You will use equal parts resin and hardener and those liquids will go into their own respective cups. Pour the resin into one cup, notice how much you put in, and put that equal amount of hardener into the other clean cup.
Put out a third clean cup for the next step, which is mixing the resin and hardener together to make a mixture.

Step 4: Mix the resin and hardener
Once you have verified that you have equal parts resin and hardener in your two cups, it’s time to make your resin mixture!
Using your craft stick, pour all of the contents of each cup into the empty third cup.
Stir the mixture until you no longer see streaks in the cup; about 3-5 minutes.
Once it’s thoroughly mixed, start to pour the mixture into the handprint mold(s)!
Be sure to go very slowly when you’re pouring. When I started pouring mine, I went too quickly and added too much resin mixture, which is pretty tough to get out of the handprint mold once it’s in there (not impossible).
Let the mold cure for 24-48 hours in a well-ventilated area (we left it outside until night, then placed it in the garage for overnight curing).
Voila! You have a beautiful handprint keepsake and can show your child how the liquid resin mixture has turned into a solid!

The science behind the Epoxy Resin Reaction experiment
This experiment teaches:
What resin is
How resin is used in everyday life, liquids and solids, how it works.
This science experiment using epoxy resin displays the state change between a liquid and a solid while creating a fun keepsake of your child’s hand.
Resin works through a chemical reaction (called polymerization, but that’s a big word for small kids!). The two substances that come with a resin kit, the epoxy resin and the hardener, react with one another that bond to form a plastic material.
Once it’s formed and hardened, resin cannot go back to its liquid state!
I am not going to get super technical here, since we’re designing this experiment for kids to understand and enjoy. But do know that the science behind resin, although very technical, is very cool!
Epoxy resin is a compound that is made from several chemicals. It is cured by reaching and holding a certain amount of heat that allows it to convert from a liquid to a solid.
The chemicals that make up resin work together to form a bond that eventually sticks them all together and forms the solid resin we know.
Resin provides super strong adhesion and chemical resistance, to name a few traits (more on that below).
Did you know that epoxy resins are widely used, from technology innovations to construction to the food you buy from the shelves (not in the food, thankfully)?
Here are just a few areas in which epoxy resins are used:
- Renewable energy sources in the solar, wind, and new battery technologies use this technology to become more efficient and affordable
- Build and construction by improving the durability of structural parts to help increase the lifespan of buildings
- In food and drink cans to add a protective layer that separates it from the metal
Using epoxy resin with your child is a good opportunity to talk about liquids and solids, as well as state changes between the two.
Epoxy resin is initially a liquid, when we can add our decorative materials to it. It solidifies when it comes in contact with the proper amount of heat.
Once the resin has been solidified, it is impossible for it to revert back to its liquid state.
More science experiments that exercise creativity to try out with your child
- Fizzing Paint: Paint with a chemical reaction!
- Magic Milk: Watch colorful milk dance before your eyes in this fun experiment
Related experiments
Swinging Science: Creating mesmerizing pendulum art
Today's experiment is SO COOL! The beautiful art that this pendulum makes makes you want to keep creating fun art on the pavement. This easy pendulum takes little time to set up but provides a lot...
Robotic Art: Make a Scribble Bot!
This experiment is a really fun one, and there are so many ways to change it up! Scribble Bots utilizes a small motor to draw on a large piece of paper with markers. It's a fun lesson on robotics...

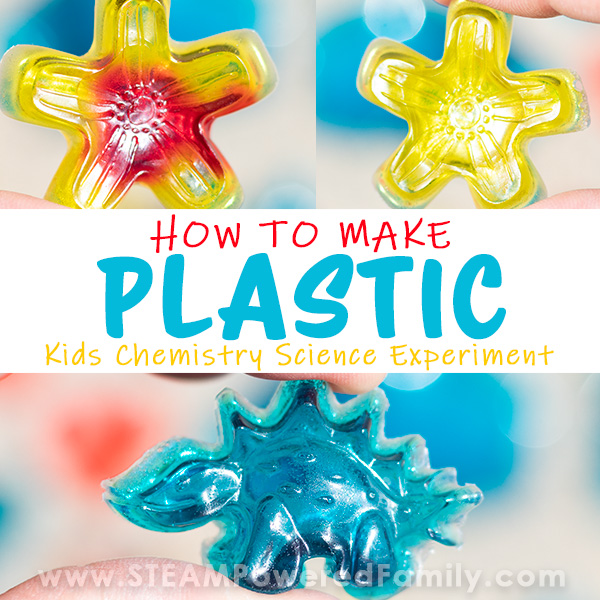
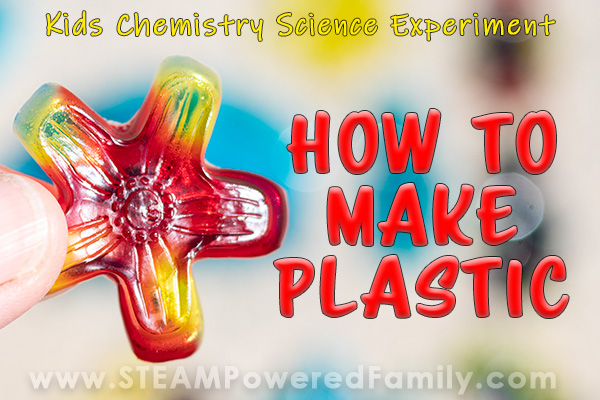
How To Make Plastic – Gelatin Bioplastic Science Project
There is a lot of talk in the media about needing to reduce our production and consumption of plastic. Plastics are causing global pollution issues and we need to address the issue now. When a topic like plastics is at the top of the news, I like to do some science experiments and activities with the kids to get hands on and explore the issue. In this case we have already successfully made milk plastic many times. It’s a favourite activity around here, but one thing we wondered, could we make a clear plastic? Turns out we can make plastic that is clear, using another kitchen staple, gelatin!
Environmental Sciences Bioplastics Project
Table of Contents
Disclaimer: This article may contain commission or affiliate links. As an Amazon Influencer I earn from qualifying purchases. Not seeing our videos? Turn off any adblockers to ensure our video feed can be seen. Or visit our YouTube channel to see if the video has been uploaded there. We are slowly uploading our archives. Thanks!
Check out this video of our bioplastic creations!
If you can’t see the video, please turn off your adblockers, they also block our video feed.
Plastics and Bioplastics
Plastics are a really hot topic of conversation in our neck of the woods. We had an amazing recycling program, but our government recently announced it is stopping the recycling of all plastics. It turns out the demand for recycled plastics is not there and it is cost prohibitive. At least that is what we are being told.
After years of living a routine of reducing and recycling, losing that recycling step is causing us to really stop and take a look at how we use plastics in our lives. It also raised some questions about why plastics are so bad and what could be done differently. We discovered there is a push towards bioplastics and it turns out we already did some scientific investigations into bioplastics with our milk plastic casein experiments.
But this time we wanted to try something different. We wanted something that looked a bit more like plastic… clear and shiny.
The answer was waiting in our pantry.
We’ve used gelatin in the past to explore edible polymers in the form of homemade gummies , which are always a huge hit. Just make sure not to let little ones try to eat these!
Stove Pot Spoon Whisk Gelatin packets (3) Water Food colouring Silicone molds (optional)
How to Make Plastic from Gelatin
Add 75mL of water and 3 gelatin packets to the pot. If desired add 2 or 3 drops of food colouring. Whisk together over medium low heat until completely mixed.
Once the mixture starts to steam and thicken a bit, remove it from the heat.
Using your spoon gently scrape the foamy layer off and discard. If you don’t remove all the foam now it will cause some cloudiness in your final plastic. This isn’t all bad and we left it on some batches and removed it on others. The better you are at removing the foam, the more clear your final plastic will be.
Shaping Gelatin Plastic
There are two different options for what you can do next.
You can pour your solution onto a container lid and leave it for about 45 minutes. After 45 minutes you will have a rubbery consistency material. You can cut it with cookie cutters, scissors, or a knife. You can shape it by hand. It’s neat to play with and I recommend doing this with at least one batch. We left ours on the lid because we wanted to see what would happen. Turns out as it cures into a hard plastic it twists and lifts creating neat shapes. It took about 2 days to cure completely and give us hard plastic.
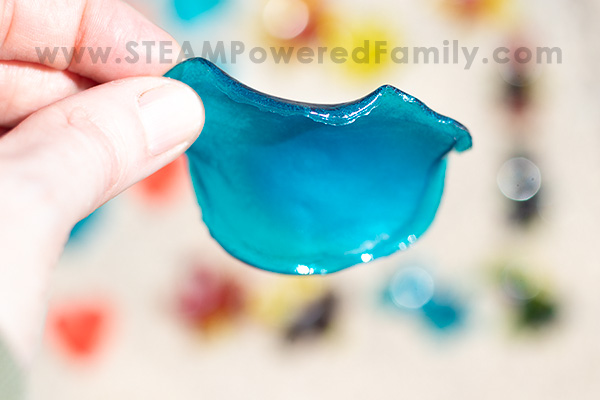
The second option is to use silicone molds. Carefully spoon your liquid solution from the pot into your silicone molds. I found it was better to fill the molds and make them quite thick. If we only added a bit to make thinner pieces, they tended to twist and curl in the molds as they set. The issue with making them thick is that it takes much longer to harden and set. Our thickest pieces spent 4 to 5 days in the molds curing, then another 2 days hardening before they were completely cured. But you can get the coolest little plastic shapes!
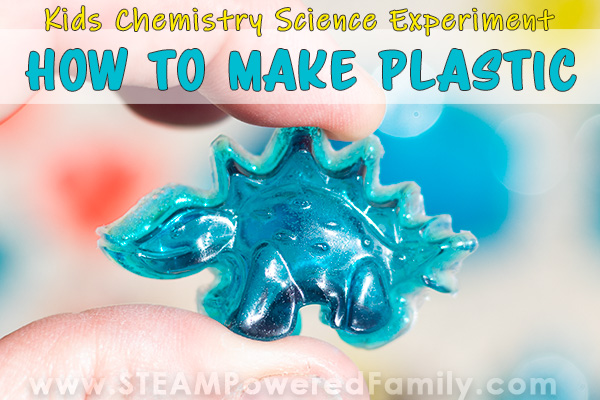
Making Two Colour Bioplastic
While making some of our pieces in the molds I poured in our gelatin solution, let it set for about 5 minutes, then added a drop of a different colouring. This created some really pretty designs. If you do it while the solution is still really hot and liquid, it will mix more, the cooler the solution, the less it will mix in.
Troubleshooting
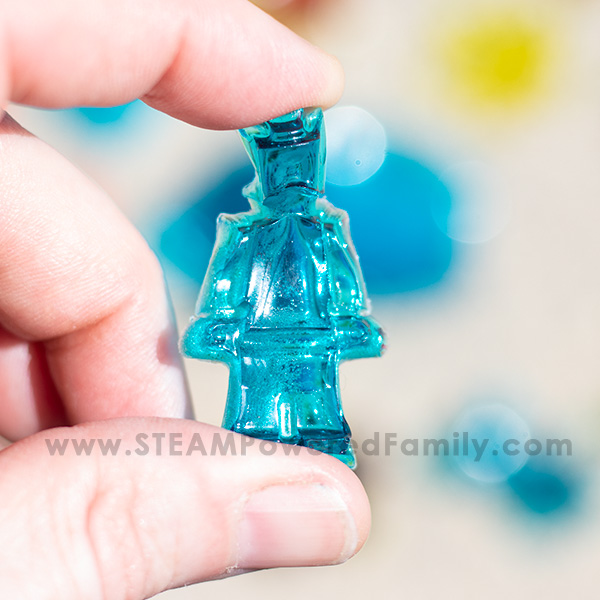
This plastic does tend to curl. Play with your consistency, humidity, and molds to see what reduces the curling for you. We found thicker pieces left in the molds curled the least. We also tried placing a book over our pieces to prevent curling. This also worked but did flatten our pieces a bit.
Notice our homemade Lego minifigs look like they are nodding and bowing! The thinner part of the neck caused some issues, plus I didn’t fill these molds all the way. I have some ideas we are going to test in future experiments to see if we can address the curling issue.
Cloudy plastic means you need to remove more of the foam from the top of your solution. You can also try not being as aggressive in your whisking of the mixture.
Not curing. Give it more time! This is not a fast experiment. It takes days, but we never once had any not cure nice and hard.
Understanding Gelatin Bioplastics Science
This project, along with our milk plastic experiment, create what is known as bioplastics and are created from biomass or organic matter. Bioplastics are different from most mass produced plastics that are created from fossil fuels.
Gelatin is created by breaking down collagen which is found in all animals where its function is to bind cells together. Collagen is a very long chain of amino acids, the building blocks of proteins, that bonds to itself in a triple helix pattern.
Gelatin is long chains of hundreds of amino acids. At room temperature it is solid, but when you heat it up the bonds between the chains loosen, allowing them to slide and stretch apart. Gelatin also has a strong affinity for water. Hydrogen atoms that are attached to the side of the chains can bond with water molecules. When we heat up and mix our solution we are weakening the chains, then during the cooling process those hydrogen atoms form connections with the water molecules. This is called a hydrogen bond.
In our solution we have added a LOT of gelatin to a fairly small amount of water. All those water molecules bond with the hydrogen molecules, then the amino acid chain also starts to bond with itself, trapping those water molecules within it’s complex 3D structure. If we used more water, we would end up with more of a gummy candy consistency or even a jello consistency. But in this experiment all the water molecules are used up, so once it finishes curing we end up with a very hard plastic.
Learn more about the science of polymers and plastics in this resource .
Breaking Down Bioplastics
When you are done with your creations, turn it into a science experiment to discover the best method for breaking down your bioplastic. Simply set out a bowl of water, a bowl of vinegar, and a bowl of saline solution (salt water). Set some of the pieces in each bowl and compare how they break down to find the best way.
These bioplastic creations will also break down in a regular compost system within 30 days.
Fascinating, isn’t it? For even more information on chemistry of gelatin, check out this article .
And don’t forget we have a great resource on Chemistry for Kids .
Happy Creating and Learning!
More DIY Plastic Projects

5 Days of Smart STEM Ideas for Kids
Get started in STEM with easy, engaging activities.
- Grades 6-12
- School Leaders
Check Out Our Latest Giveaways! Win a Classroom Garden, Field Trips, and More
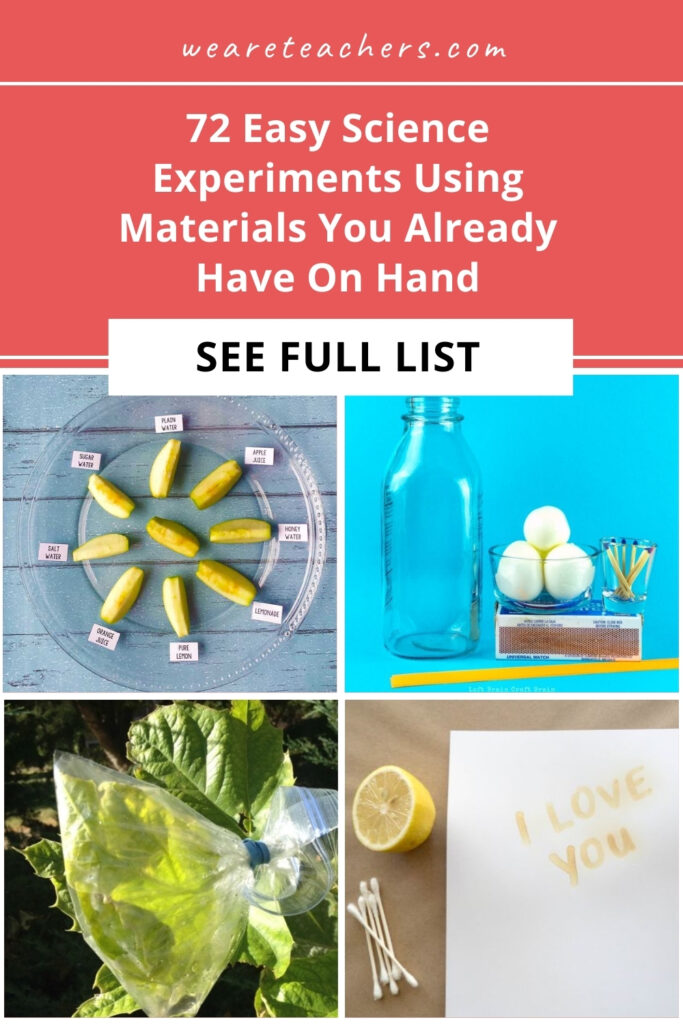
72 Easy Science Experiments Using Materials You Already Have On Hand
Because science doesn’t have to be complicated.
If there is one thing that is guaranteed to get your students excited, it’s a good science experiment! While some experiments require expensive lab equipment or dangerous chemicals, there are plenty of cool projects you can do with regular household items. We’ve rounded up a big collection of easy science experiments that anybody can try, and kids are going to love them!
Easy Chemistry Science Experiments
Easy physics science experiments, easy biology and environmental science experiments, easy engineering experiments and stem challenges.
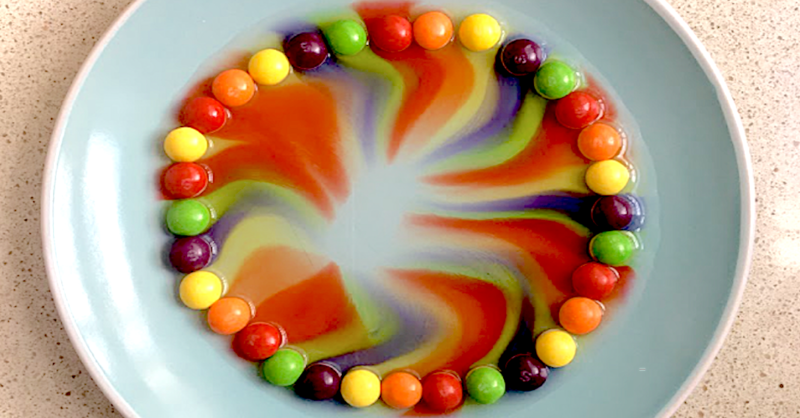
1. Taste the Rainbow
Teach your students about diffusion while creating a beautiful and tasty rainbow! Tip: Have extra Skittles on hand so your class can eat a few!
Learn more: Skittles Diffusion
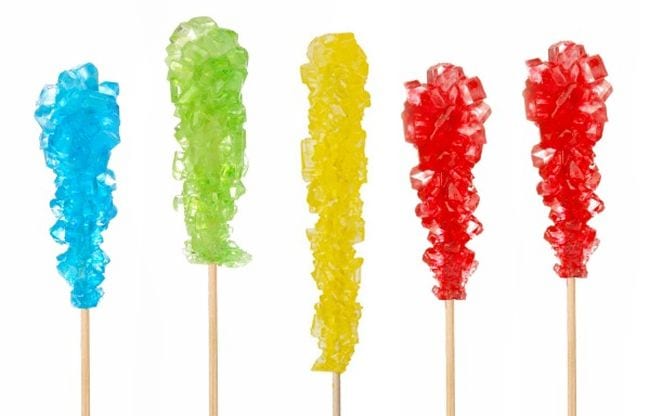
2. Crystallize sweet treats
Crystal science experiments teach kids about supersaturated solutions. This one is easy to do at home, and the results are absolutely delicious!
Learn more: Candy Crystals
3. Make a volcano erupt
This classic experiment demonstrates a chemical reaction between baking soda (sodium bicarbonate) and vinegar (acetic acid), which produces carbon dioxide gas, water, and sodium acetate.
Learn more: Best Volcano Experiments
4. Make elephant toothpaste
This fun project uses yeast and a hydrogen peroxide solution to create overflowing “elephant toothpaste.” Tip: Add an extra fun layer by having kids create toothpaste wrappers for plastic bottles.
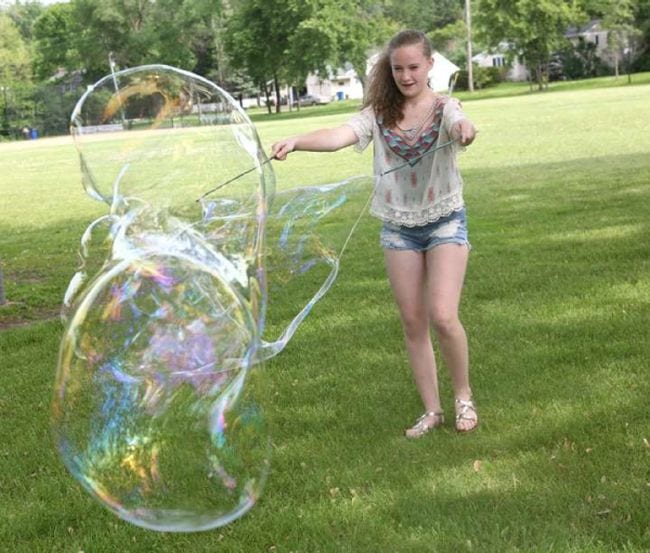
5. Blow the biggest bubbles you can
Add a few simple ingredients to dish soap solution to create the largest bubbles you’ve ever seen! Kids learn about surface tension as they engineer these bubble-blowing wands.
Learn more: Giant Soap Bubbles
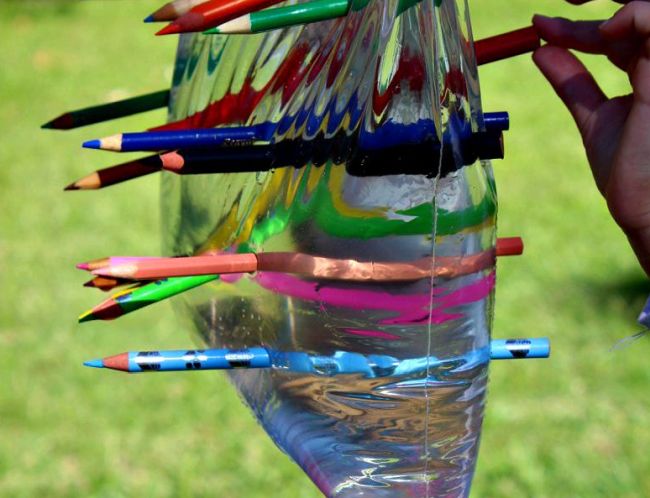
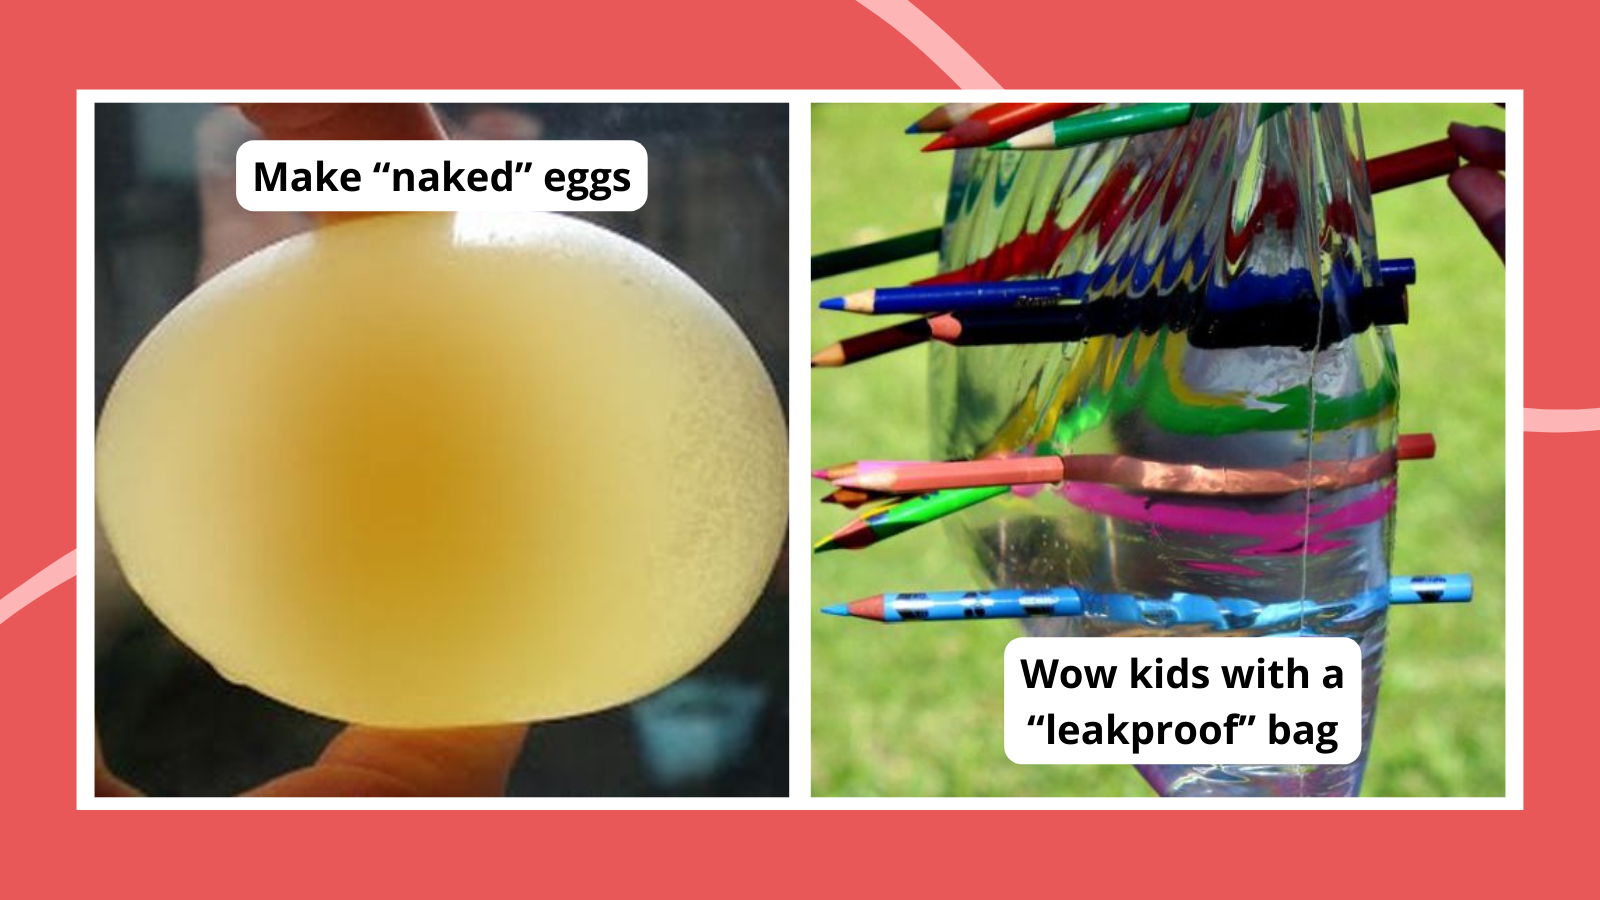
6. Demonstrate the “magic” leakproof bag
All you need is a zip-top plastic bag, sharp pencils, and water to blow your kids’ minds. Once they’re suitably impressed, teach them how the “trick” works by explaining the chemistry of polymers.
Learn more: Leakproof Bag
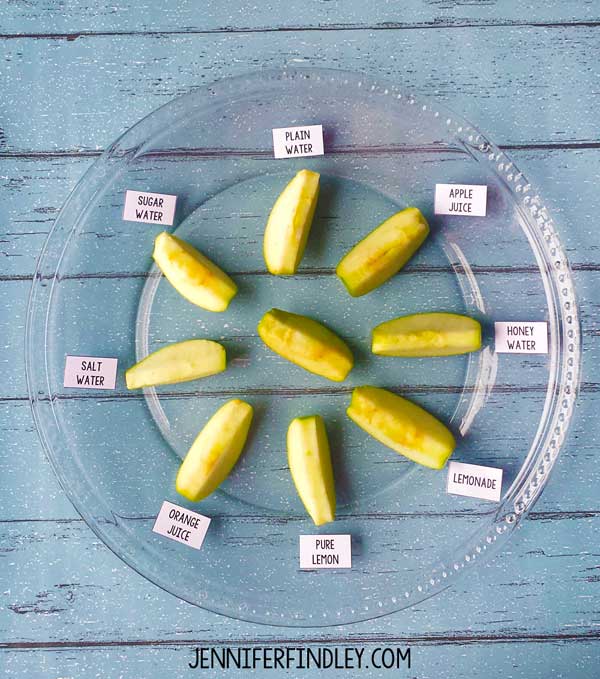
7. Use apple slices to learn about oxidation
Have students make predictions about what will happen to apple slices when immersed in different liquids, then put those predictions to the test. Have them record their observations.
Learn more: Apple Oxidation
8. Float a marker man
Their eyes will pop out of their heads when you “levitate” a stick figure right off the table! This experiment works due to the insolubility of dry-erase marker ink in water, combined with the lighter density of the ink.
Learn more: Floating Marker Man

9. Discover density with hot and cold water
There are a lot of easy science experiments you can do with density. This one is extremely simple, involving only hot and cold water and food coloring, but the visuals make it appealing and fun.
Learn more: Layered Water
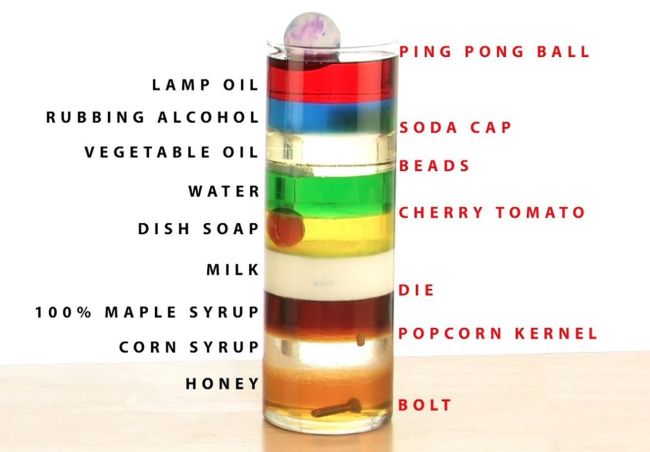
10. Layer more liquids
This density demo is a little more complicated, but the effects are spectacular. Slowly layer liquids like honey, dish soap, water, and rubbing alcohol in a glass. Kids will be amazed when the liquids float one on top of the other like magic (except it is really science).
Learn more: Layered Liquids
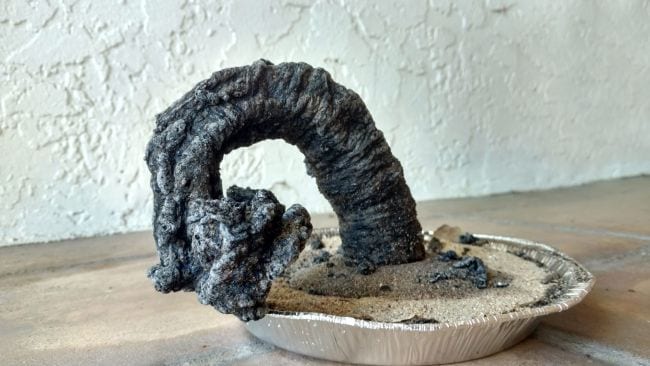
11. Grow a carbon sugar snake
Easy science experiments can still have impressive results! This eye-popping chemical reaction demonstration only requires simple supplies like sugar, baking soda, and sand.
Learn more: Carbon Sugar Snake
12. Mix up some slime
Tell kids you’re going to make slime at home, and watch their eyes light up! There are a variety of ways to make slime, so try a few different recipes to find the one you like best.
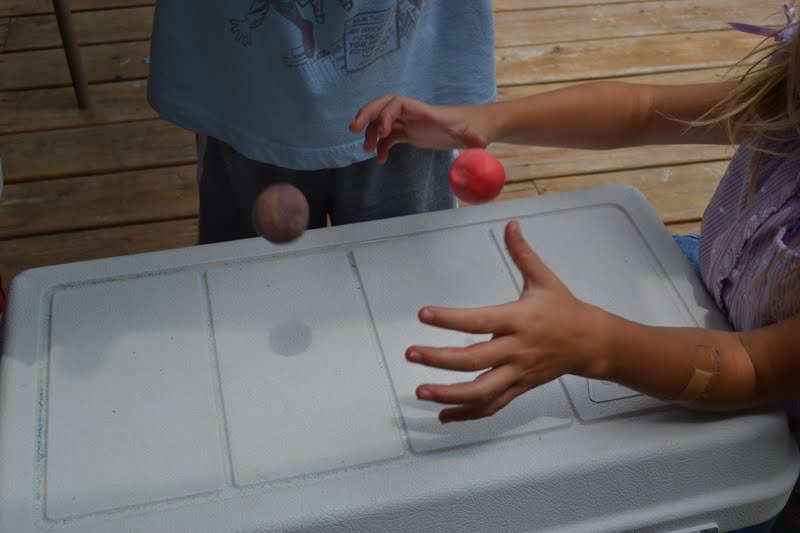
13. Make homemade bouncy balls
These homemade bouncy balls are easy to make since all you need is glue, food coloring, borax powder, cornstarch, and warm water. You’ll want to store them inside a container like a plastic egg because they will flatten out over time.
Learn more: Make Your Own Bouncy Balls

14. Create eggshell chalk
Eggshells contain calcium, the same material that makes chalk. Grind them up and mix them with flour, water, and food coloring to make your very own sidewalk chalk.
Learn more: Eggshell Chalk
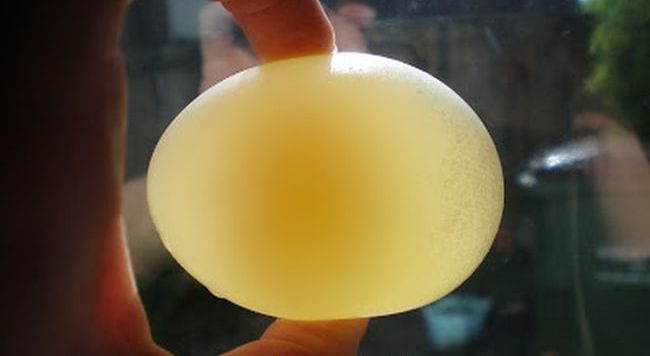
15. Make naked eggs
This is so cool! Use vinegar to dissolve the calcium carbonate in an eggshell to discover the membrane underneath that holds the egg together. Then, use the “naked” egg for another easy science experiment that demonstrates osmosis .
Learn more: Naked Egg Experiment
16. Turn milk into plastic
This sounds a lot more complicated than it is, but don’t be afraid to give it a try. Use simple kitchen supplies to create plastic polymers from plain old milk. Sculpt them into cool shapes when you’re done!
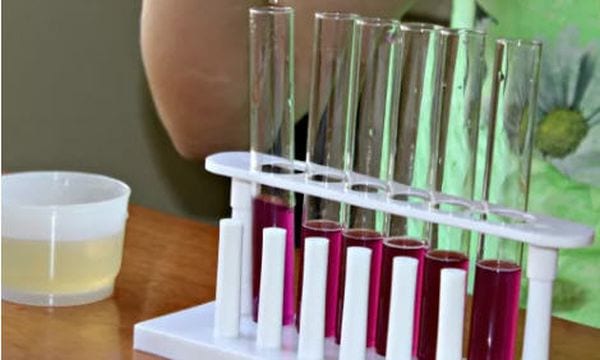
17. Test pH using cabbage
Teach kids about acids and bases without needing pH test strips! Simply boil some red cabbage and use the resulting water to test various substances—acids turn red and bases turn green.
Learn more: Cabbage pH
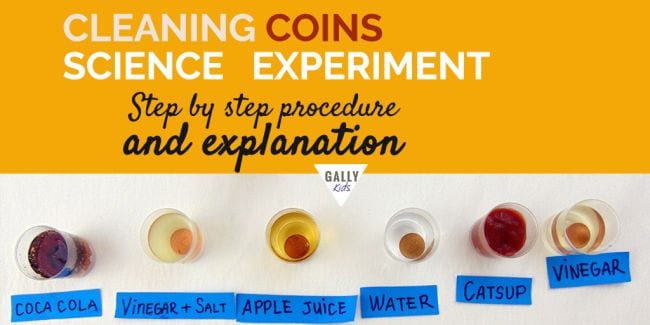
18. Clean some old coins
Use common household items to make old oxidized coins clean and shiny again in this simple chemistry experiment. Ask kids to predict (hypothesize) which will work best, then expand the learning by doing some research to explain the results.
Learn more: Cleaning Coins
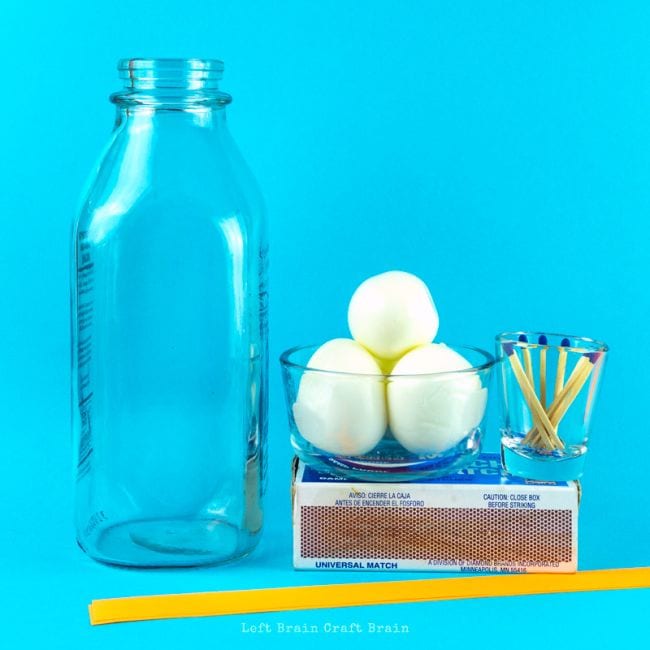
19. Pull an egg into a bottle
This classic easy science experiment never fails to delight. Use the power of air pressure to suck a hard-boiled egg into a jar, no hands required.
Learn more: Egg in a Bottle
20. Blow up a balloon (without blowing)
Chances are good you probably did easy science experiments like this when you were in school. The baking soda and vinegar balloon experiment demonstrates the reactions between acids and bases when you fill a bottle with vinegar and a balloon with baking soda.
21 Assemble a DIY lava lamp
This 1970s trend is back—as an easy science experiment! This activity combines acid-base reactions with density for a totally groovy result.
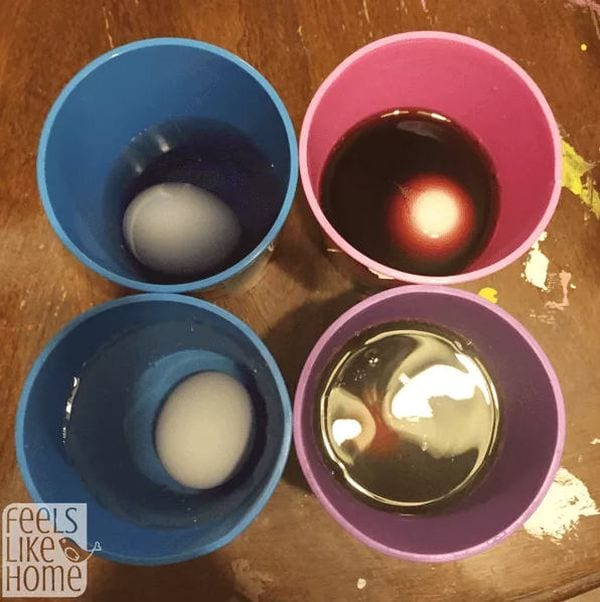
22. Explore how sugary drinks affect teeth
The calcium content of eggshells makes them a great stand-in for teeth. Use eggs to explore how soda and juice can stain teeth and wear down the enamel. Expand your learning by trying different toothpaste-and-toothbrush combinations to see how effective they are.
Learn more: Sugar and Teeth Experiment
23. Mummify a hot dog
If your kids are fascinated by the Egyptians, they’ll love learning to mummify a hot dog! No need for canopic jars , just grab some baking soda and get started.
24. Extinguish flames with carbon dioxide
This is a fiery twist on acid-base experiments. Light a candle and talk about what fire needs in order to survive. Then, create an acid-base reaction and “pour” the carbon dioxide to extinguish the flame. The CO2 gas acts like a liquid, suffocating the fire.
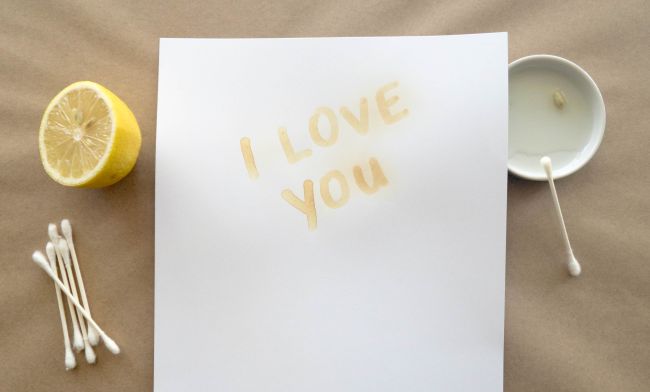
25. Send secret messages with invisible ink
Turn your kids into secret agents! Write messages with a paintbrush dipped in lemon juice, then hold the paper over a heat source and watch the invisible become visible as oxidation goes to work.
Learn more: Invisible Ink
26. Create dancing popcorn
This is a fun version of the classic baking soda and vinegar experiment, perfect for the younger crowd. The bubbly mixture causes popcorn to dance around in the water.
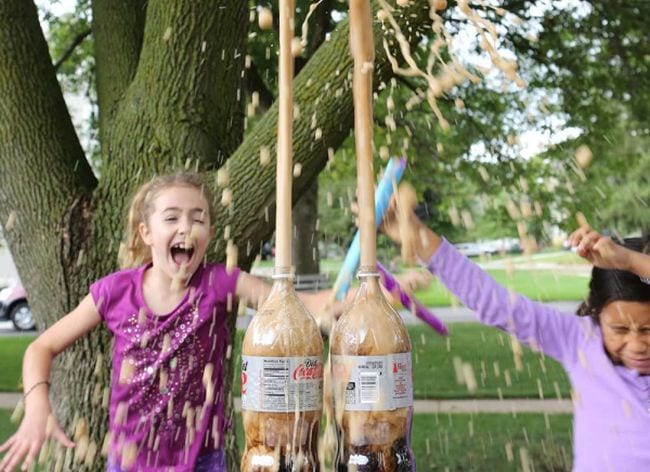
27. Shoot a soda geyser sky-high
You’ve always wondered if this really works, so it’s time to find out for yourself! Kids will marvel at the chemical reaction that sends diet soda shooting high in the air when Mentos are added.
Learn more: Soda Explosion
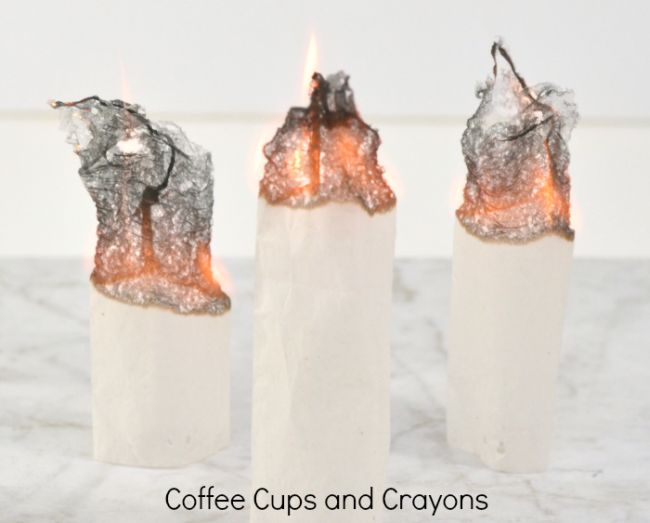
28. Send a teabag flying
Hot air rises, and this experiment can prove it! You’ll want to supervise kids with fire, of course. For more safety, try this one outside.
Learn more: Flying Tea Bags
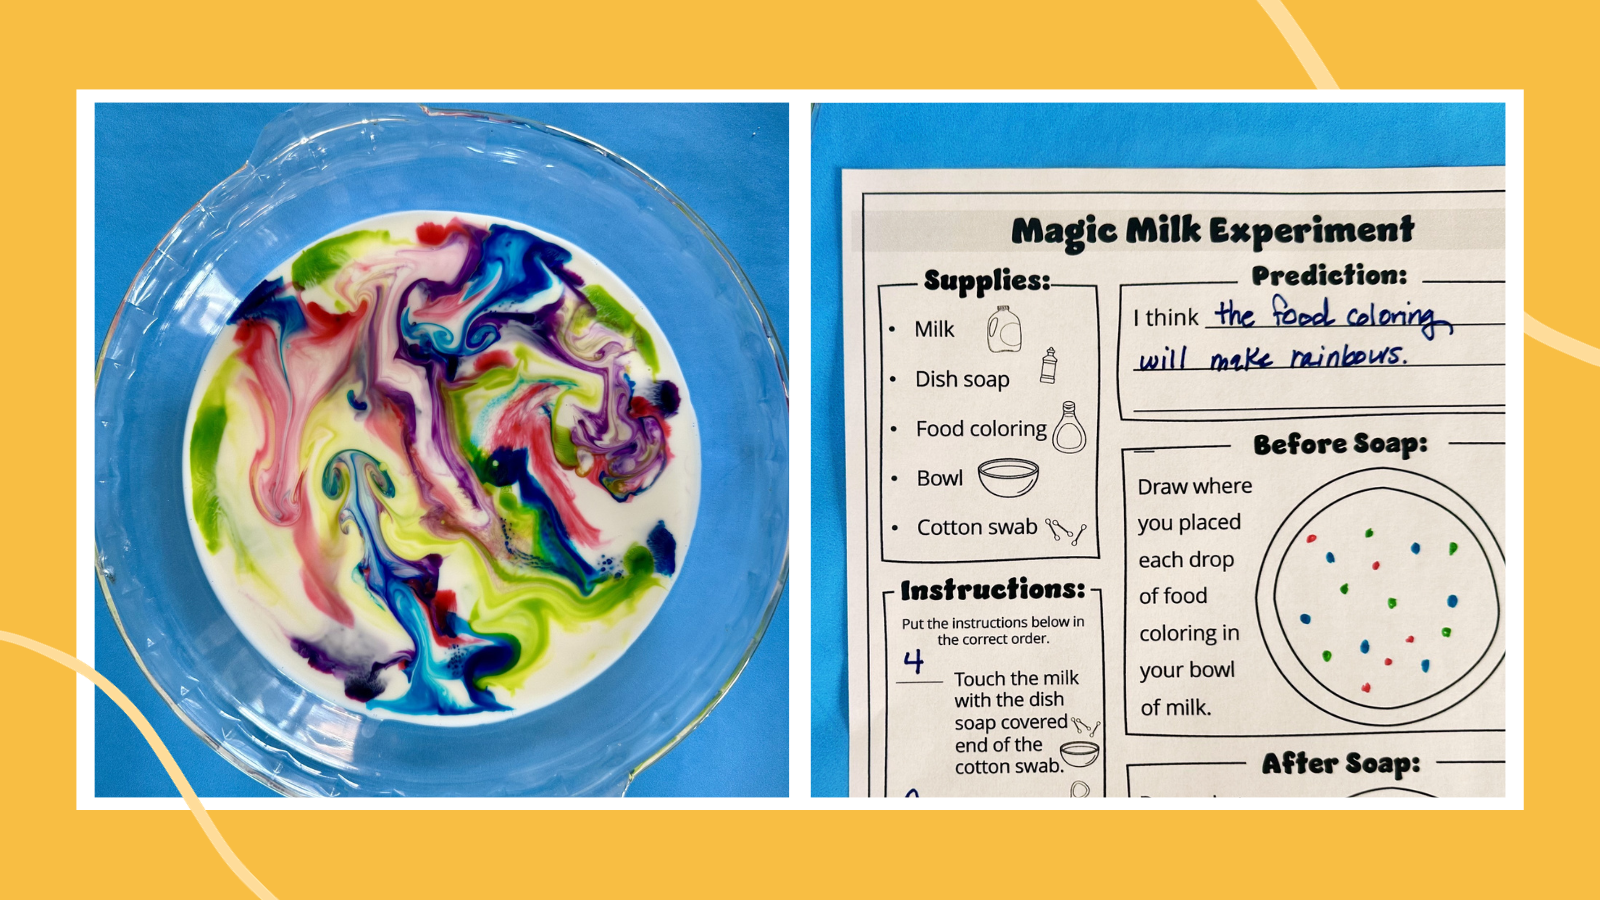
29. Create magic milk
This fun and easy science experiment demonstrates principles related to surface tension, molecular interactions, and fluid dynamics.
Learn more: Magic Milk Experiment
30. Watch the water rise
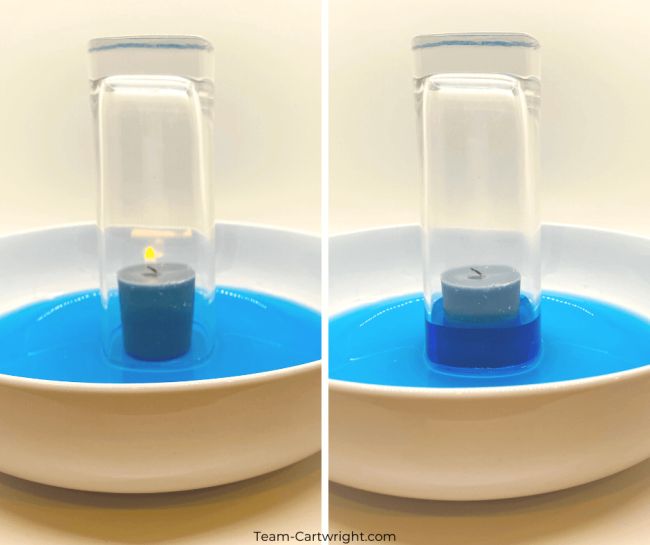
Learn about Charles’s Law with this simple experiment. As the candle burns, using up oxygen and heating the air in the glass, the water rises as if by magic.
Learn more: Rising Water
31. Learn about capillary action
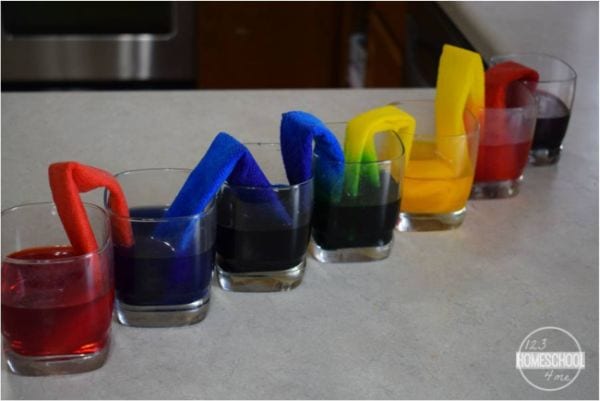
Kids will be amazed as they watch the colored water move from glass to glass, and you’ll love the easy and inexpensive setup. Gather some water, paper towels, and food coloring to teach the scientific magic of capillary action.
Learn more: Capillary Action
32. Give a balloon a beard
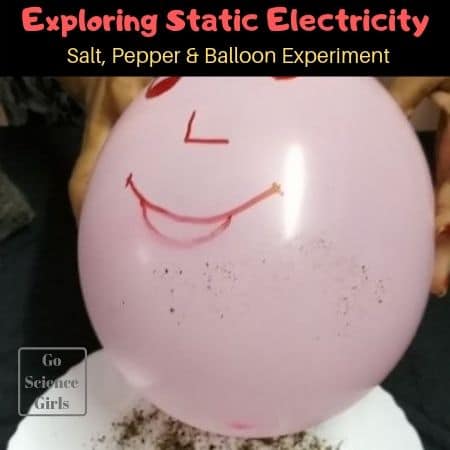
Equally educational and fun, this experiment will teach kids about static electricity using everyday materials. Kids will undoubtedly get a kick out of creating beards on their balloon person!
Learn more: Static Electricity
33. Find your way with a DIY compass
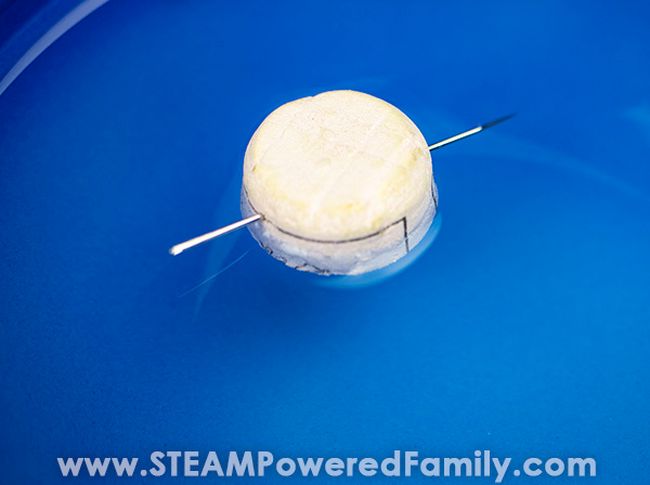
Here’s an old classic that never fails to impress. Magnetize a needle, float it on the water’s surface, and it will always point north.
Learn more: DIY Compass
34. Crush a can using air pressure
Sure, it’s easy to crush a soda can with your bare hands, but what if you could do it without touching it at all? That’s the power of air pressure!
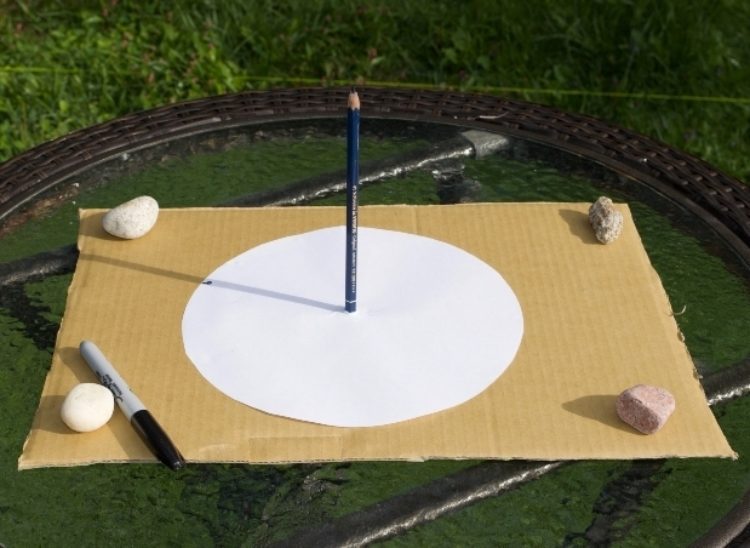
35. Tell time using the sun
While people use clocks or even phones to tell time today, there was a time when a sundial was the best means to do that. Kids will certainly get a kick out of creating their own sundials using everyday materials like cardboard and pencils.
Learn more: Make Your Own Sundial
36. Launch a balloon rocket
Grab balloons, string, straws, and tape, and launch rockets to learn about the laws of motion.
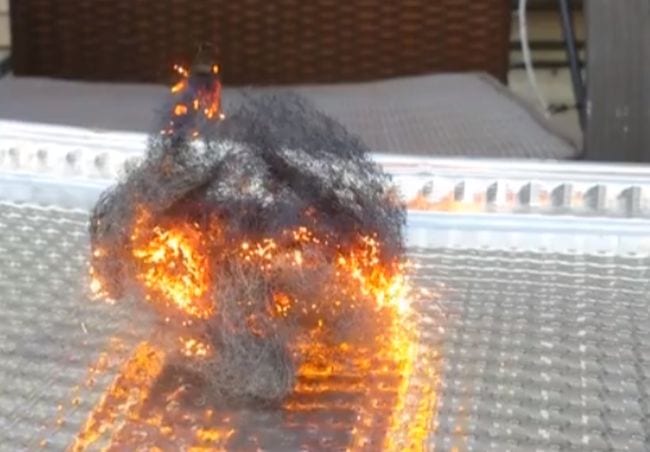
37. Make sparks with steel wool
All you need is steel wool and a 9-volt battery to perform this science demo that’s bound to make their eyes light up! Kids learn about chain reactions, chemical changes, and more.
Learn more: Steel Wool Electricity
38. Levitate a Ping-Pong ball
Kids will get a kick out of this experiment, which is really all about Bernoulli’s principle. You only need plastic bottles, bendy straws, and Ping-Pong balls to make the science magic happen.
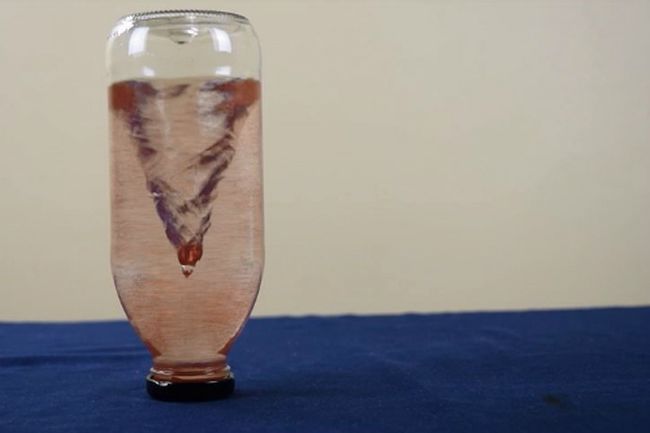
39. Whip up a tornado in a bottle
There are plenty of versions of this classic experiment out there, but we love this one because it sparkles! Kids learn about a vortex and what it takes to create one.
Learn more: Tornado in a Bottle
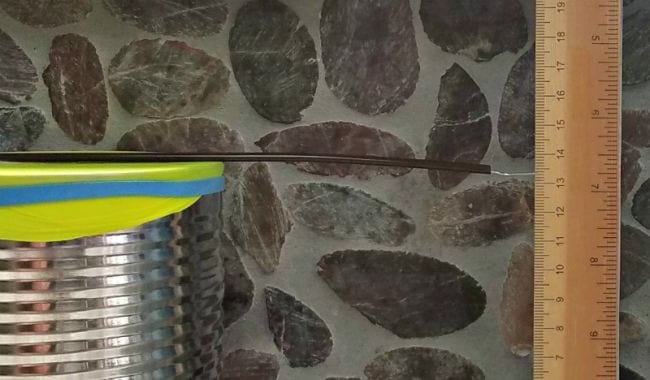
40. Monitor air pressure with a DIY barometer
This simple but effective DIY science project teaches kids about air pressure and meteorology. They’ll have fun tracking and predicting the weather with their very own barometer.
Learn more: DIY Barometer
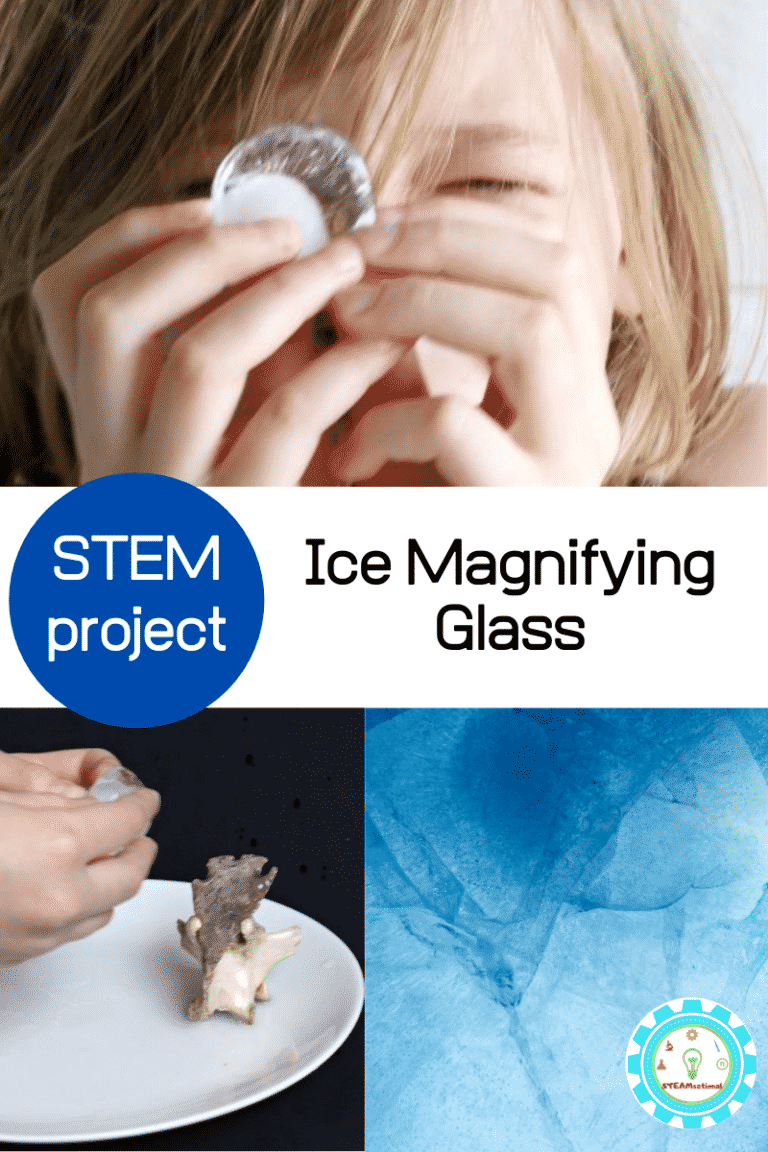
41. Peer through an ice magnifying glass
Students will certainly get a thrill out of seeing how an everyday object like a piece of ice can be used as a magnifying glass. Be sure to use purified or distilled water since tap water will have impurities in it that will cause distortion.
Learn more: Ice Magnifying Glass
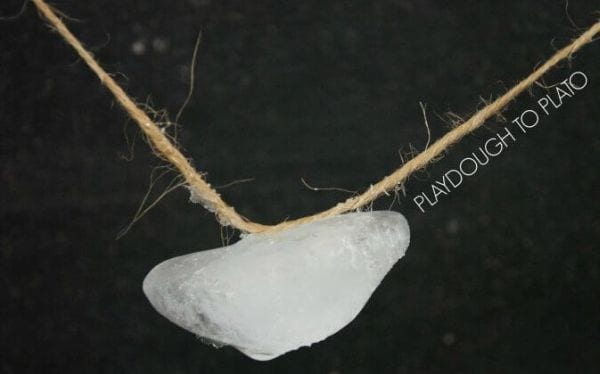
42. String up some sticky ice
Can you lift an ice cube using just a piece of string? This quick experiment teaches you how. Use a little salt to melt the ice and then refreeze the ice with the string attached.
Learn more: Sticky Ice
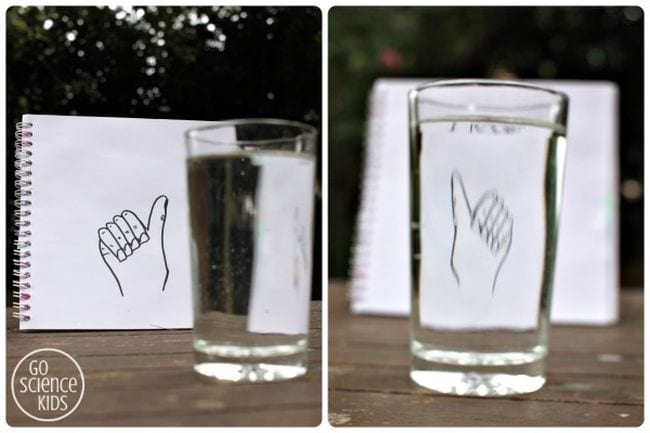
43. “Flip” a drawing with water
Light refraction causes some really cool effects, and there are multiple easy science experiments you can do with it. This one uses refraction to “flip” a drawing; you can also try the famous “disappearing penny” trick .
Learn more: Light Refraction With Water
44. Color some flowers
We love how simple this project is to re-create since all you’ll need are some white carnations, food coloring, glasses, and water. The end result is just so beautiful!
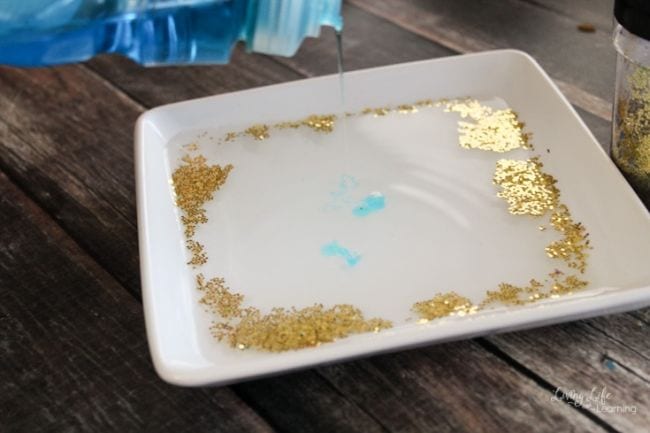
45. Use glitter to fight germs
Everyone knows that glitter is just like germs—it gets everywhere and is so hard to get rid of! Use that to your advantage and show kids how soap fights glitter and germs.
Learn more: Glitter Germs
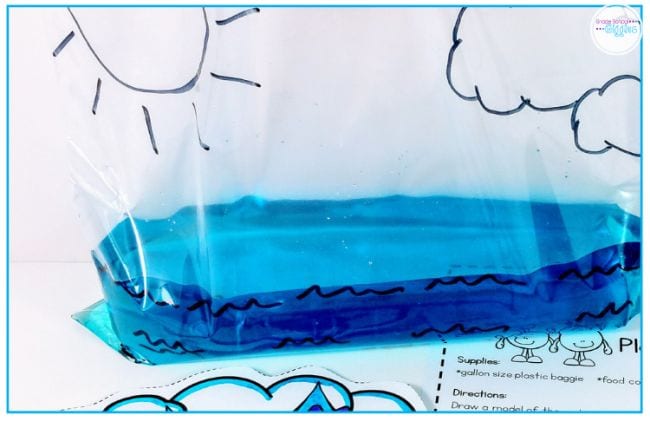
46. Re-create the water cycle in a bag
You can do so many easy science experiments with a simple zip-top bag. Fill one partway with water and set it on a sunny windowsill to see how the water evaporates up and eventually “rains” down.
Learn more: Water Cycle
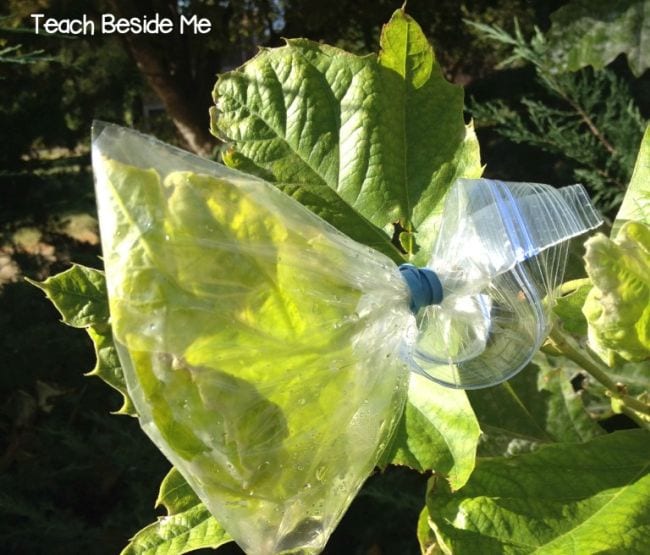
47. Learn about plant transpiration
Your backyard is a terrific place for easy science experiments. Grab a plastic bag and rubber band to learn how plants get rid of excess water they don’t need, a process known as transpiration.
Learn more: Plant Transpiration
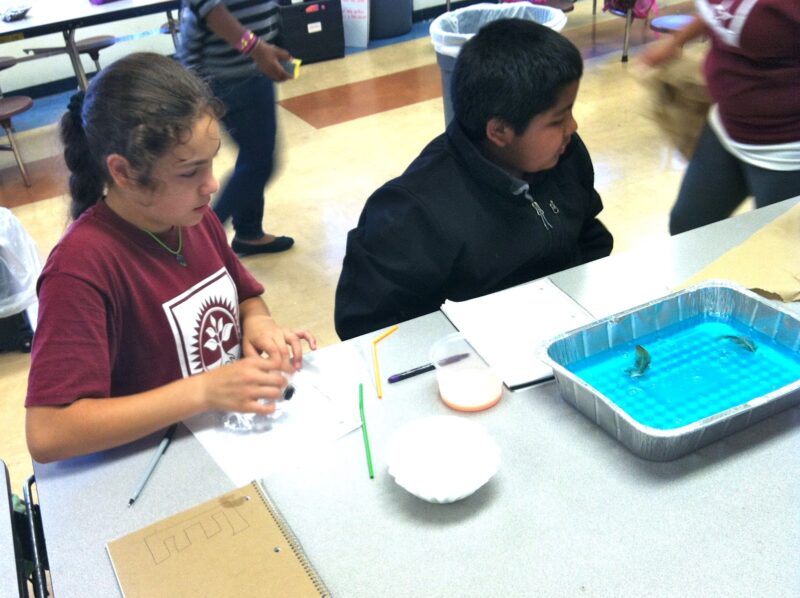
48. Clean up an oil spill
Before conducting this experiment, teach your students about engineers who solve environmental problems like oil spills. Then, have your students use provided materials to clean the oil spill from their oceans.
Learn more: Oil Spill
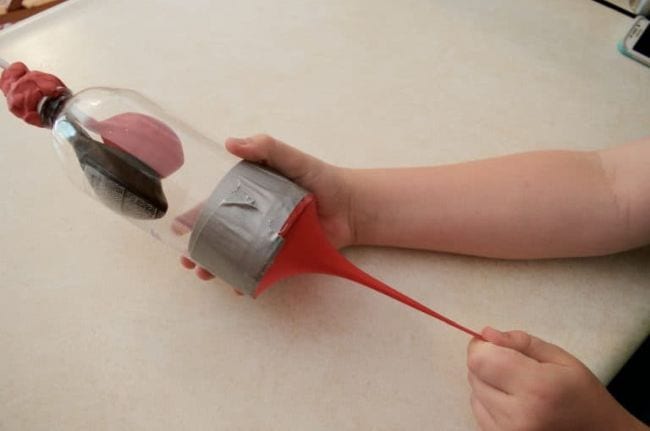
49. Construct a pair of model lungs
Kids get a better understanding of the respiratory system when they build model lungs using a plastic water bottle and some balloons. You can modify the experiment to demonstrate the effects of smoking too.
Learn more: Model Lungs
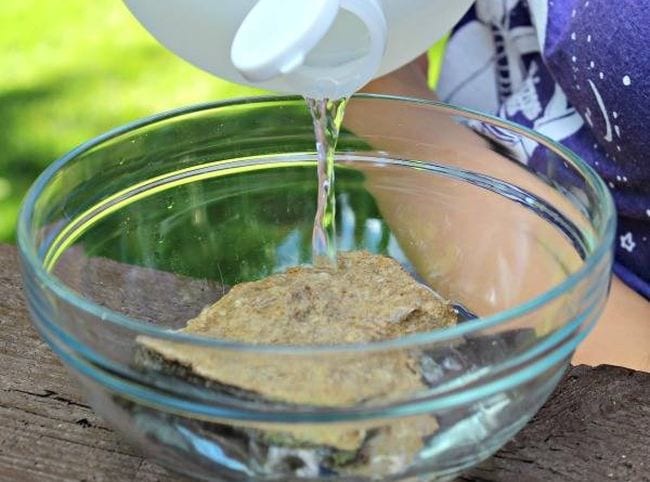
50. Experiment with limestone rocks
Kids love to collect rocks, and there are plenty of easy science experiments you can do with them. In this one, pour vinegar over a rock to see if it bubbles. If it does, you’ve found limestone!
Learn more: Limestone Experiments
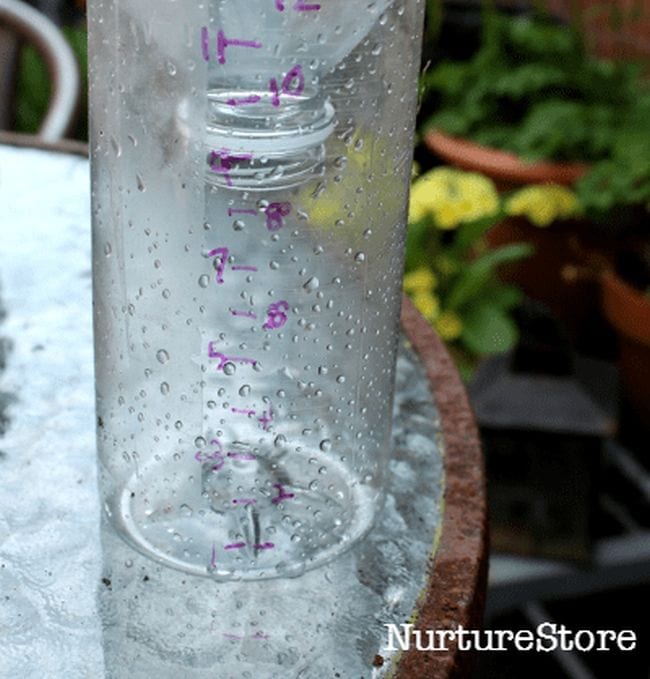
51. Turn a bottle into a rain gauge
All you need is a plastic bottle, a ruler, and a permanent marker to make your own rain gauge. Monitor your measurements and see how they stack up against meteorology reports in your area.
Learn more: DIY Rain Gauge
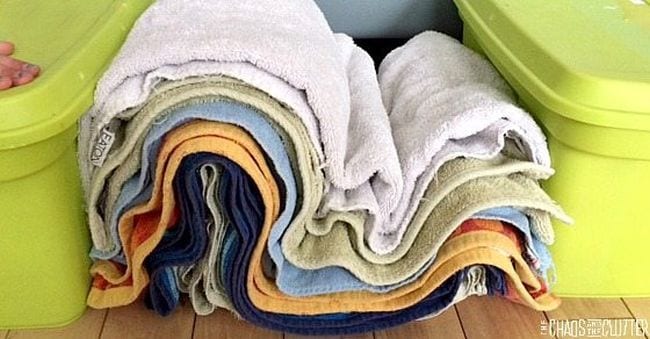
52. Build up towel mountains
This clever demonstration helps kids understand how some landforms are created. Use layers of towels to represent rock layers and boxes for continents. Then pu-u-u-sh and see what happens!
Learn more: Towel Mountains
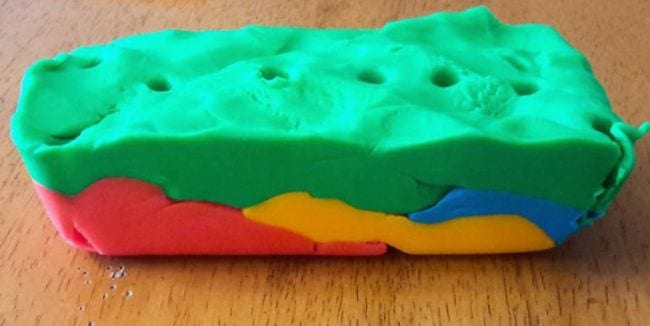
53. Take a play dough core sample
Learn about the layers of the earth by building them out of Play-Doh, then take a core sample with a straw. ( Love Play-Doh? Get more learning ideas here. )
Learn more: Play Dough Core Sampling
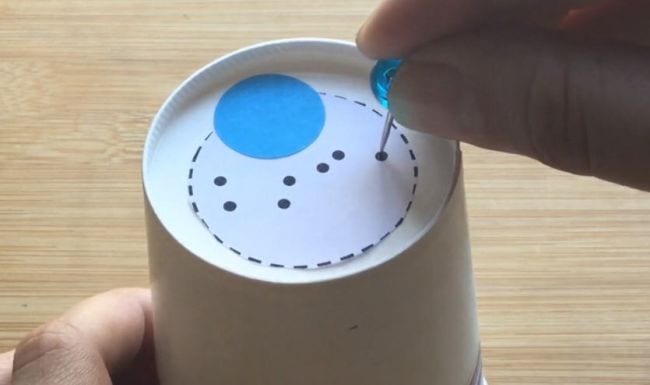
54. Project the stars on your ceiling
Use the video lesson in the link below to learn why stars are only visible at night. Then create a DIY star projector to explore the concept hands-on.
Learn more: DIY Star Projector
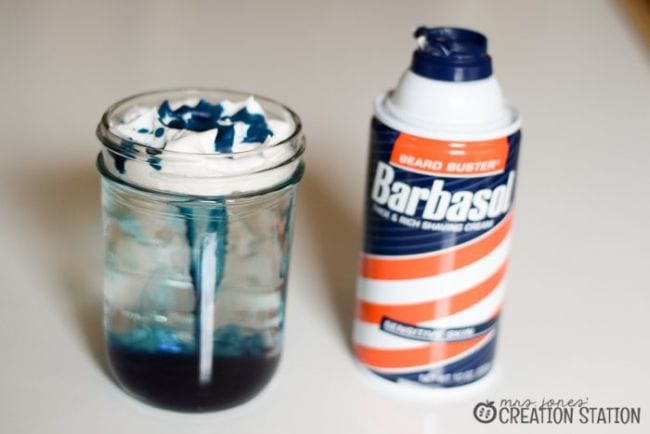
55. Make it rain
Use shaving cream and food coloring to simulate clouds and rain. This is an easy science experiment little ones will beg to do over and over.
Learn more: Shaving Cream Rain
56. Blow up your fingerprint
This is such a cool (and easy!) way to look at fingerprint patterns. Inflate a balloon a bit, use some ink to put a fingerprint on it, then blow it up big to see your fingerprint in detail.
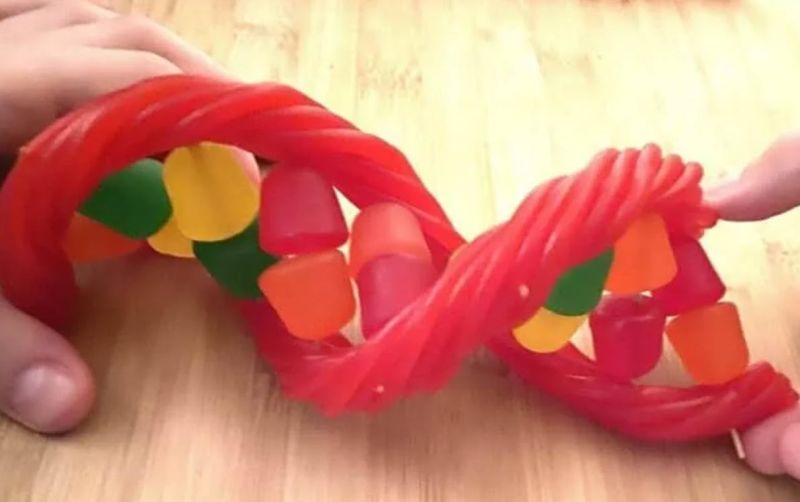
57. Snack on a DNA model
Twizzlers, gumdrops, and a few toothpicks are all you need to make this super-fun (and yummy!) DNA model.
Learn more: Edible DNA Model
58. Dissect a flower
Take a nature walk and find a flower or two. Then bring them home and take them apart to discover all the different parts of flowers.
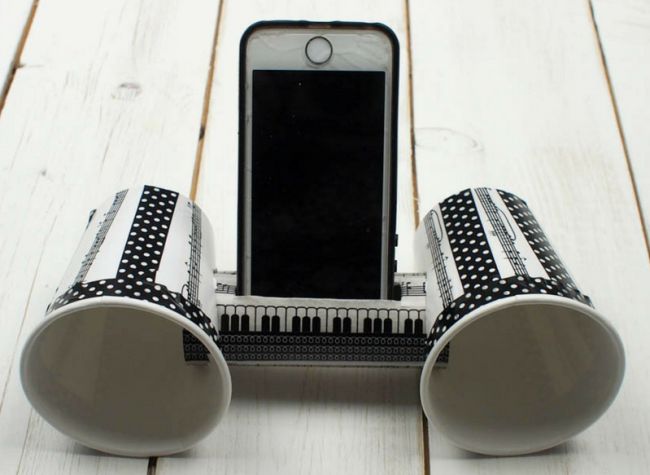
59. Craft smartphone speakers
No Bluetooth speaker? No problem! Put together your own from paper cups and toilet paper tubes.
Learn more: Smartphone Speakers
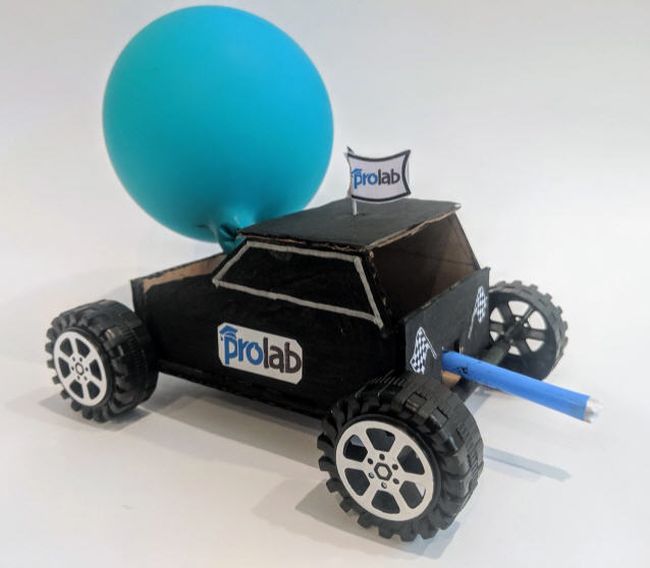
60. Race a balloon-powered car
Kids will be amazed when they learn they can put together this awesome racer using cardboard and bottle-cap wheels. The balloon-powered “engine” is so much fun too.
Learn more: Balloon-Powered Car
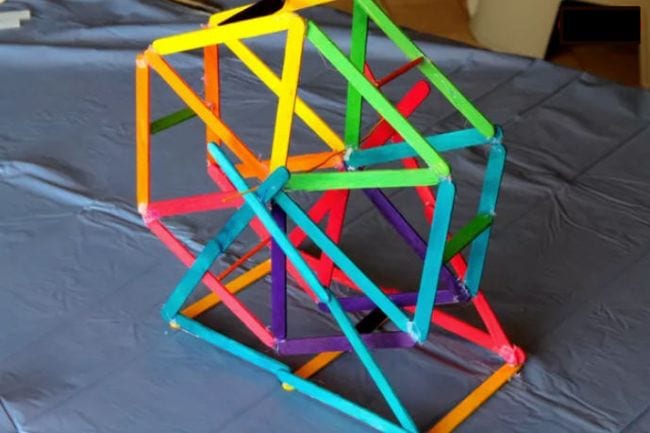
61. Build a Ferris wheel
You’ve probably ridden on a Ferris wheel, but can you build one? Stock up on wood craft sticks and find out! Play around with different designs to see which one works best.
Learn more: Craft Stick Ferris Wheel
62. Design a phone stand
There are lots of ways to craft a DIY phone stand, which makes this a perfect creative-thinking STEM challenge.
63. Conduct an egg drop
Put all their engineering skills to the test with an egg drop! Challenge kids to build a container from stuff they find around the house that will protect an egg from a long fall (this is especially fun to do from upper-story windows).
Learn more: Egg Drop Challenge Ideas
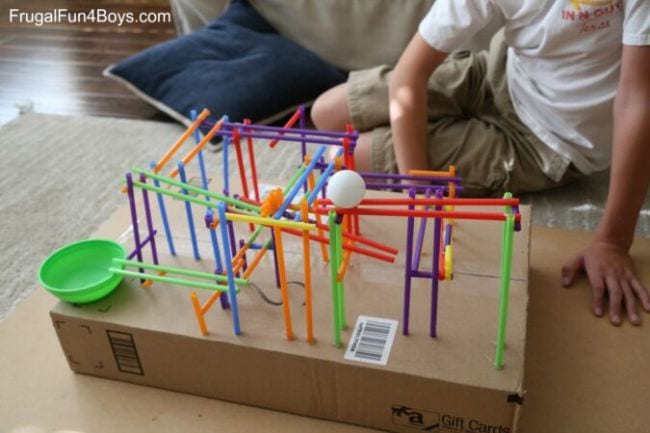
64. Engineer a drinking-straw roller coaster
STEM challenges are always a hit with kids. We love this one, which only requires basic supplies like drinking straws.
Learn more: Straw Roller Coaster
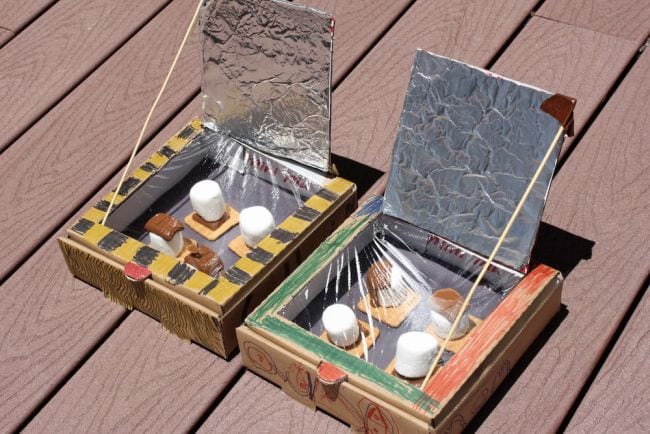
65. Build a solar oven
Explore the power of the sun when you build your own solar ovens and use them to cook some yummy treats. This experiment takes a little more time and effort, but the results are always impressive. The link below has complete instructions.
Learn more: Solar Oven
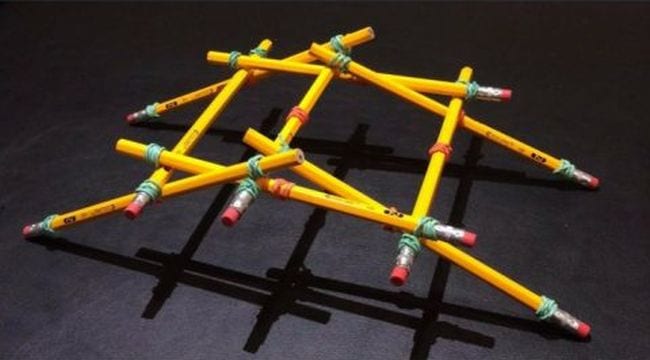
66. Build a Da Vinci bridge
There are plenty of bridge-building experiments out there, but this one is unique. It’s inspired by Leonardo da Vinci’s 500-year-old self-supporting wooden bridge. Learn how to build it at the link, and expand your learning by exploring more about Da Vinci himself.
Learn more: Da Vinci Bridge
67. Step through an index card
This is one easy science experiment that never fails to astonish. With carefully placed scissor cuts on an index card, you can make a loop large enough to fit a (small) human body through! Kids will be wowed as they learn about surface area.
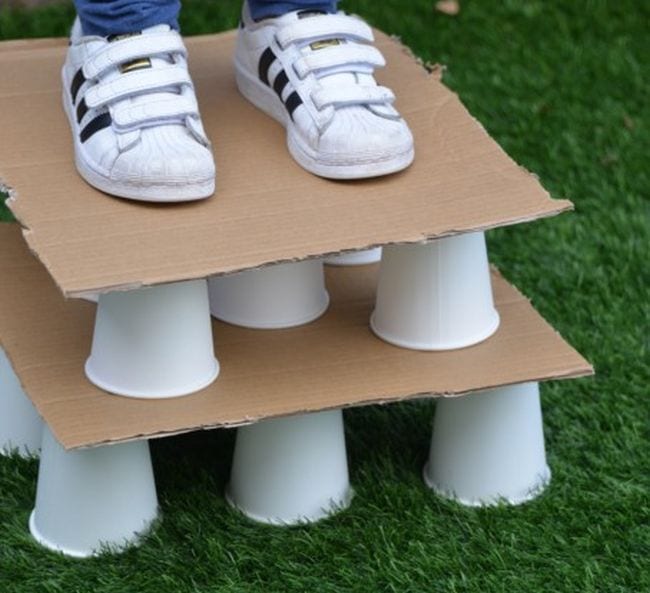
68. Stand on a pile of paper cups
Combine physics and engineering and challenge kids to create a paper cup structure that can support their weight. This is a cool project for aspiring architects.
Learn more: Paper Cup Stack
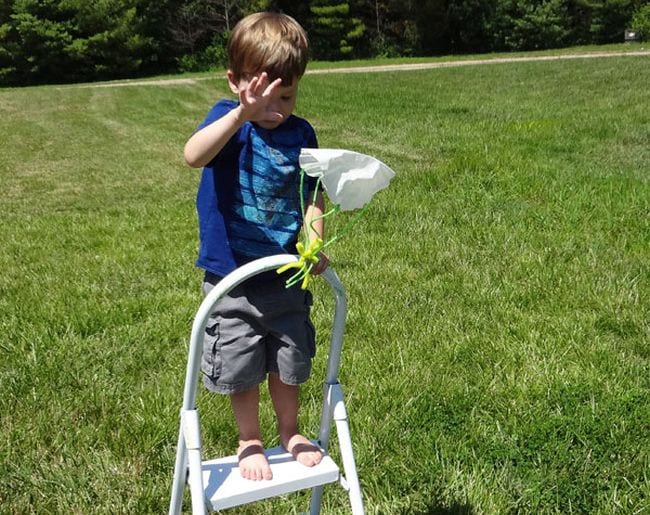
69. Test out parachutes
Gather a variety of materials (try tissues, handkerchiefs, plastic bags, etc.) and see which ones make the best parachutes. You can also find out how they’re affected by windy days or find out which ones work in the rain.
Learn more: Parachute Drop
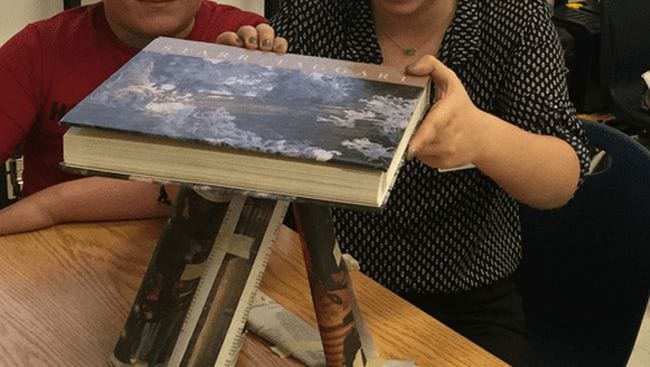
70. Recycle newspapers into an engineering challenge
It’s amazing how a stack of newspapers can spark such creative engineering. Challenge kids to build a tower, support a book, or even build a chair using only newspaper and tape!
Learn more: Newspaper STEM Challenge
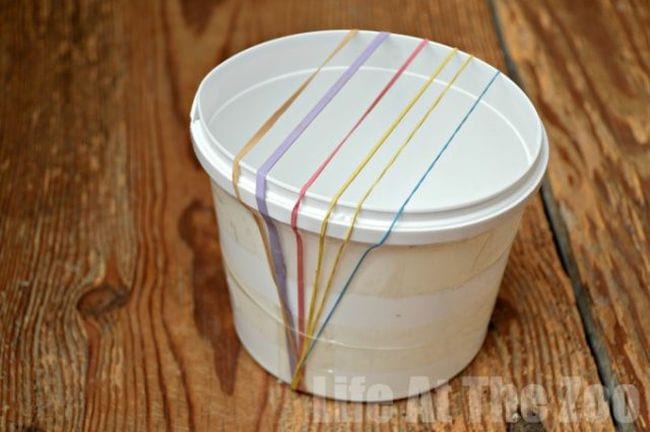
71. Use rubber bands to sound out acoustics
Explore the ways that sound waves are affected by what’s around them using a simple rubber band “guitar.” (Kids absolutely love playing with these!)
Learn more: Rubber Band Guitar
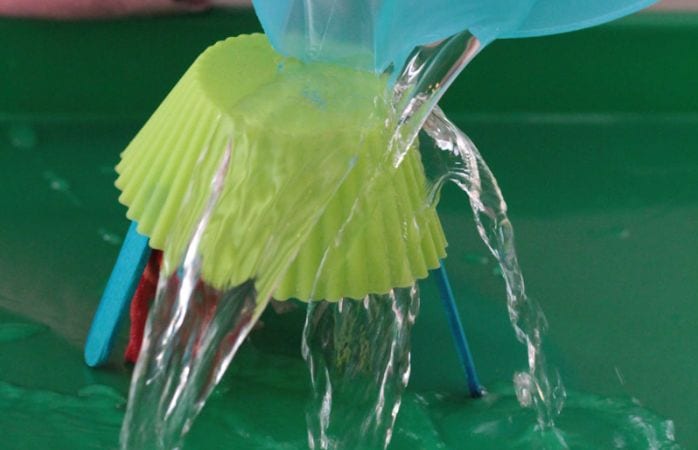
72. Assemble a better umbrella
Challenge students to engineer the best possible umbrella from various household supplies. Encourage them to plan, draw blueprints, and test their creations using the scientific method.
Learn more: Umbrella STEM Challenge
Plus, sign up for our newsletters to get all the latest learning ideas straight to your inbox.
You Might Also Like
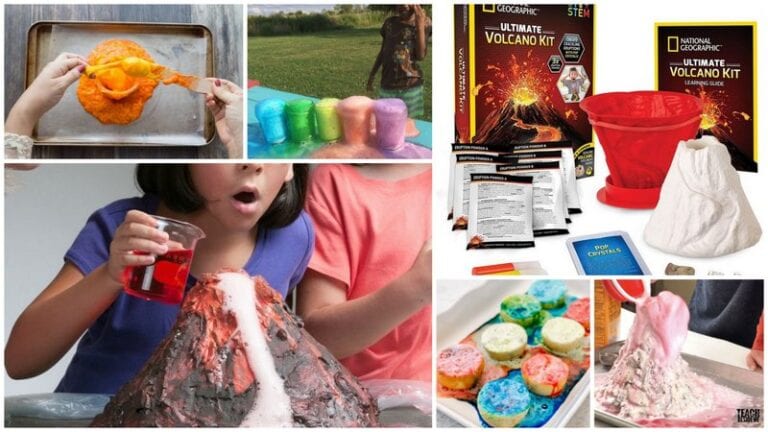
16 Red-Hot Volcano Science Experiments and Kits For Classrooms or Science Fairs
Kids will erupt with excitement! Continue Reading
Copyright © 2024. All rights reserved. 5335 Gate Parkway, Jacksonville, FL 32256
- November 2024 12
- October 2024 12
- September 2024 13
- August 2024 17
- July 2024 14
- June 2024 12
- May 2024 14
- April 2024 33
- March 2024 14
- February 2024 11
- January 2024 13
- December 2023 21
- November 2023 23
- October 2023 15
- September 2023 12
- August 2023 14
- July 2023 13
- June 2023 16
- May 2023 11
- April 2023 12
- March 2023 14
- February 2023 12
- January 2023 10
- December 2022 13
- November 2022 15
- October 2022 11
- September 2022 11
- August 2022 13
- July 2022 11
- June 2022 7
- May 2022 10
- April 2022 11
- March 2022 11
- February 2022 10
- January 2022 13
- December 2021 12
- November 2021 9
- October 2021 10
- September 2021 8
- August 2021 7
- July 2021 5
- June 2021 7
- May 2021 10
- April 2021 6
- March 2021 4
- February 2021 6
- January 2021 8
- December 2020 9
- November 2020 17
- October 2020 12
- September 2020 11
- August 2020 12
- July 2020 12
- June 2020 9
- April 2020 10
- March 2020 11
- February 2020 15
- January 2020 12
- December 2019 17
- November 2019 15
- October 2019 13
- September 2019 5
- August 2019 10
- July 2019 13
- June 2019 10
- May 2019 18
- April 2019 20
- March 2019 12
- February 2019 18
- January 2019 13
- December 2018 21
- November 2018 37
- October 2018 21
- September 2018 19
- August 2018 22
- July 2018 20
- June 2018 21
- May 2018 23
- April 2018 23
- March 2018 34
- February 2018 20
- January 2018 24
- December 2017 26
- November 2017 41
- October 2017 27
- September 2017 26
- August 2017 28
- July 2017 25
- June 2017 23
- May 2017 25
- April 2017 22
- March 2017 31
- February 2017 21
- January 2017 23
- December 2016 25
- November 2016 36
- October 2016 24
- September 2016 19
- August 2016 19
- July 2016 24
- June 2016 15
- May 2016 18
- April 2016 24
- March 2016 18
- February 2016 19
- January 2016 21
- December 2015 28
- November 2015 27
- October 2015 31
- September 2015 29
- August 2015 30
- July 2015 31
- June 2015 25
- May 2015 28
- April 2015 28
- March 2015 28
- February 2015 23
- January 2015 23
- December 2014 40
- November 2014 32
- October 2014 25
- September 2014 25
- August 2014 25
- July 2014 27
- June 2014 27
- May 2014 23
- April 2014 26
- March 2014 25
- February 2014 24
- January 2014 27
- December 2013 29
- November 2013 32
- October 2013 37
- September 2013 27
- August 2013 26
- July 2013 26
- June 2013 21
- May 2013 25
- April 2013 27
- March 2013 23
- February 2013 22
- January 2013 28
- December 2012 23
- November 2012 24
- October 2012 26
- September 2012 24
- August 2012 29
- July 2012 26
- June 2012 26
- May 2012 17
- April 2012 15
- February 2012 26
- January 2012 23
- December 2011 27
- November 2011 28
- October 2011 27
- September 2011 26
- August 2011 6
- July 2011 9
- June 2011 7
- May 2011 11
- April 2011 8
- March 2011 1
- February 2011 3
- December 1988 24
- July 1988 1
Report Abuse
- dropdown menu
- _dropdown link 1
- _dropdown link 2

Doodlecraft
100 diy resin crafts projects ideas (beginner and up).

100 DIY Resin Crafts Projects Ideas! (Beginner and up)
Hey friends! Welcome to Doodlecraft! I'm Natalie and I am a lover of resin crafts.
I've worked with Resin Crafts Blog for years and so if you do a quick google search for "resin crafts", chances are, you've seen a lot of my work.
There's a huge variety of resin products out there, so there are some things you should know.
Resin is magic. Okay, there's some science to it, but it basically is polymers that make a plastic.
There are different resins for different applications.
If it's your first time working with resin, I have a bunch of projects that are all really beginner friendly, simple projects and using different types of resin--and I've got step-by-step guides for all of them!
Story time:

What is the BEST Resin to use?
- For clear projects that are more than 1/4" thick use: EasyCast
- For quick projects that are opaque or white use: Fast Cast
- For a thick glossy finish on projects use: High Gloss Finish
- For pressing or molding things into resin clay use: Epoxy Sculpt Clay
Wear protective gear like a Respirator Mask, when working with resin and read the instructions thoroughly!
Work in a well ventilated area, it is smelly and has chemicals that should not be huffed. Resin can also cause skin irritation, so wear gloves.
But lots of resin is also food safe when cured, so read labels and make sure you are using your resin exactly as directed.
Other Supplies to Use with Resin:
- Alcohol Inks
- Mica Powders
- Silicone Molds
What Can I Make with Resin?
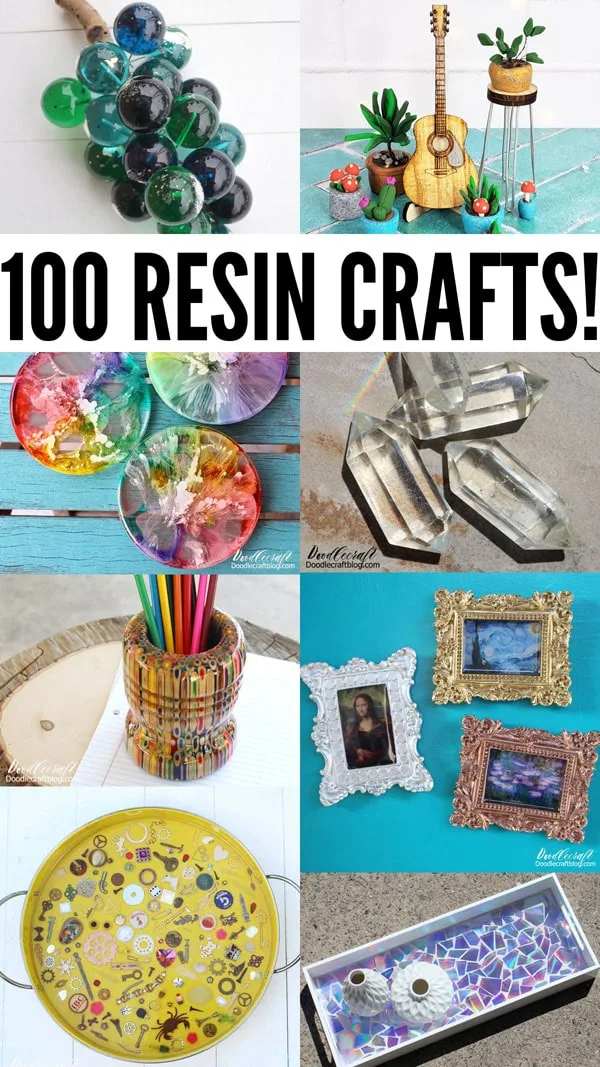
What Resin Crafts SELL the Best?
Here's my top 10 resin crafts to sell:.
- Resin Jewelry (Earring, Pendant and Bracelet or Ring sets)
- Resin Coasters
- Mosaic Resin Trays
- Glitter Resin Tumblers
- Resin Keychains
- Resin Poured Wall Art
- Resin Trinket Boxes or Dishes
- Resin Paperweights
- Resin Coffee Tables
- Resin Flowers or Bugs
100+ Resin Craft Ideas for Any Skill Level!
It's been such a fun journey of resin crafting--with several fails along the way.
Hopefully I've made it so that you are guaranteed success with your resin adventure!
104 How to Make a Resin Geode Mirror (Easy DIY Tutorial)
Learn how to upcycle a chipped mirror into a resin geode mirror with Amazing Clear Cast Epoxy resin, Color Creator Mica Powders, glitter and glass crystals!
This gorgeous mirror looks amazing and takes just a little bit of time to create this piece of art.
Maybe you have a mirror that already could use a face-lift or you can thrift one easily over the weekend and make a statement geode art piece for your home!
-min.jpg)
103 Lightwish UV Colorful Resin Pendants
Lightwish has completely changed the resin game with their new UV Colored Resin!
This amazing resin totally hardens in mere minutes under a UV light and it comes colored.
No fussy mixing or stirring or waiting.
It's seriously a game changer!
-min.jpg)
102 How to Make Resin Nuka-Cola Quantum Keychain DIY
Crafting the Apocalypse has become my newest obsession--I'm thinking of new Fallout crafts to make every day.
Hopefully there's other Fallout nerds out there to appreciate these--or at least this can give you an idea on how to cast an object in mold making resin and duplicating it in resin.
Let's make a DIY Fallout 76 Nuka Quantum Resin Keychain!
-min.jpg)
101 How to Make Custom Shrink Plastic Enamel Lapel Pins
Learn how to make your own enamel pins with this fun faux shrink plastic enamel pin technique!
Make a collection of full color pin badges in various shapes.
I'll show you how to make them every step of the way!
-min.jpg)

100 Glitter Resin Tumblers
Using glitter in all shapes and sizes is the perfect way to decorate a boring blank tumbler.
You'll want t cup spinner for this craft, but it's one of the great beginner resin projects!
How to Make Glitter Resin Tumblers!
Learn how easy and fun it is to make glitter resin tumblers.
These tumblers are super sparkly with a variety of glitter colors and sizes!
Customize these tumbler for any occasion! Wedding party color scheme, Graduation gift school colors, or just a favorite color!
-min.jpg)
99 Miniature Guita r Studio
Small objects made with a laser cutter are awesome when coated with some high gloss clear resin.
How to Make a Miniature Acoustic Guitar Studio! This miniature guitar studio is one of my most favorite projects to date. I love how this tiny little acoustic guitar turned out.
I love that mini hairpin leg stool. Learn how to make a miniature acoustic guitar and potted plants for the miniature lover in your life!
-min.jpg)
98 Marbled Polymer Clay Earrings
How to Make Marbled Polymer Clay Earrings!
Learn how fun and simple it is to make marbled polymer clay earrings!
Polymer clay bakes is soft to work with and bakes hard in the oven.
Marbling the clay makes gorgeous quartz crystal effects, paired with gold leaf for the ultimate classy earrings.
-min.jpg)
97 Letterboard Letters
How to make letterboard letters with fastcast resin and bling jewels!
If you are wanting to do a resin project but don't have a long time, Fast Cast sets in 15 minutes!
It's a simple project if you have a silicone mold.
-min.jpg)
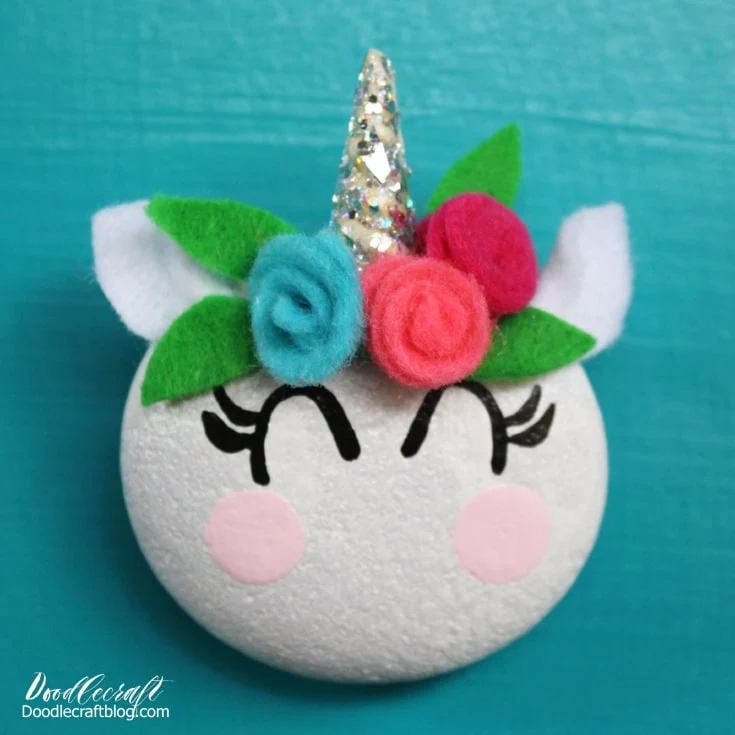
96 Unicorn Painted Rock with Resin Horn
How to paint a unicorn rock with felt flowers, ears and a glittery resin horn.
Using casting resin in a silicone mold makes the cutest horn for a rock painting!
Small projects are a perfect place to start with epoxy crafts.
95 Colored Pencil Vase
Make your own colored pencil vase with 216 colored pencils, Easycast Deep Pour resin and a lathe for wood turning.
This is definitely an advanced project, you'll need a lathe and a several steps, but this is an interesting craft if you are ready for new possibilities.

94 Vintage Lucite Resin Grapes
How to make Vintage Resin Lucite Grapes DIY with easycast resin.
This home décor resin art is an old crafting technique from the 50's!
Use different colors and make lucite grapes match your vibe.
Great project for someone that's worked with resin before.

93 Crystal Orb Staff
Full tutorial for a Crystal Orb Scepter made with Resin--and the air bubbles add to the orb!
This amazing crystal orb scepter is the perfect addition to a costume or cosplay.
A Wizard, Warlock, Sage, Witch, Sorcerer, Mage, Enchanter, or Necromancer would all be excited to hold a staff like this.
This could be used by an Adventurer, Druid, Plague Doctor, or just as an exotic walking stick.

92 Iridescent Tumbler
Make a resin tumbler that rivals the shimmer of a little mermaid tail!
This iridescent resin tumbler diy is easy to make and has texture, shine and smoothness.
Resin crafts are so much fun and if you haven't tried a tumbler yet, consider this your sign!
This shiny tumbler is perfect for staying hydrated, mixed drinks or as the perfect handmade gift.
This is a great first resin project!
-min.jpg)
91 Resin Cake Topper
How to Make a Resin Birthday Cake Topper in Minutes! Resin Crafts are a favorite of mine.
They take a project and amp up the coolness! It's basically the "icing on the cake" to have a fabulous cake topper.
Cake toppers are my favorite birthday element, and this one is quick casting resin!
Learn how easy and quick it is to make a Resin Birthday Cake Topper in just a few minutes!
-min.jpg)
90 Coconut Shell Necklace
Make a high gloss resin coconut shell necklace for a natural and tropical look.
Turn ordinary pieces of coconut shells into glossy and stunning jewelry.
Craft projects like this are so fun...to take something on the way to the compost and turn it into something amazing!

89 Glitter Keychains
How to Make Glitter Resin Keychains!
Make gorgeous glitter resin keychains with power words as the perfect handmade gift. These glitter keychains are a great resin craft for beginners.
Learn to make glitter resin keychains with power words using EasyCast Resin, letter beads, tassels and keychain hardware.
Small items made with pour resin and glitter is an easy way to make a statement without too much work!

88 Felix Felicis Liquid Luck Pendant
Make liquid luck to wear around your neck.
Are you a fan of Harry Potter like me? I love the books, the movies and all the merch!
Use Resin to make a Felix Felicis Liquid Luck vial necklace to wear and showcase your true devotion to the Wizarding World.

87 I Spy Game Trinket Tray
This I spy game resin serving tray filled with miniatures and trinkets is a fun DIY and would make a great gift!
Fill the tray with little things from the junk drawer or little heirlooms that sit in a jewelry box collecting dust. (Or you can buy a bunch of miniatures at craft stores)
With a thick layer of glossy resin--done in several thin layers, the trinkets stay in place and offer a smooth surface for using the tray for serving or a coffee table catch all.

86 Layered Resin Painting
Make a layered piece of art with layers of flowers (could even use pressed fresh flowers), textures and sparkle.
This painting is canvas with multiple layers of thick, creamy paints and 2 layers of Envirotex Lite High Gloss Resin.
There are a variety of textures, shines, depths and finishes on this painting that makes it so intriguing.

85 Galaxy Coasters
Make stunning galaxy coasters with high gloss resin and vivid colors.
These amazing coasters are addicting to make with this fun resin pour technique.

84 Acrylic Paint Poured Pendant
How to make a resin pendant with paint pour skins leftovers from dirty paint pours.
This is a great way to make craft gold gold with otherwise useless pieces from another project!
-min.JPG)
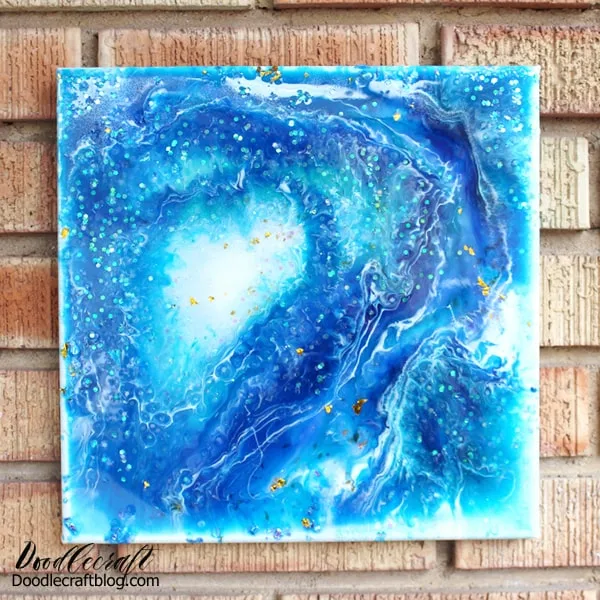
83 Geode Resin Pour
How to make a geode resin pour canvas with glitter!
Making art projects for home decorations is a great option for resin crafting.
82 Resin Faux Quartz Crystals
How to make faux quartz crystals using easycast resin!
Create beautiful items with a clear deep pour type of resin, that sparkle in the sunlight just like the real thing!

81 No Tumbler Polished Rocks
How to make polished shiny rocks without a rock tumbler using high gloss resin spray!
For best results, spray in warm temperature...but not hot or cold temperatures.
-min.jpg)
80 Hairpin Leg Table
Make a stunning table using reclaimed wood and DIY Hairpin Legs!
This versatile table can be used for anything and everything. Is there a wedding in your future?
This is a great option for a wedding cake table.
Perfect on the patio for cocktails or in the living room holding a big plant. What will your table be used for?

79 Lucky Keychain
Learn how to make a Lucky Keychain with resin and glitter...great ideas for older kids crafts too.

78 Succulent Vase Magnet
Make a cute succulent vase magnet with FastCast resin, a little faux succulent and a disc magnet, perfect for a fridge or locker ornament.
I love filling my fridge with wedding invitations, cards, kids artwork and more…most days my fridge looks completely cluttered.

77 Conversation Heart Necklaces
How to make resin conversation heart necklaces with sparkly tinsel and letter beads!
Great craft for special events or gift ideas!

76 Resin Fish Bowl
Resin Fish Bowl Easy Pet DIY Fish are the only pet that we can own…because of our especially horrible animal allergies.
It got me thinking that it would be fun to make a resin fishbowl, then it’s the perfect pet that needs no attention or care.
Little fish bowls would make a cute table centerpiece, fun for an animal themed party or a carnival set up...this is a longer period of layering and curing...so not a quick craft.

75 Colorshift Popsocket
Color Shift Pop Socket with Resin DIY Make a fun custom POP Socket craft using color shift pigment and Envirotex Lite Pour-On High Gloss Finish.
Make your pop socket shine in the sunlight with this simple resin DIY. The best thing--this fun craft makes a great handmade gift too!

74 Faux Greenstone Oblique Calligraphy Holders
Make a shiny oblique calligraphy pen holder that looks like jade!
Have you used an oblique calligraphy pen before?
They are my favorite, maybe because they look weird...but they let you angle you hand and paper and still write with the nib straight.

73 Food Safe Chocolate Molds
How to make food safe chocolate molds out of easymold silicone rubber.
72 Mosaic Cake Stand
Resin crafting is awesome, there are so many different applications for resin.
Here's a fun cakestand that makes a great resin project for a beginner, without looking like a beginner project! Great for a cake mix cake or just decor!
Upcycle an old cake stand with a glass mosaic finished with high gloss resin to give it new life.

71 Glitter Light Switch Plate!
How to make a glittery light switch plate cover using glitter and resin!
Customize the color of glitter and top it off with High Gloss Resin for a smooth and shiny finish.
It’s a simple DIY craft (and hack light light) that just takes a few minutes of work time and overnight drying.

70 Skeleton Key Necklace
How to Cast Skeleton Key in Clear Resin Skeleton keys are my favorite, they remind me of secret doors.
Create an amazing skeleton key necklace with resin for an especially fun steampunk flare accessory.
This project takes just a few supplies and a little time.

69 Resin Glitter Hairclips
Make gold and sparkly hair clips with jewelry resin to match an outfit or for a handmade gift.
This unique resin craft takes just a few supplies and about 10 minutes of working time, then overnight to dry.
These cute clips should be made in every color, perfect for every outfit or dress in the closet.
One can never have too many hair clips!

68 Faux Jade Stick Barrettes
How to Make a Faux Jade Resin Stick Barrette!
Learn how to make a faux jade stick barrette.
It's a breeze using Easy Sculpt epoxy clay and scrap tooling leather. Perfect for totally chic hairstyles!

67 Pineapple Canvas with High Gloss Resin
Pineapple Painted Canvas with High Gloss Resin is a simple project.
Best part, paint whatever you like on a canvas and then coat it in art resins for gorgeous shine!

66 Paperclip Bookmarks
Make a darling bookmark with a paperclip and some regal resin shapes painted with metallic paints.
This is a perfect craft for a book club, quick gift or for fun.
Create the perfect paperclip bookmark with small amounts of FastCast resin, metallic paint and a little twine.

65 Resin Monster Eyes
Resin Monster Eyes Perfect for Costumes Cosplay DIY!
This type of resin can be colored with acrylic paint for an opaque finish!

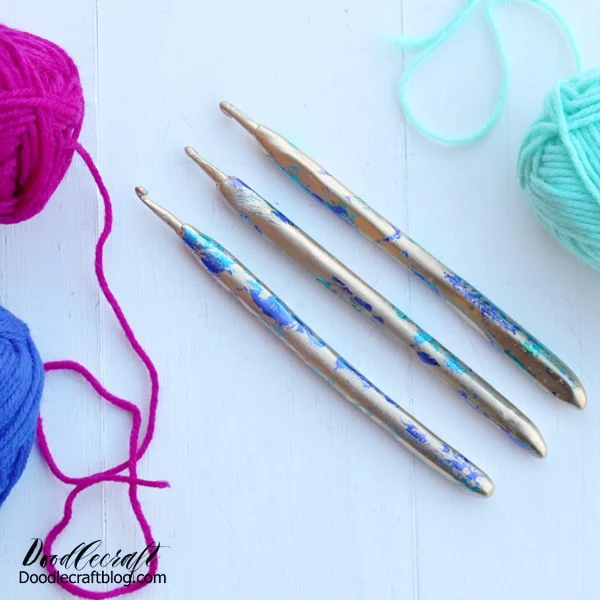
64 Metallic Leaf Crochet Hooks
Do you crochet or know someone that does?
Crochet hooks are not especially comfortable and this craft makes them more comfy to use–plus more fashionable!
These hooks will make a uniquely great gift for a yarn crafter.
63 Gold Leaf Necklaces
How to make gold leaf necklaces with bezels and jewelry resin clay!
This type of resin is not in liquid form, it's a clay that you mix 2 parts together to trigger the chemical reaction!
It's a simple project and looks awesome!

62 Resin Pine Needle Coasters
Pine needle coasters are easy to make with EasyCast Resin and a small branch from your Christmas tree.
Make a resin coaster each year to memorialize your holidays spent together.
Make some of these coasters now...or save this idea for the holidays!

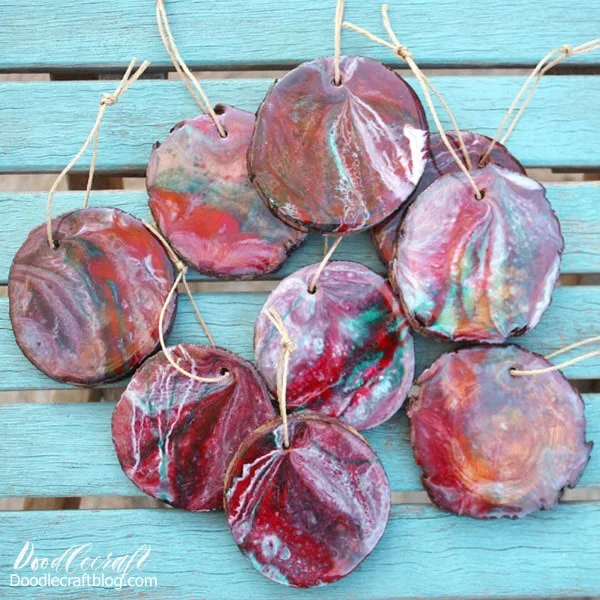
61 Resin Wood Slice Ornaments
Wood slice ornaments are perfect to give as neighbor gifts or to deck the tree with matching handmade ornaments.
Make stunning wood slice ornaments using high gloss resin and the dirty pour technique.
Resin pouring is a highly addictive craft, let’s get started!
60 Faux Butterfly Wing Earrings
How to make faux butterfly wing earrings with high gloss resin!

59 Upcycled EasySculpt Make-up Brushes

58 Metallic Leaf Serving Tray
How to make a metallic leaf serving tray with high gloss resin!
Just a thin layer of table top resin makes this tray an awesome open concept art piece.

57 Motherboard Jewelry
How to make jewelry with an old motherboard and high gloss resin.
This is a thin layer of resin, so using UV light or a UV resin starter kit would work great for these!
-min-min.JPG)
56 Resin Vintage Frame Art Magnets
How to make mini vintage works of epoxy resin crafts art!
Casting vintage frames out of Fast Cast resin and printing famous works of art, then coating them with high gloss resin for the perfect fridge artwork.
-min.JPG)
55 Crayon Marbled Pendants
Learn how to make marbled pendants with melted crayons and covered with high gloss resin.
-min.JPG)
54 Make your own Silicone Cabochon Mold
Learn how to make your own silicone cabochon mold with easymold resin putty.
53 Marbled Resin Wood Slice Table
How to make a wood slice hair pin leg table with a split cup or marbled resin flo paint pour.
-min.JPG)
52 Faux Enamel Pins
How to make faux enamel pins with shrink plastic and high gloss resin...just a thin layer of low viscosity resin is the perfect shine finish for these pins reminiscent of the old olden days.
-min.JPG)
52 Copper Acorns
How to make copper acorns out of EasySculpt resin clay--great examples of a different resin item!
-min.JPG)
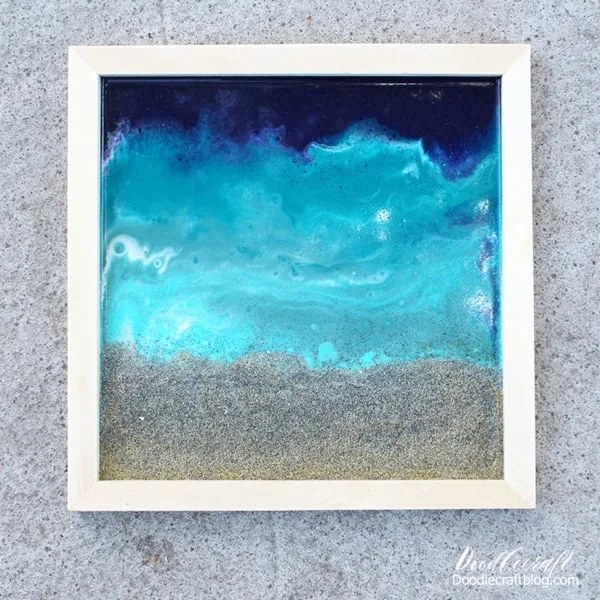
51 Ocean Resin Pour with Sand
Use glossy resin to make the perfect ocean pour including a little beach sand. Great for beach-inspired home decor.
50 Four Leaf Clover Coaster
Preserve a four leaf clover in a wooden coaster with glossy resin for a long lasting reminder of your good fortune!

49 Lightsaber and Magic Wand Pens
Customize your cheap plastic pens with EasySculpt resin clay in your favorite fandom like Star Wars lightsabers or Harry Potter magic wands...like a classic controller.

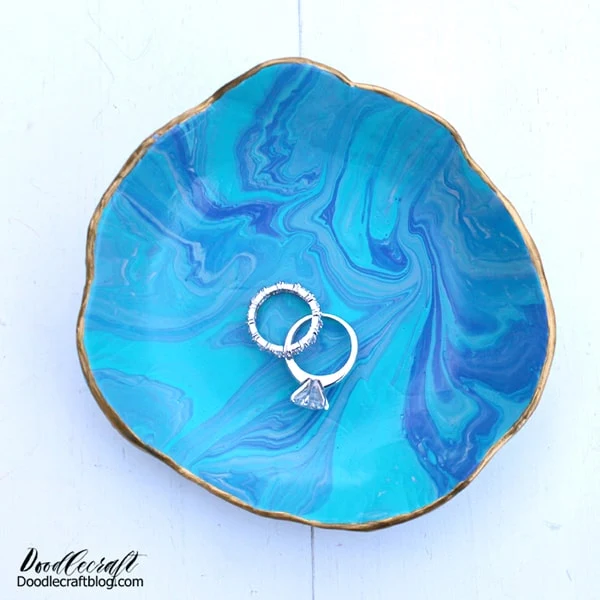
48 EasySculpt Marbled Ring Dish
Make a ring dish with easy sculpt 2 part epoxy resin clay and marbled with acrylic paint.
47 Flower Vase Centerpiece
Make a flower vase centerpiece that looks great year round and doesn't need any maintenance using EasyCast resin.

46 Abstract Canvas with Gold Leaf
Gold leaf high gloss resin abstract painted canvas.
Perfect home decor with an easy painted abstract wall art.
I love having unique decor in my home!

45 Leaf Pendants

44 Marbled Calligraphy Pens
Marbled Oblique Calligraphy nib holders made with Easy Sculpt resin clay.

43 Resin Paperweights
Learn how to make resin paperweights using deep casting resin and found objects, like a full dandelion!
Paperweights made of resin are the perfect beginner resin craft to get started!

42 Acrylic Paint Pour
Acrylic paint poured round serving cheese tray coated in high gloss resin for long lasting finish.

41 Maui Hook Necklace
Moana inspired Maui's fishing hook necklace made with EasySculpt resin clay.

40 Gold and Silver Leaf Pendants
Gold and Silver leaf suspended in clear Easy Cast resin made into pendant necklaces.

39 Gold Glitter Tray
Gold Glitter tray with high gloss resin finish--this is a perfect beginning resin craft project!

38 Four Leaf Clover Keychain
Four leaf clovers set in clear Easy Cast resin and made into easy key chains.

37 Steampunk Bottle Caps (keychains, magnets, pinbacks)
Steampunk bottle caps using resin epoxy clay--great for keychains, magnets and pinbacks!

36 Sparrow Mold and Casting
Sparrow mold made with silicone mold putty and fast cast resin.
35 Emerald and Gold Leaf Knobs
Emerald green resin with gold leaf suspended inside and made into dresser knobs.

34 Faux Agate Slices
Faux agate slices made with easy cast resin and translucent dyes.

33 Gold Leaf Paperweights
Gold Leaf Paperweights with black background. Made with EasyCast resin.

32 Jewelry Tree Organizer
Tree branch jewelry organizer using a real tree branch and resin.

31 Rainbow Alcohol Ink Coasters
Petrified Rainbow coasters using Easy Cast resin and Alcohol ink drips.

30 Lace Pendants
Lace pendants coated in jewelry resin for long lasting heirloom.

29 Mermaid Tale Keychains
Glittery mermaid tale keychains made with easy cast resin and silicone mold.

28 Mixed Media Canvas
Mixed media resin canvas diy.
Paint, stencil and add texture...then finish it off with high gloss resin.

27 Mosaic Frame
Paper pieced mosaic frame with high gloss resin finish.

26 Beetles Paperweights
Beetles or bugs in clear resin for paperweights or pendants--great way to preserve insects for specimens or fun!

25 Cicadas in Resin--Specimen Art
Cicadas in resin for the perfect clear resin specimen art.

24 Candy Keychains
Candy sprinkles in resin key chains.

23 DVD Mosaic Tray
DVD mosaic serving tray with high gloss resin for smooth and glossy finish.
Upcycle those old burnable dvd's or cd's and let the shimmery shiny finish make the perfect mosaic.
Finished off with high gloss resin for the perfect effect!

22 Rainbow Acrylic Paint Pour
Rainbow acrylic paint pour coated in high gloss resin for a beautiful glossy shine!

21 Pressed Flower Paperweight
Pressed flowers suspended in Easy Cast resin paperweight.

20 Pink Glitter Knobs
Pink Glitter resin knobs made with Easy Cast resin, great for adding a personal touch to your furniture!

19 Faux Crystal Necklaces
Faux crystal turquoise wire wrapped pendant necklace diy.

18 Fabric Serving Tray
Flower fabric lined serving tray coated with high gloss resin for long lasting finish.

17 Resin Cameo Brooches
Cameo Brooches made with Fast Cast resin and high gloss resin with geek inspired pictures.

16 Galaxy Clock
Galaxy painted resin clock with high gloss resin finish.

15 Metallic Photo Holders
Metallic photo holders made with Fast Cast resin for quick set project.

14 Resin and Wood Bookend
Geometric Resin and Wood Bookend made with EasyCast resin.

13 Geometric Succulent Holder
Geometric succulent holders made with Easy Cast and Fast Cast resin.

12 Steampunk Pendant
Steampunk gears and cogs set in ornate pendant with jewelry resin.

11 Seashell Soap Dish
Blue ombre resin in seashell for soap dish.

10 Rolled Paper Pendant
Rolled paper upcycled scrap papers pendant coated with glossy jewelry resin.

9 Glitter Tumbler
Glitter tumbler coated in high gloss resin for long lasting finish.

8 Trinkets in Spoon Pendants
Trinkets in spoon pendants filled with resin to look like water.

7 Resin Pour with Gold Leaf Gallery Art
Gallery Wall canvas resin paint pour with gold leaf finish.

6 Monogram Necklace
Monogram pendant coated with jewelry resin. Coat with a little Mod Podge for a clear finish.

5 Rainbow Resin Pour Coasters
Rainbow sunset resin paint pour on wooden coasters.

4 Tropical Leaf Serving Tray
Paper tropical leaves on serving tray coated with high gloss resin for long lasting finish.

3 Unicorn Horn Calligraphy Pen
Easy Sculpt resin clay formed into Unicorn horns and then made into oblique calligraphy pen holders.

2 Unicorn Jewelry Dish
Unicorn ring dish with horn for rings made of easysculpt resin clay.

1 USA Ocean Resin Pour
Resin paint pour ocean waves across the United States wood cut out.

Phew, can you believe I've created 100 things from resin!?
Which projects are your favorite?
I love number 99, 31, 46, and 80 so much!
Of course, I love them all!
Like, Pin, Share and Save for Later!!!
you may also like
Popular posts from this blog
100 cricut projects to sell to make money with cricut.

How to Make Boondoggle Lanyard Keychains DIY Tutorial

How to Make a DIY Spinner Prize Wheel!

How to Make a Cape in 20 Minutes (Easy DIY Tutorial)
-min.jpg)
How to do Cindy Lou Who Hair Tutorial

Shop Blick!
Get the xTool S1 Laser Cutter!
Get a Cricut Today!
Get Stamp-n-Storage

Easy Search
- Doodlecraft Privacy Policy
Shop HTVRONT


IMAGES
VIDEO
COMMENTS
The science behind the Epoxy Resin Reaction experiment. This experiment teaches: What resin is; How resin is used in everyday life; Liquids and solids; How it works. This science experiment using epoxy resin displays the state change between a liquid and a solid while creating a fun keepsake of your child’s hand.
On this episode of Ben's Worx I look back at what I think are my best 5 epoxy resin experiments, If you think there are other projects of mine you would like...
SPLIT CUP Resin Bloom Experiment! Does it all go wrong?👉 Watch more resin related content? If so, click here https://youtube.com/playlist?list=PLWjKnhSrupsi...
50 Awesome Science Experiments for Fourth Graders. 10 Cool Cold Weather Science Experiments for Kids. 100+ Fun and Educational Science Trivia Questions for Kids. 25 Must-Read Science Books for First Graders. If your child is interested in science check out the videos at How Stuff Works. It will keep them informed and entertained for hours!
For cool and safe experiments to do at home sign up to MEL Science here: https://goo.gl/KAS1pZWarning! This experiment is not included in the MEL Chemistry s...
Add 75mL of water and 3 gelatin packets to the pot. If desired add 2 or 3 drops of food colouring. Whisk together over medium low heat until completely mixed. Once the mixture starts to steam and thicken a bit, remove it from the heat. Using your spoon gently scrape the foamy layer off and discard.
Go Science Kids. 43. “Flip” a drawing with water. Light refraction causes some really cool effects, and there are multiple easy science experiments you can do with it. This one uses refraction to “flip” a drawing; you can also try the famous “disappearing penny” trick.
The floating dry erase marker experiment is a simple and education science project that’s safe for young children. But, you don’t have to be a kid to enjoy it! Basically, it involves drawing a picture and floating it off the surface using water. The project demonstrates key science concepts, including adhesion, solubility, and density.
Heat for more time if needed. If you cannot do the rest of the activity right away, store the hot milk in a thermos until it is needed. Add 4 teaspoons (tsp.) of white vinegar to a mug or other heat-resistant cup. Add the 1 cup of hot milk to the mug. You should see the milk form white clumps (curds).
95 Colored Pencil Vase. Make your own colored pencil vase with 216 colored pencils, Easycast Deep Pour resin and a lathe for wood turning. This is definitely an advanced project, you'll need a lathe and a several steps, but this is an interesting craft if you are ready for new possibilities.